
I’ve been wanting to learn Irish Crochet techniques to incorporate into my jewelry designs. I came across a very pretty leaf pattern, but it was written in Russian, and Google Translate did not do well with the combination of Russian and crochet terminology.
I’ve attempted to recreate the pattern in U.S. terms. It’s not perfect, the stem-end corner and back-loop ridging both need some work. For this how-to, I a Lion Brand BonBon cotton fingering weight yarn. For projects, I’m using Aunt Lydia’s size 20 crochet thread.
.
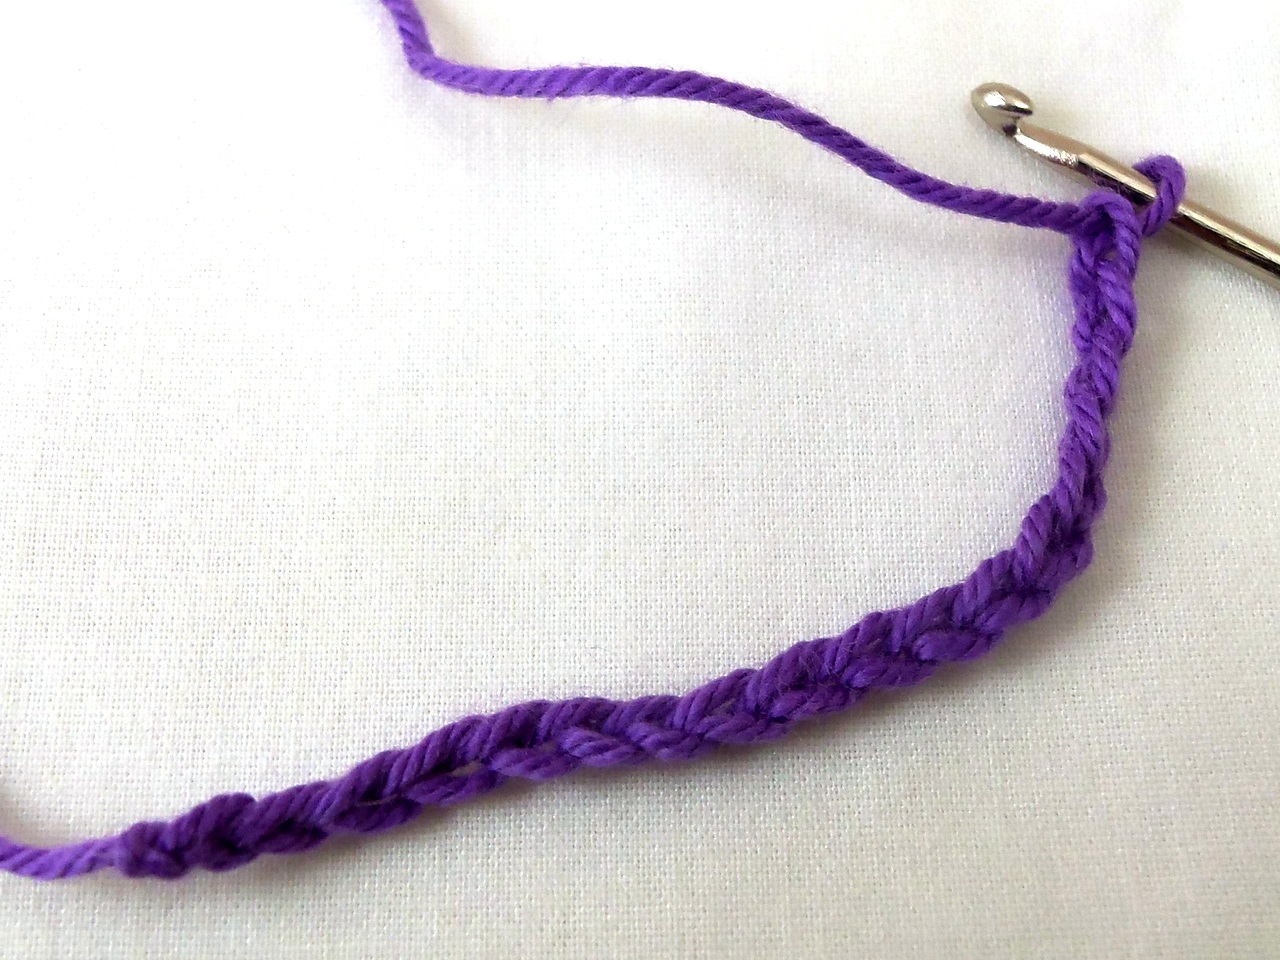
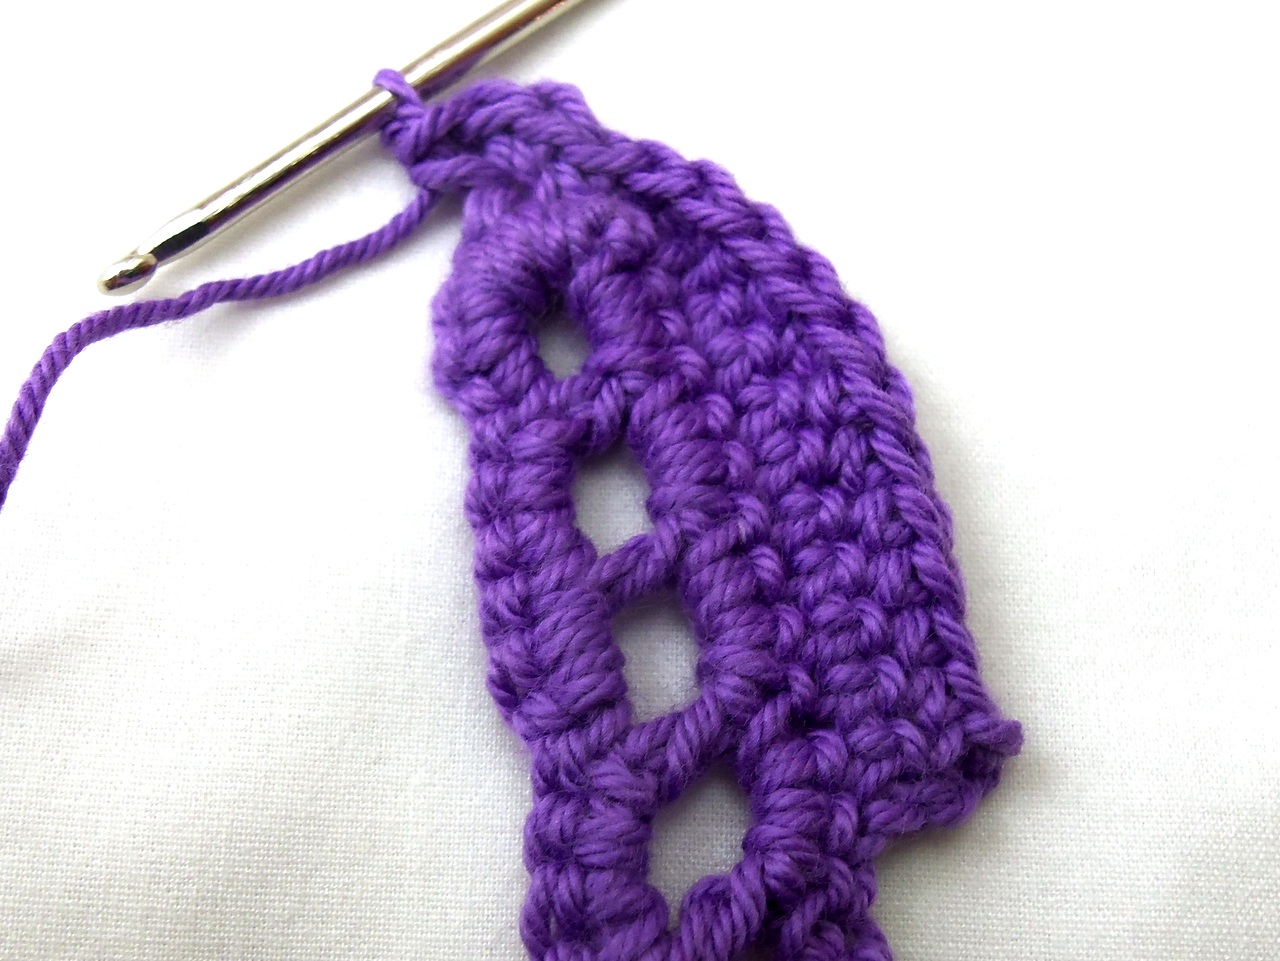
Chain 18
DC into the 7th chain from your hook
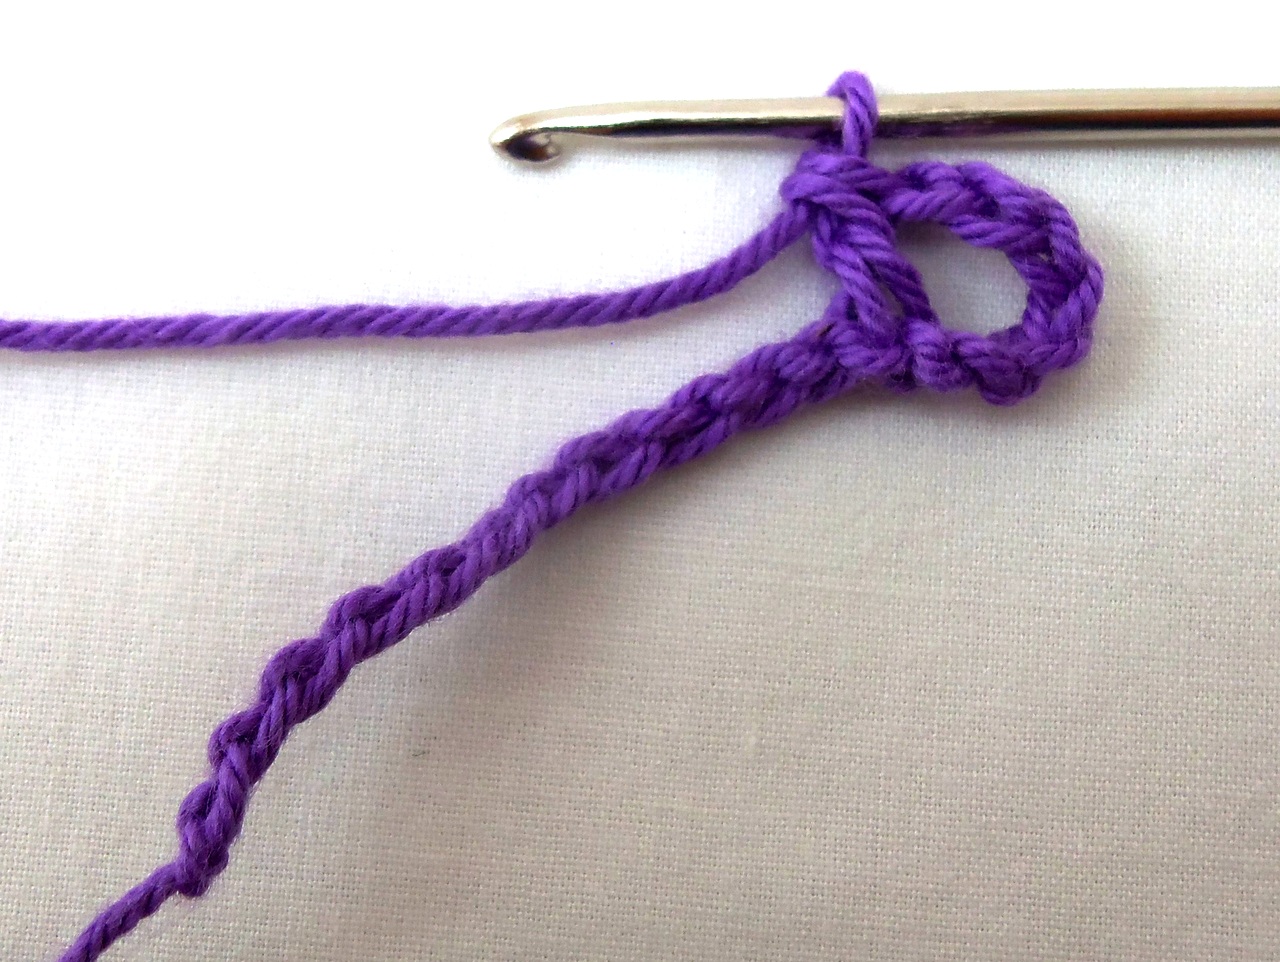
Chain 2, skip 2, DC into third stich. Repeat once.
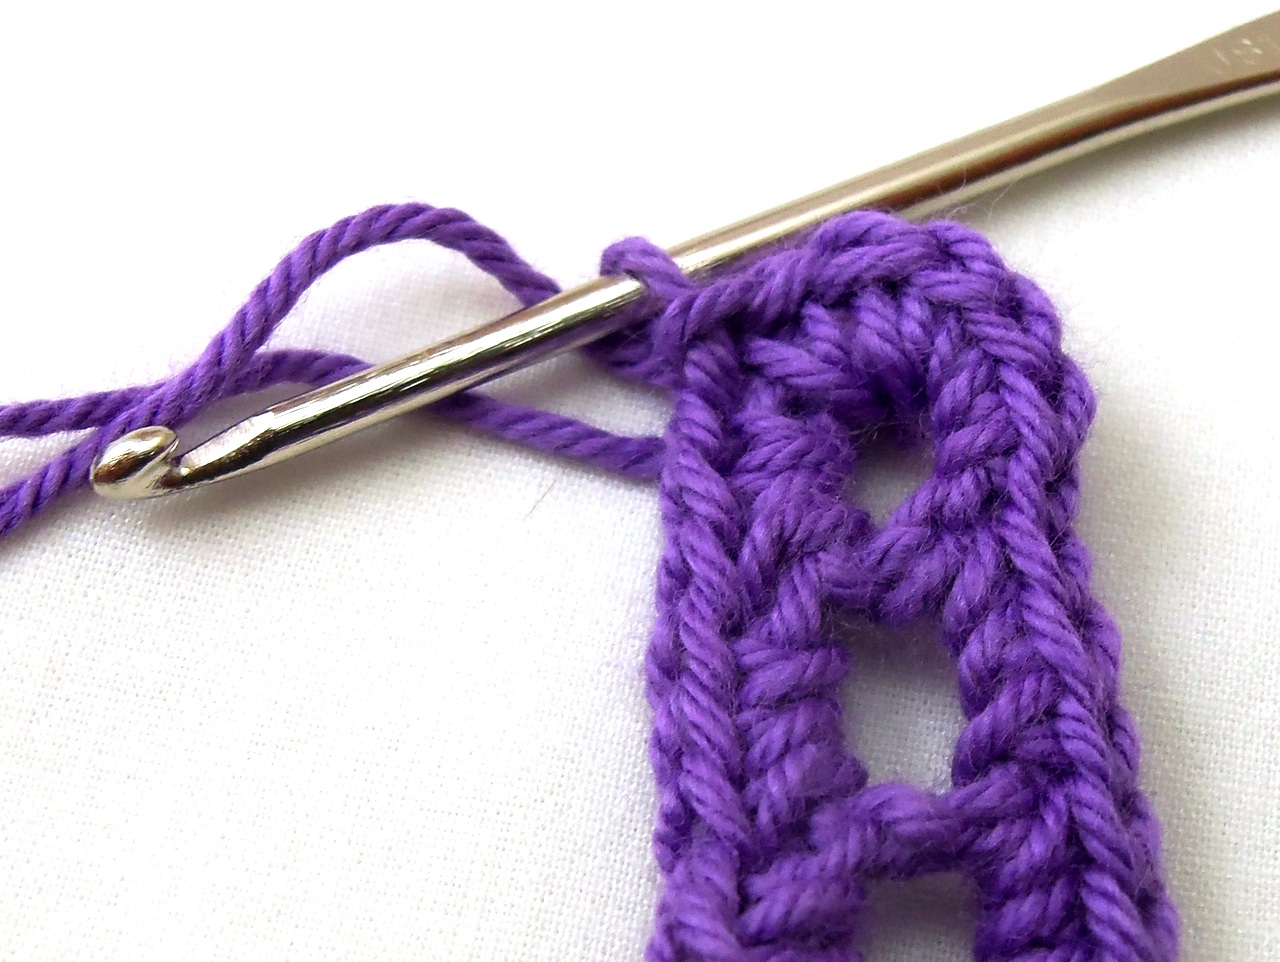
Chain 2, skip 2, HDC into third stich
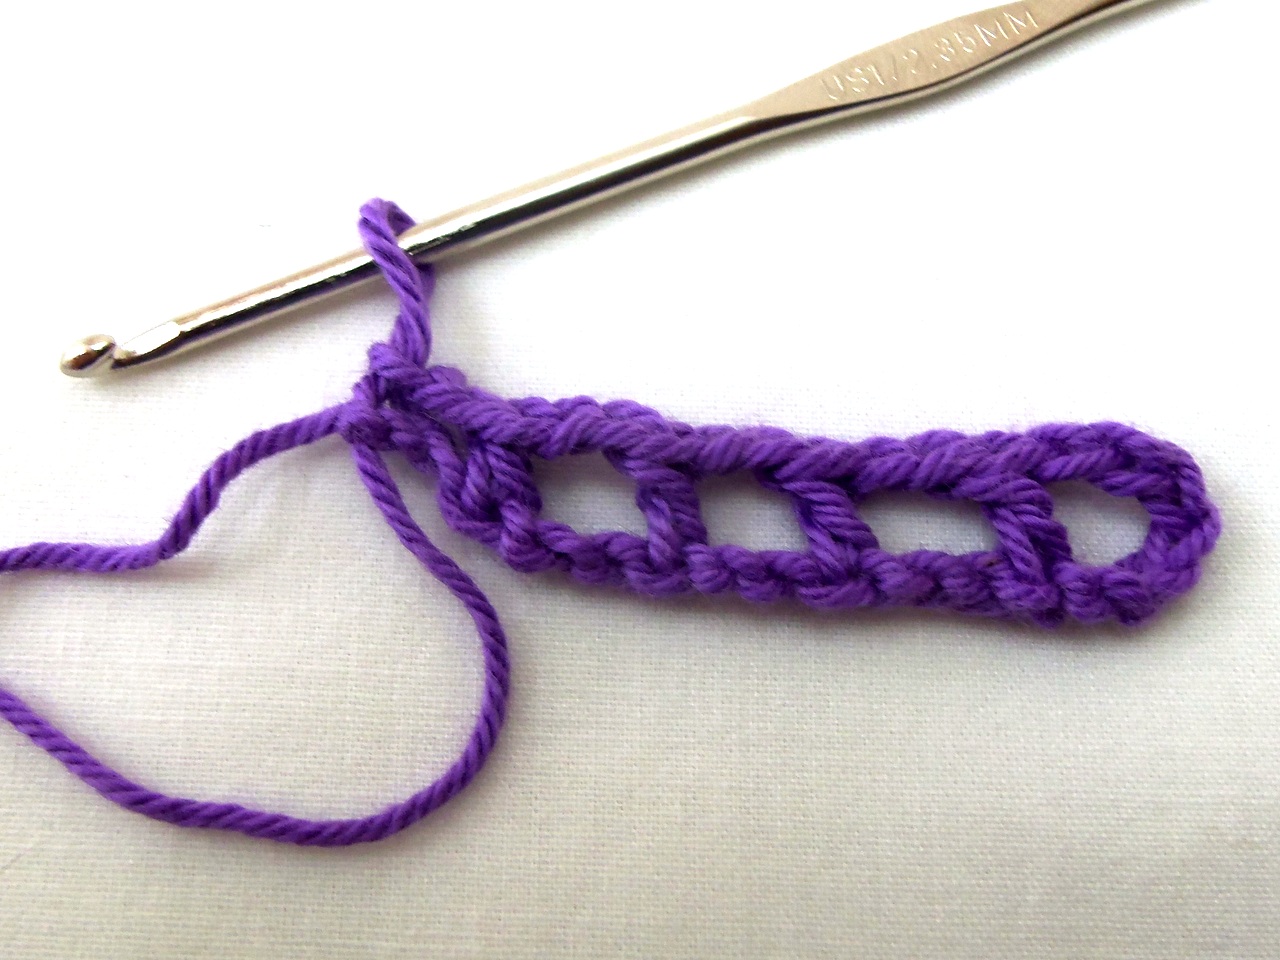
Chain 2, slip stitch into end.
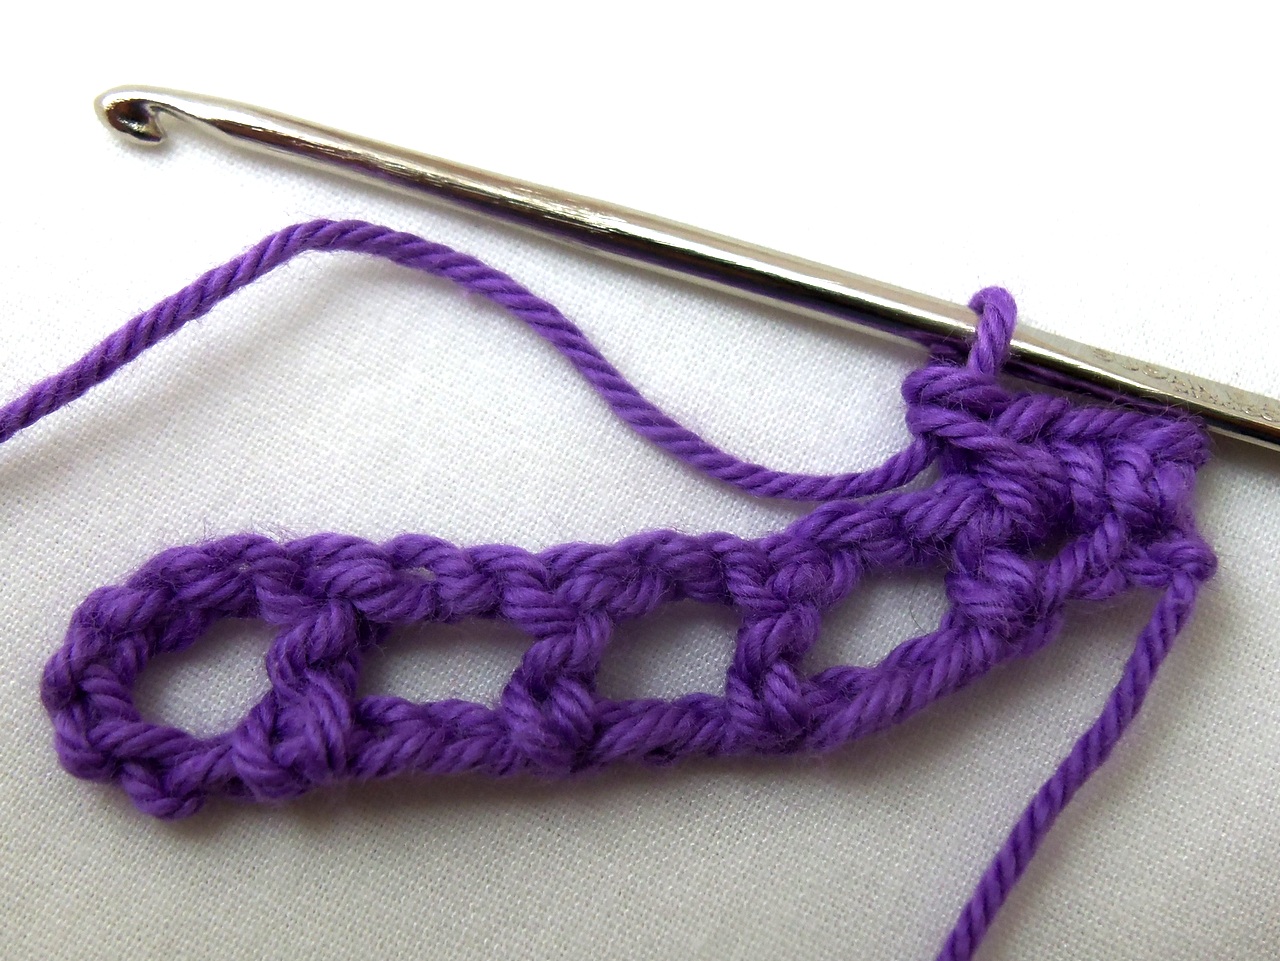
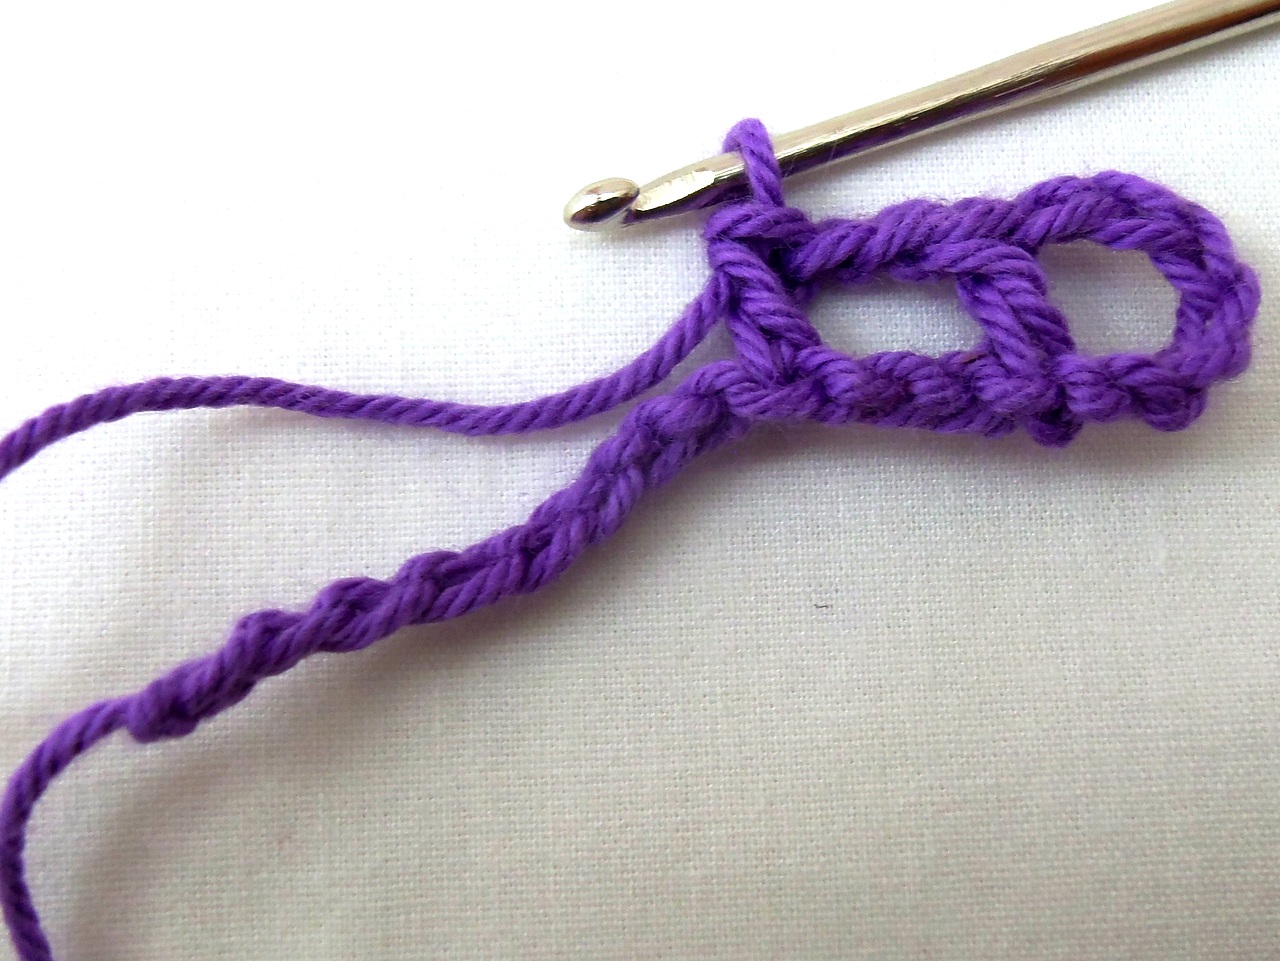
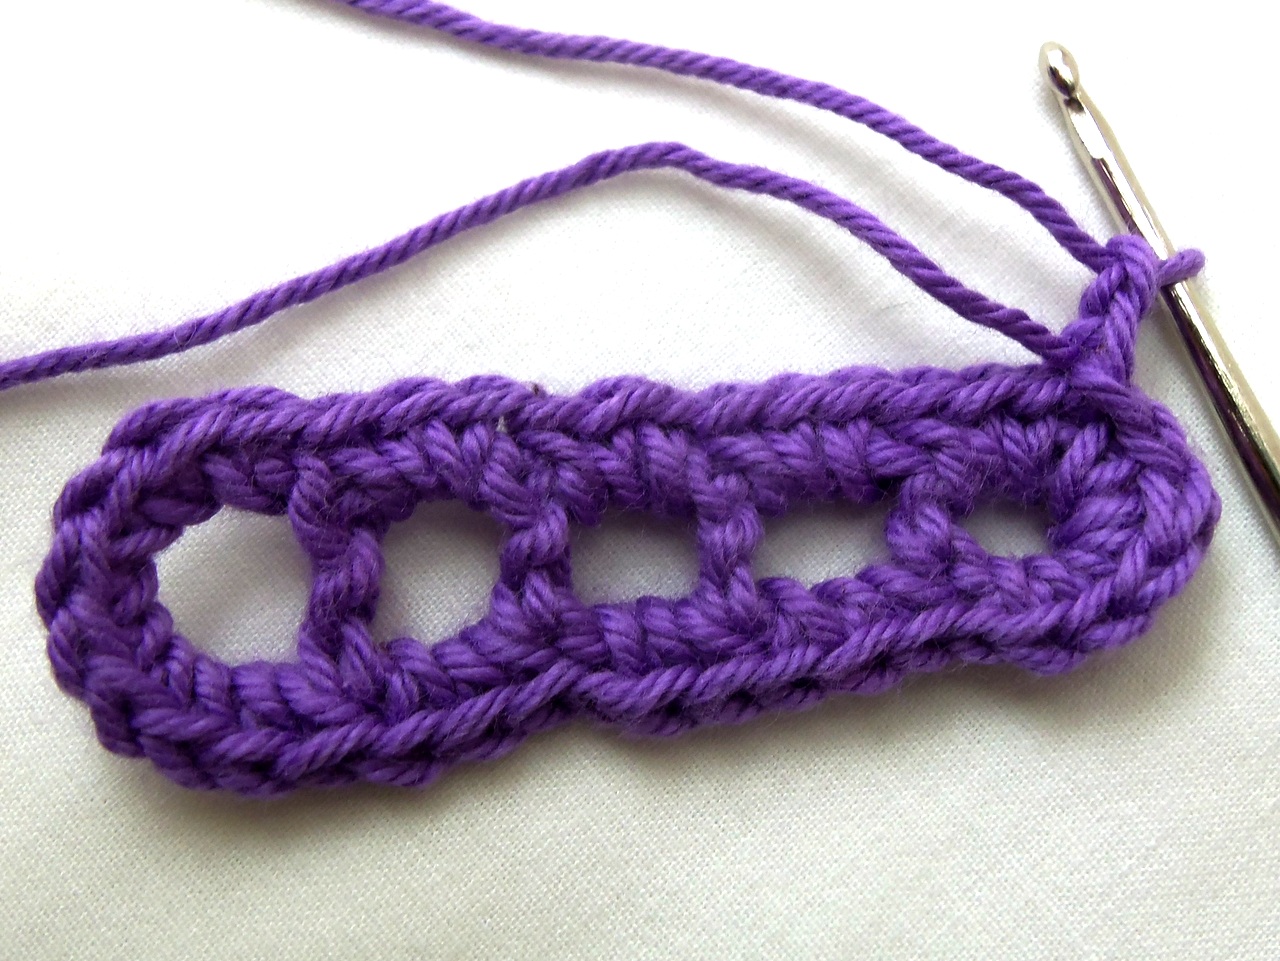
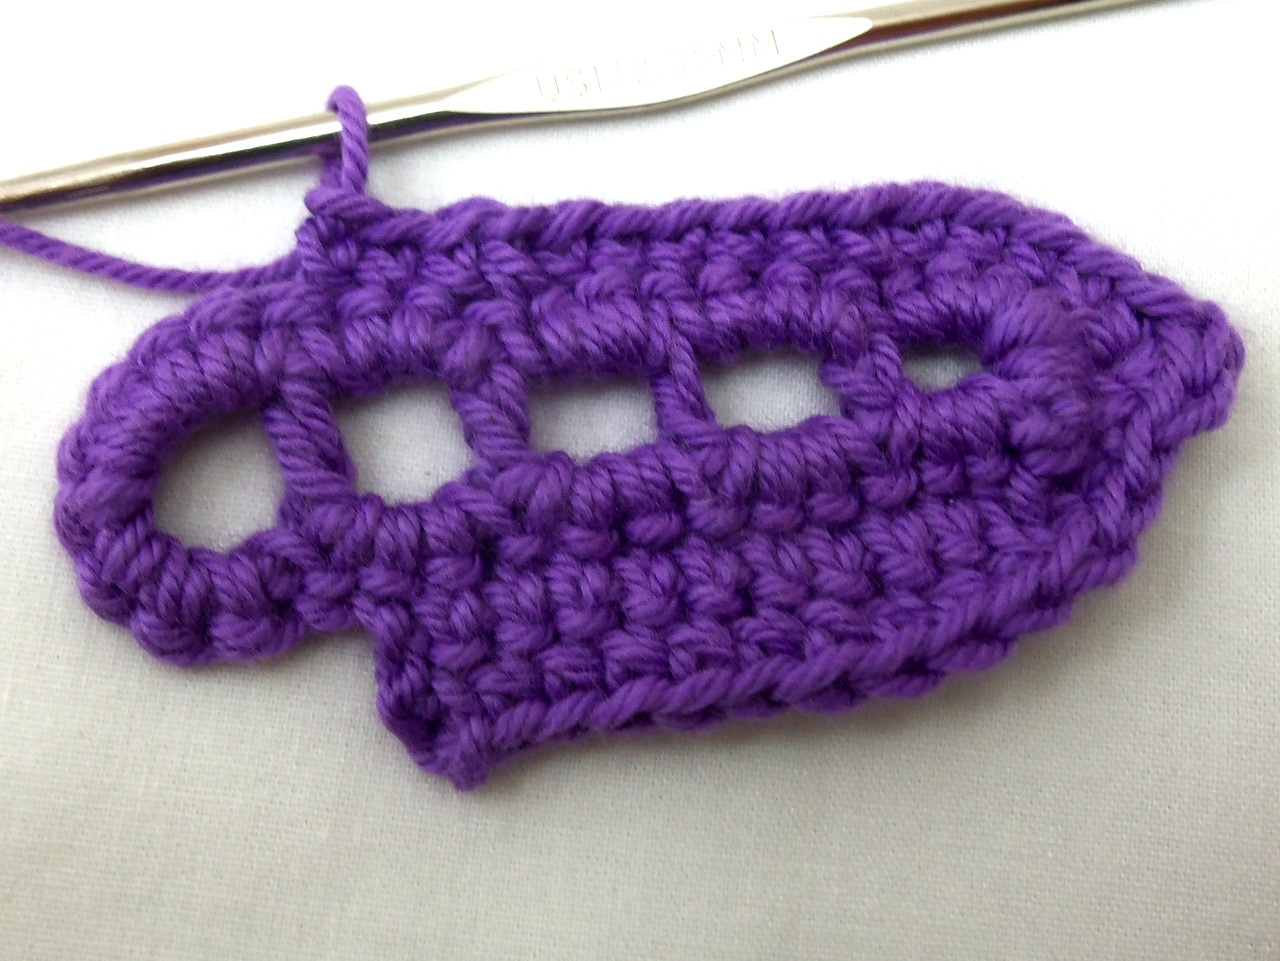
Chain 2, turn. SC 3 into space.
Continue SC 3 into each space until you reach the end space.

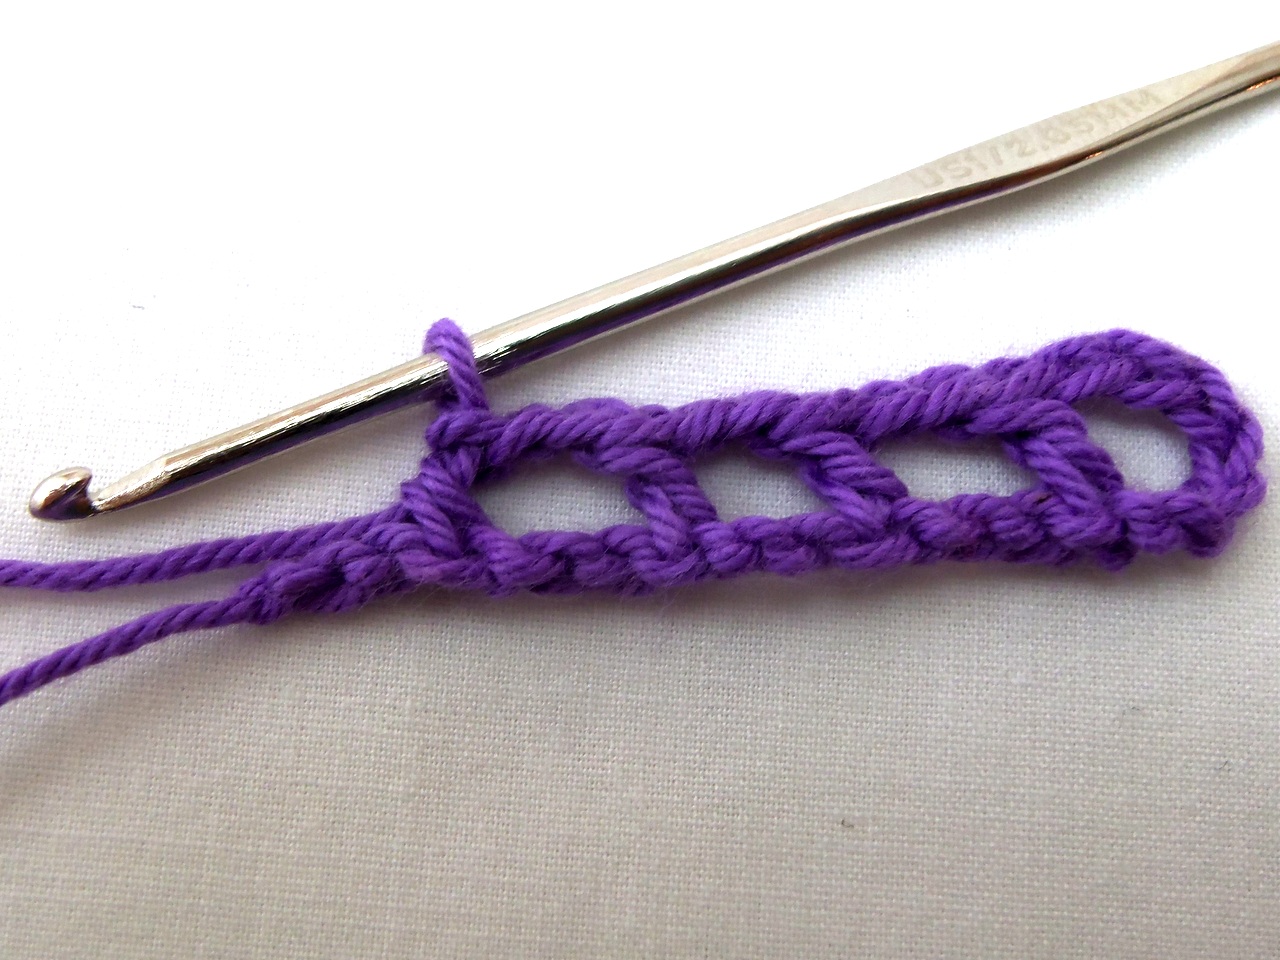
SC 9 around the end.
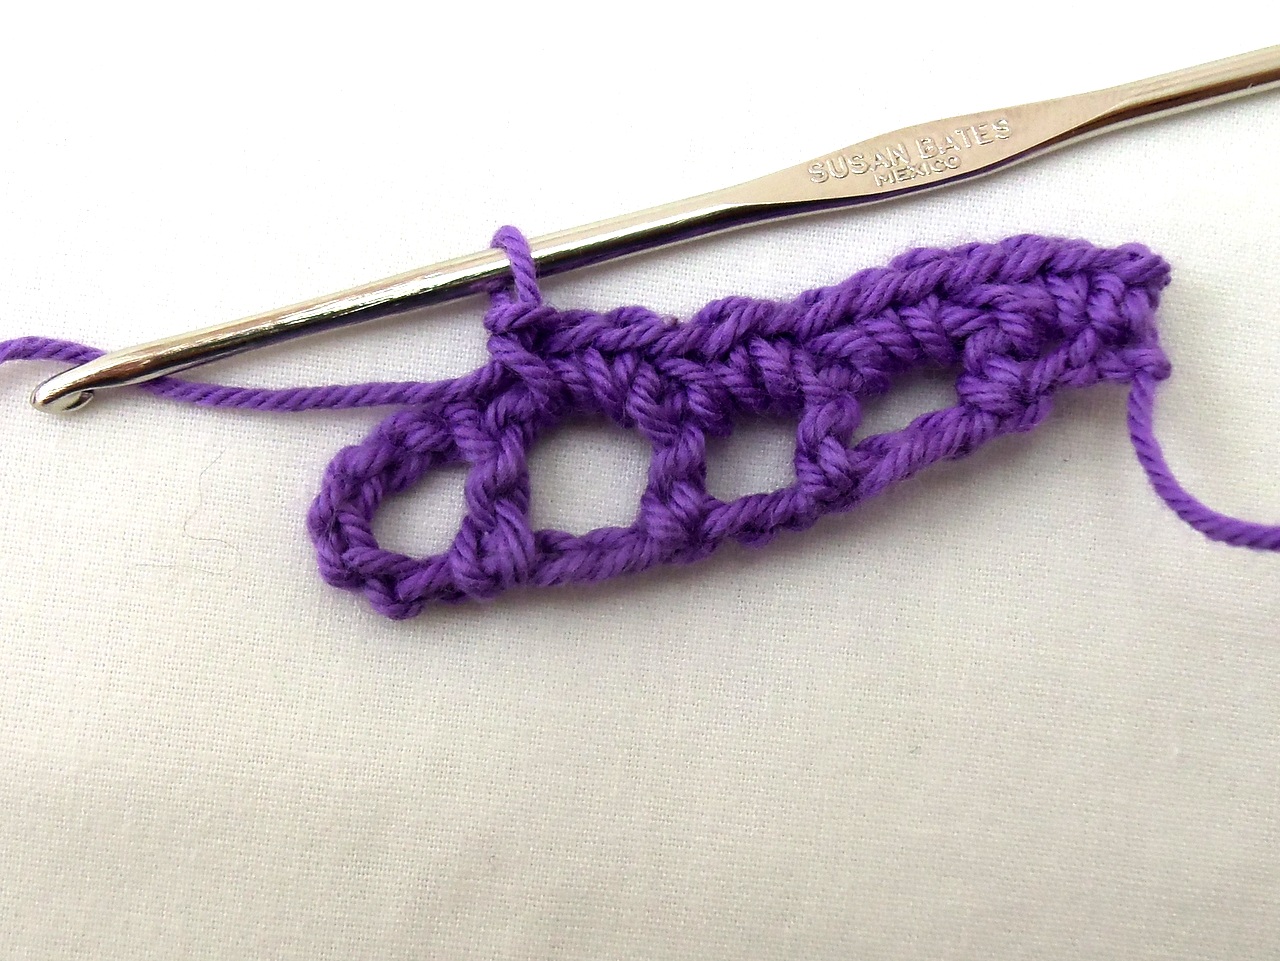
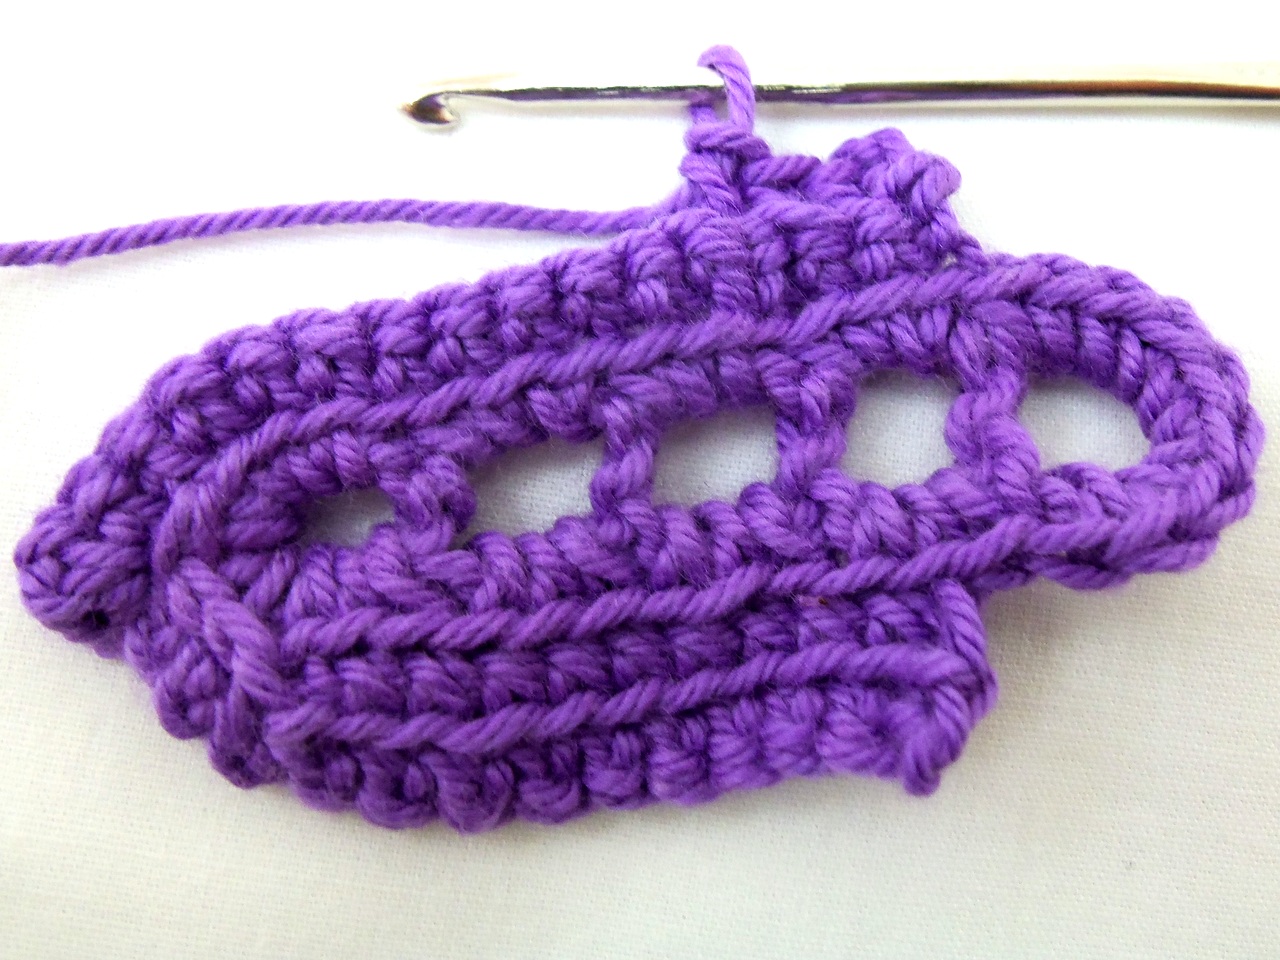
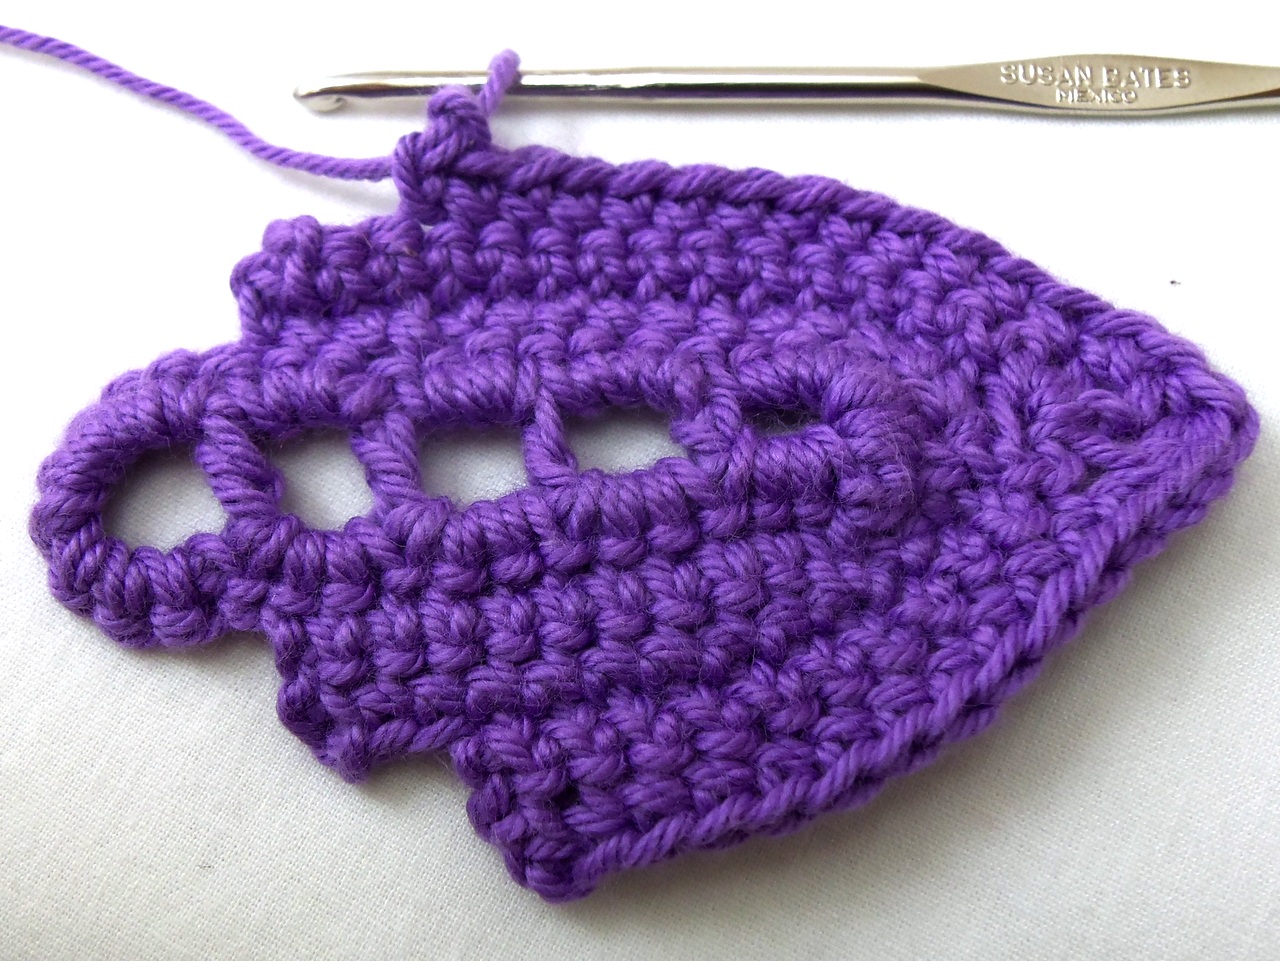
Continue SC 3 into each space down the other side until reaching the last space. In the last space, SC 3, HDC, DC, HDC. Join to first SC with a slip stitch.
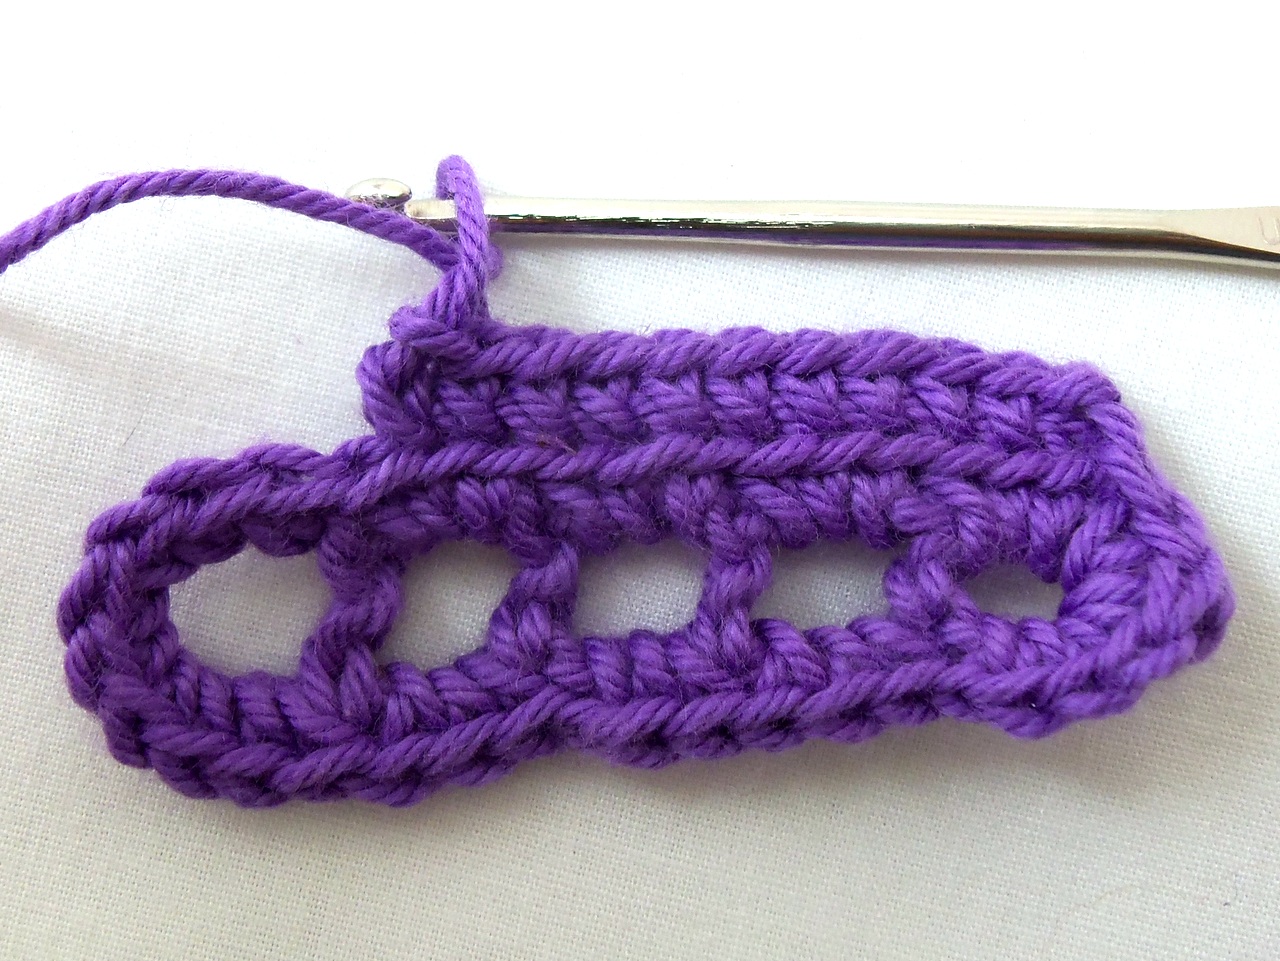
Another view of the HDC-DC-HDC at the “pointy” end of the leave, which will become the stem end.
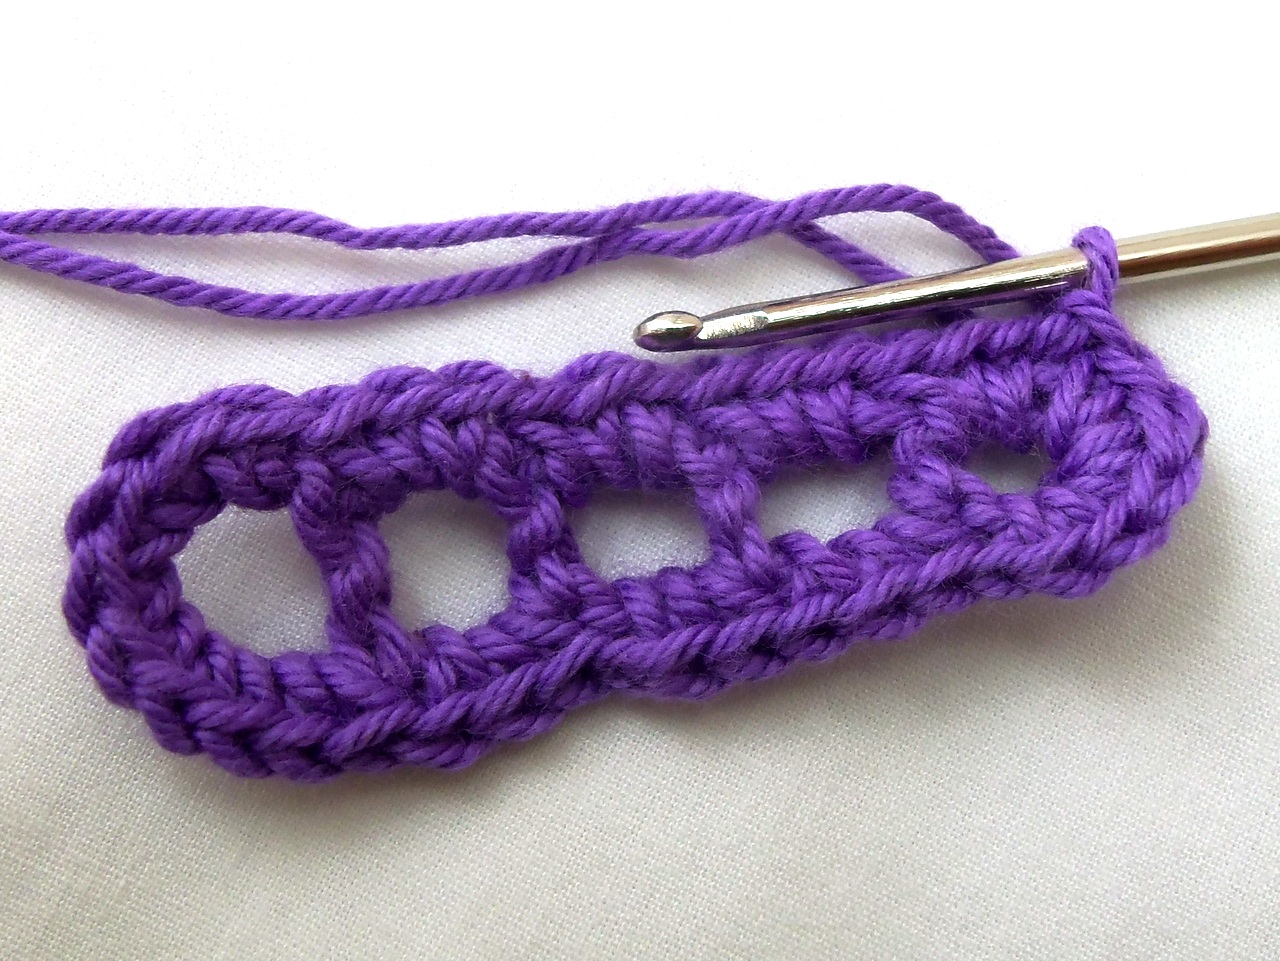
Chain 2
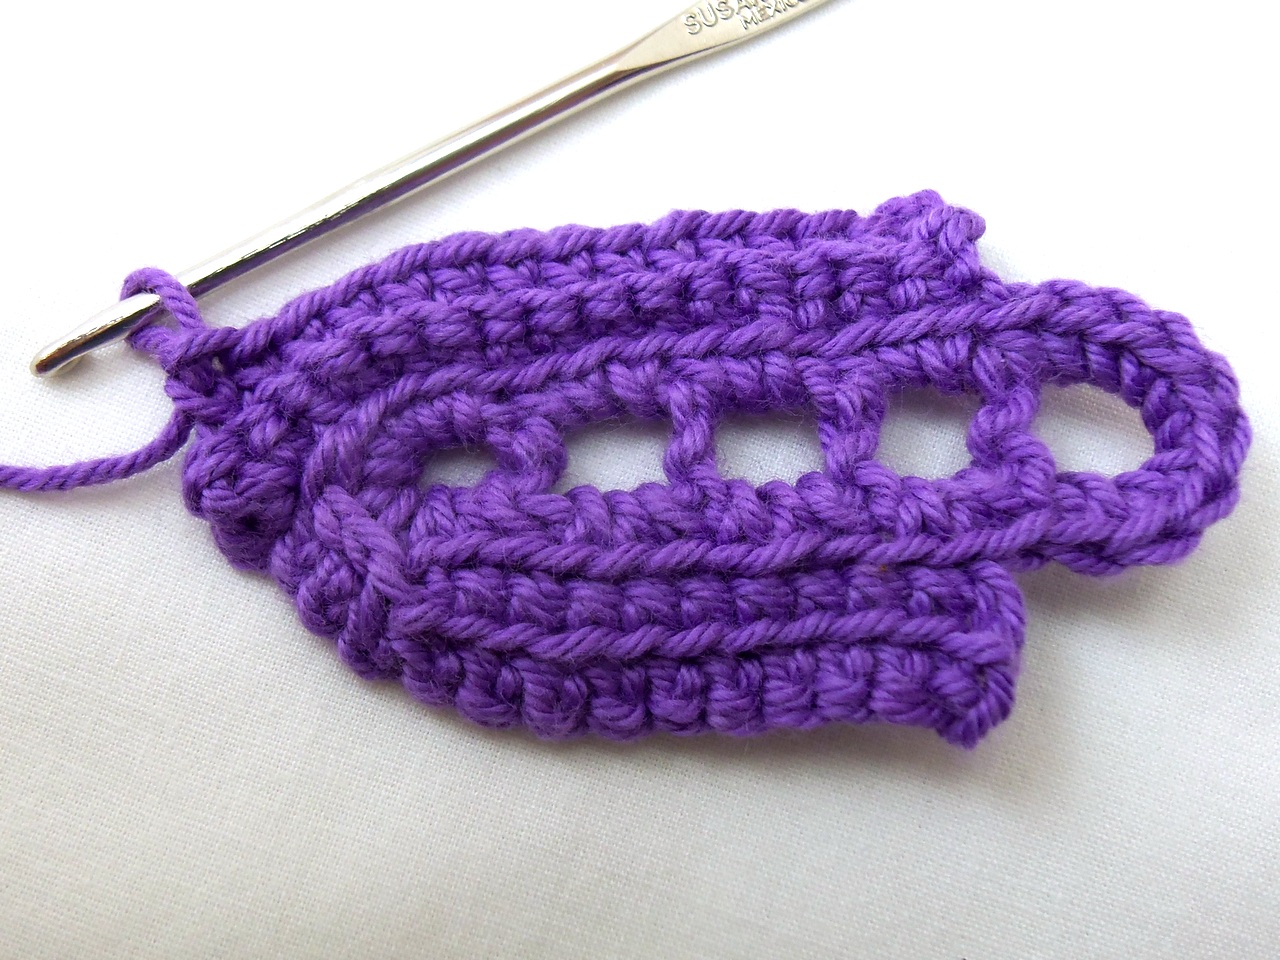
Working in the back loops, SC in each stitch until just above the first DC stitch on the left.
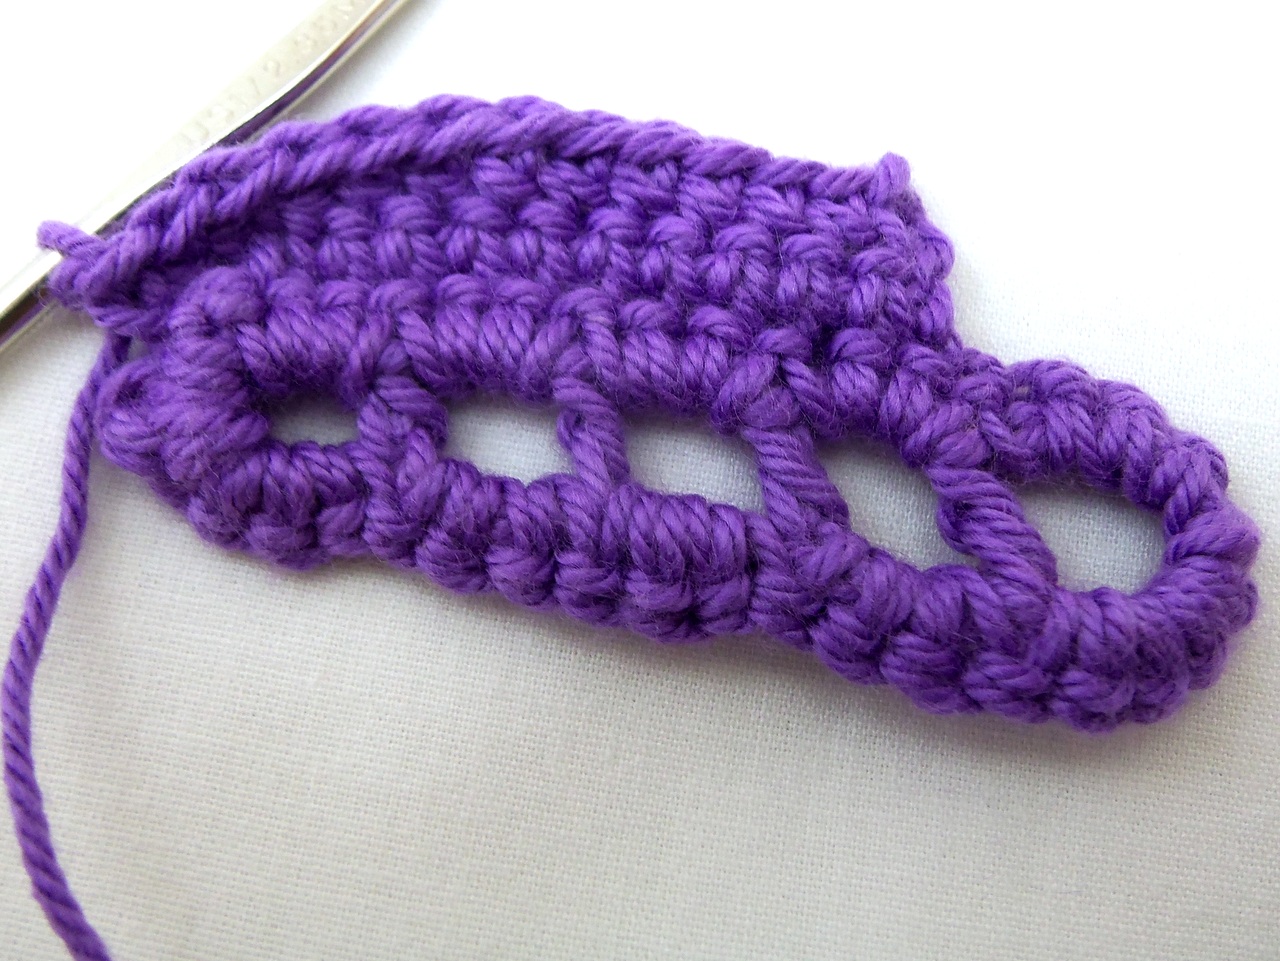
CH 2, turn. Continuing to work in the back loops (the ones now closest to you since you’ve turned the piece over) SC into each stitch until reaching the corner.
Here, my pattern goes haywire (I’ll update when I figure it out). I tried to turn the corner by putting three stitches (HDC-DC-HDC) but my corners end up too knotty and tight. Instead, I believe it may be better to SC 2 into the previous stitch, HDC-DC-HDC into the corner stitch, 2 SC into next stitch, then continue with SCs in each stitch down the other side. It’s not clear in the original pattern – she’s either adding extra stitches or putting extra chain stitches in between stitches.
Continue SC (into back loops) to just above the last DC. CH 2 and turn.
Working in the back loops (now farthest from you), SC into each stitch.
Turn the corner at the stem end with 2 SC, HDC-DC-HDC, 2 SC into the three stitches at the corner (or whatever you deem the best technique).

Continue SC until just above the 2nd DC from the end (three stitches from the end). CH 2, turn. Continue SC around, turning the corner with the SC2-HDC-DC-HDC-SC2 sequence.
Continue to just above the 2nd DC from the end (3 stitches from the end). CH 2, turn, and continue SC to stem end, working in back loops as before.
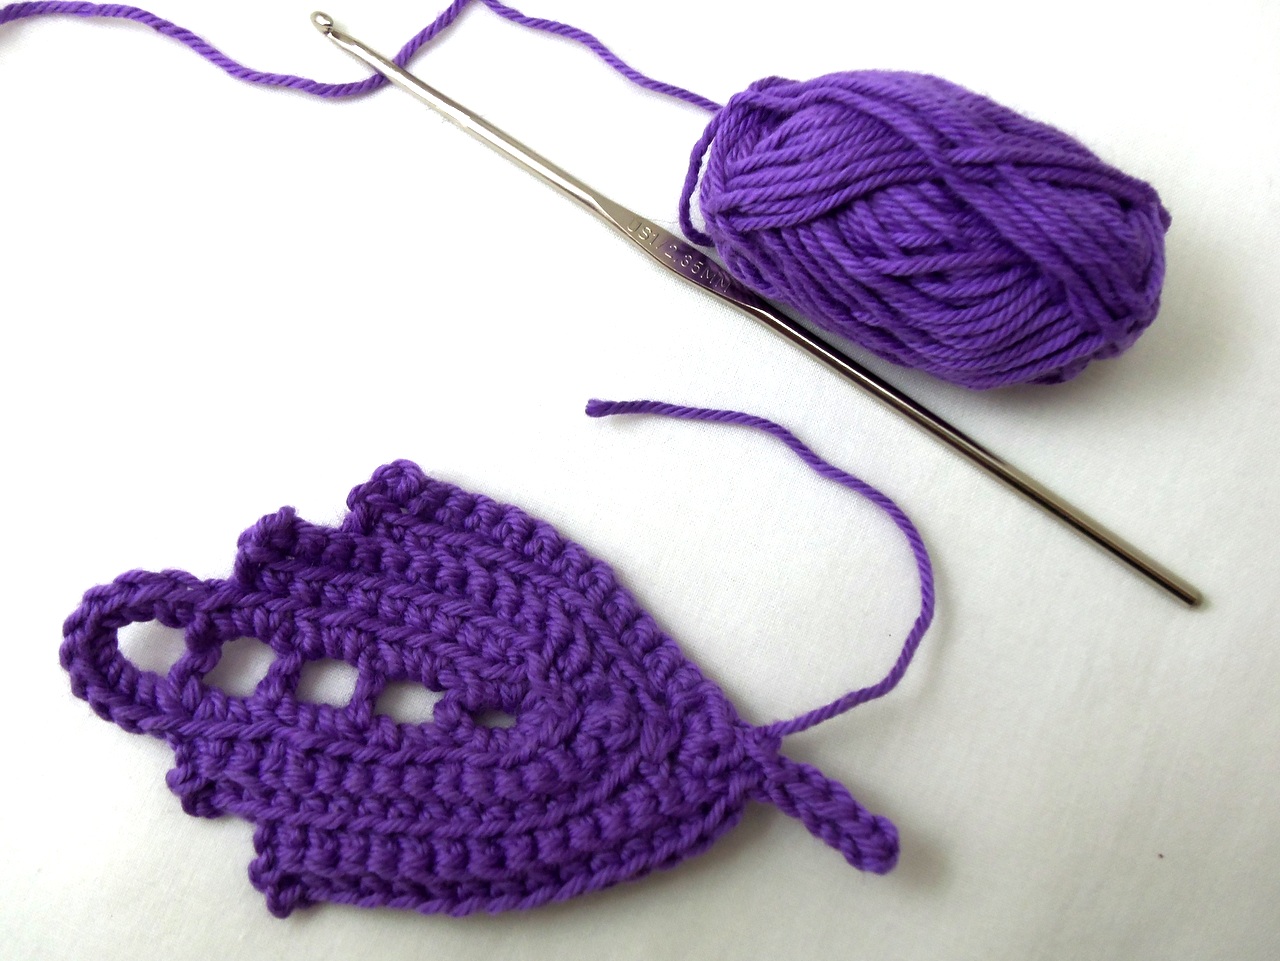
At the stem end, slip stitch into corner (instead of doing the turn-the-corner sequence). Either tie off or chain a stem.
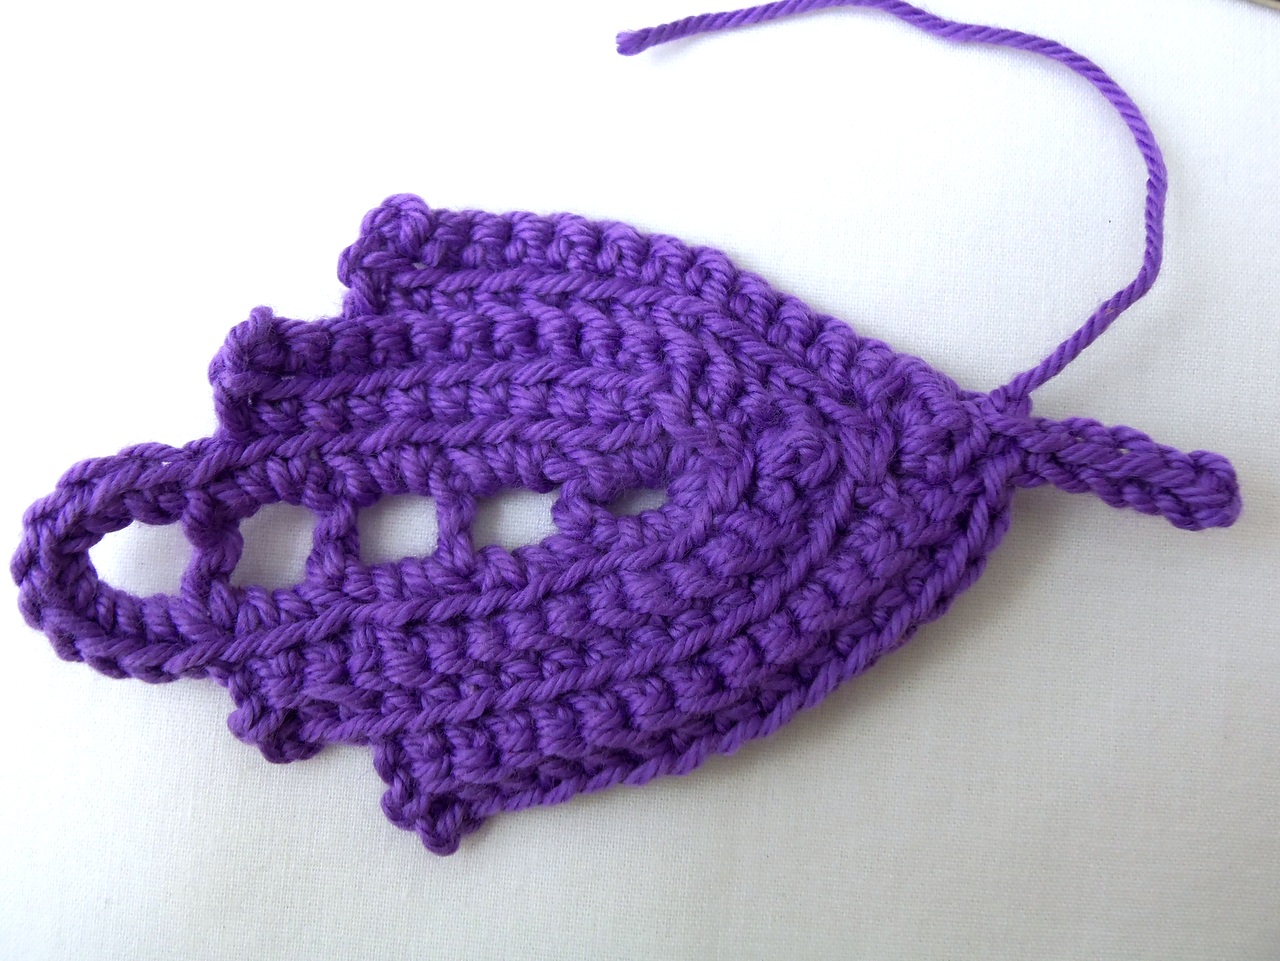
Here’s my finished piece. You could continue adding rows to make a longer leaf.
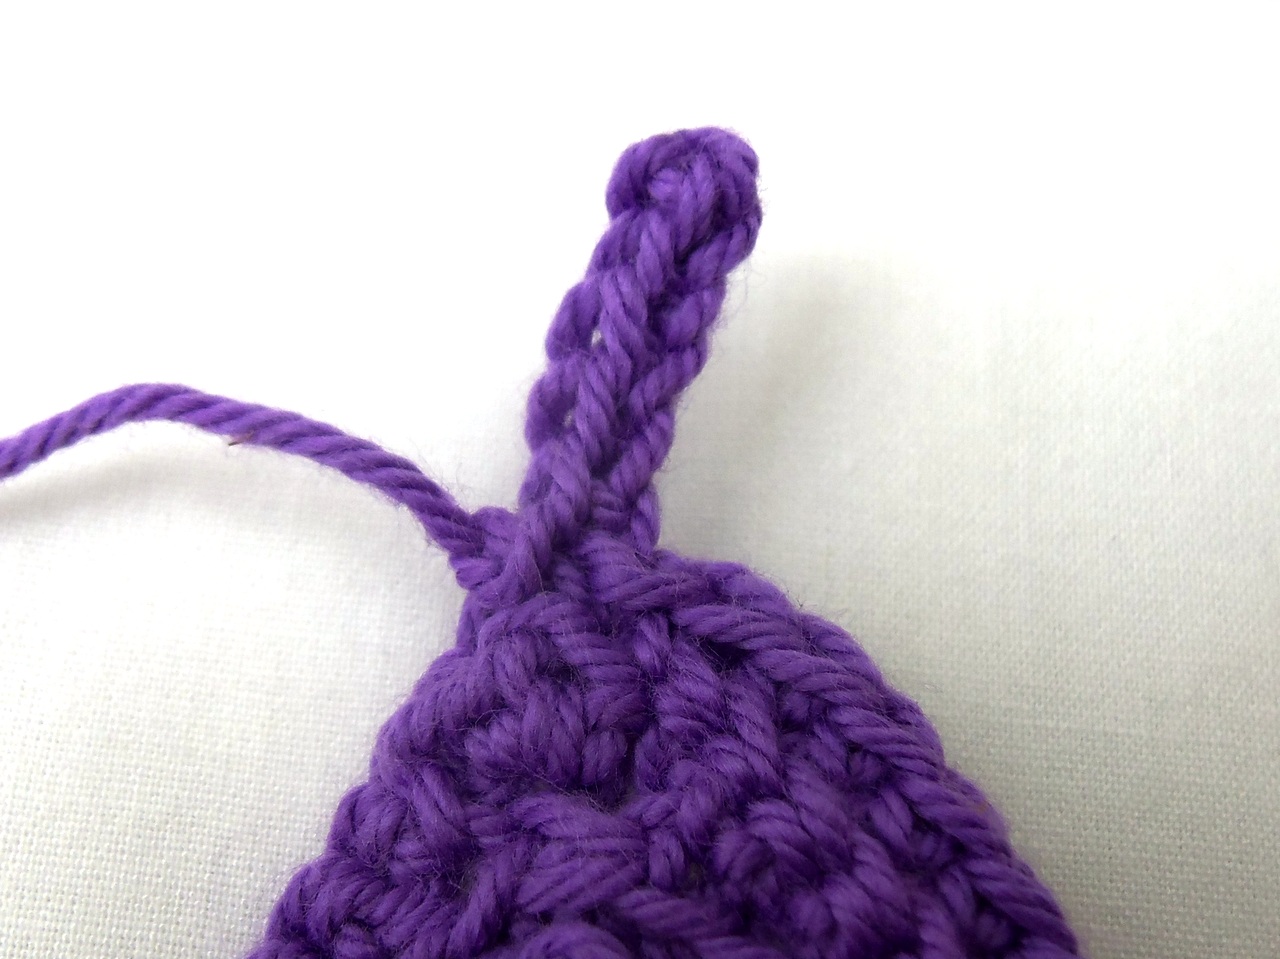
I added a stem by chaining 6, then slip stitching back along the chain (skipping the first stitch), and tying off at the base of the stem.
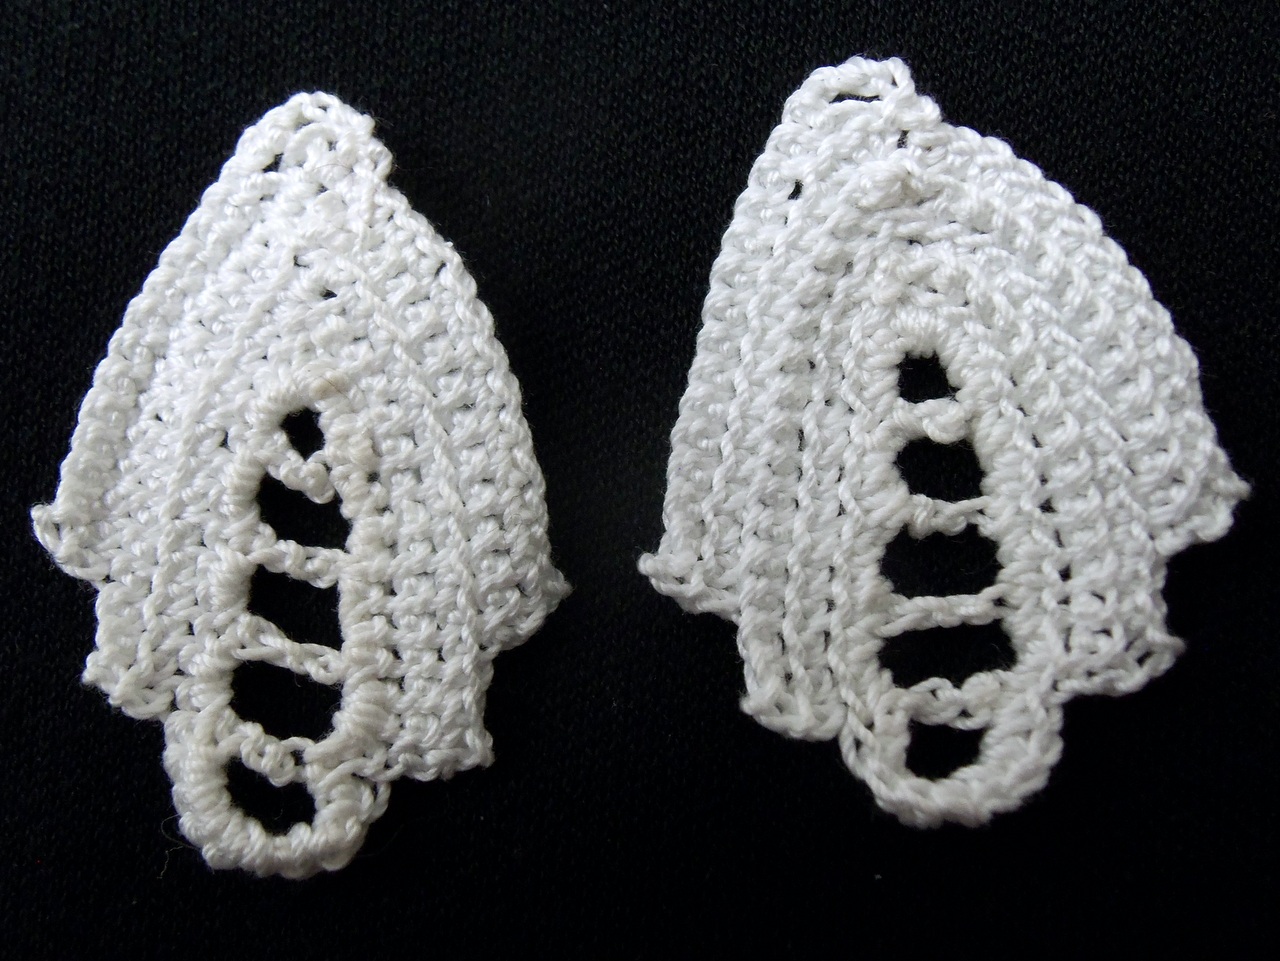
Here are a pair of leaves I worked in Aunt Lydia’s size 20 crochet thread. These are practice pieces, but I intend to make a pair of earrings, possibly with beads along the center or at the tips of the leaves.