
Finishing a necklace made with leather cord (or imitation leather cord, rattail, or similar materials) can be a challenge. Attaching clasps is difficult and can look clunky. Personally, I’m fond of long slip-over necklaces that don’t have a clasp to tangle in my hair, and I like being able to adjust the length of my necklaces to suit my outfit.
In this tutorial, I show you how to make an adjustable slider for your necklace using a few beads and a bit of basic macramé.
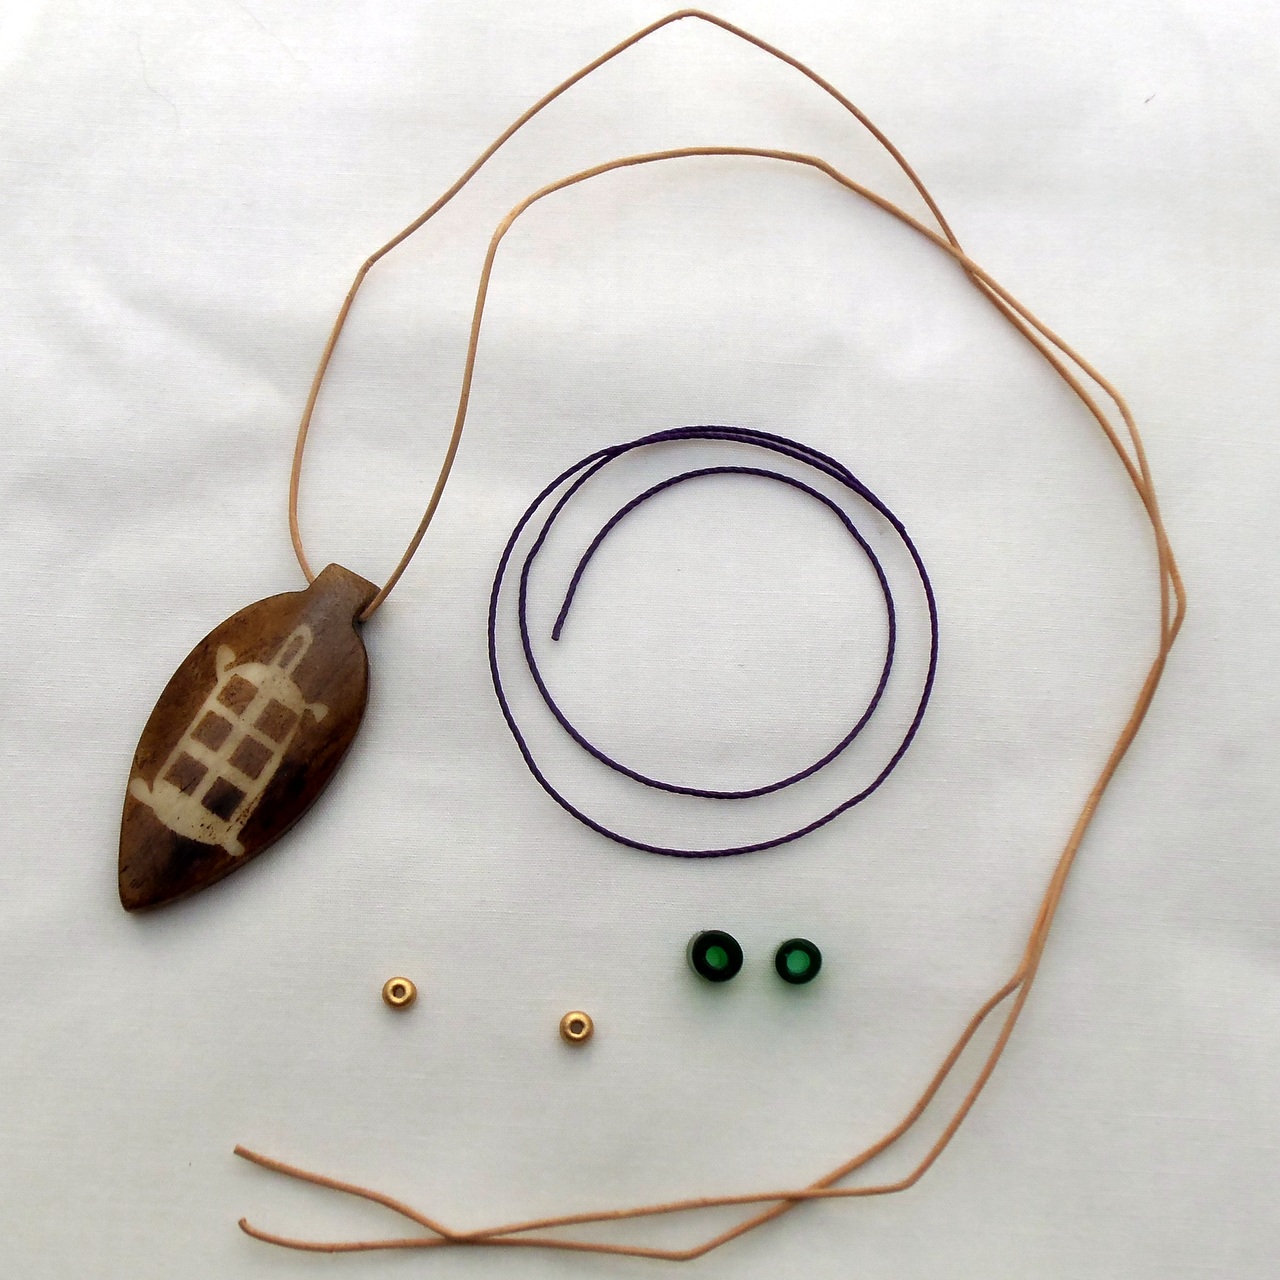
Materials
- Finished necklace made using a leather cord (or similar material): Your cord should be at least 24 inches. Check to make sure your cord will fit over your head, and add a couple inches to make up for the length we’ll be taking up adding the slider. I refer to this as the core cord in this how-to.
- 12 inches of jewelry macramé cord: This should be a thin cord for macramé jewelry, such as Super-Lon #18 cord. There are a number of nylon, hemp, and other suitable materials usually found in the jewelry making section of the craft store.
- 2 large-hole beads: These will be the guide beads that keep the ends of your core cord held against the necklace. The holes should be big enough to fit two strands of your core cord through. For example, if you have a 1mm core cord, you’ll want beads with at least a 3mm hole. Crow beads (aka 6mmx9mm pony or roller beads) are good for this. I often use a 6mm tube bead.
- 2 smaller-hole beads: These will be the stopper/pull beads that keep the guide beads from slipping off the ends of your core cord and give you something to hold and pull to tighten the necklace. The holes should be just big enough to fit a single strand of your core cord through, and should not let your knotted core cord pull through. “E” beads are often good for this.
- Tools: You’ll also need scissors, white glue (or some other clear-drying permanent glue), and a way to pin down your work. I usually pin down my work directly to the table with a bit of painter’s tape, or a clipboard also works nicely. I also find pliers handy for tightening knots.
Instructions
Set up the beads
Step 1: String the two larger “guide” beads onto one end of your core cord.
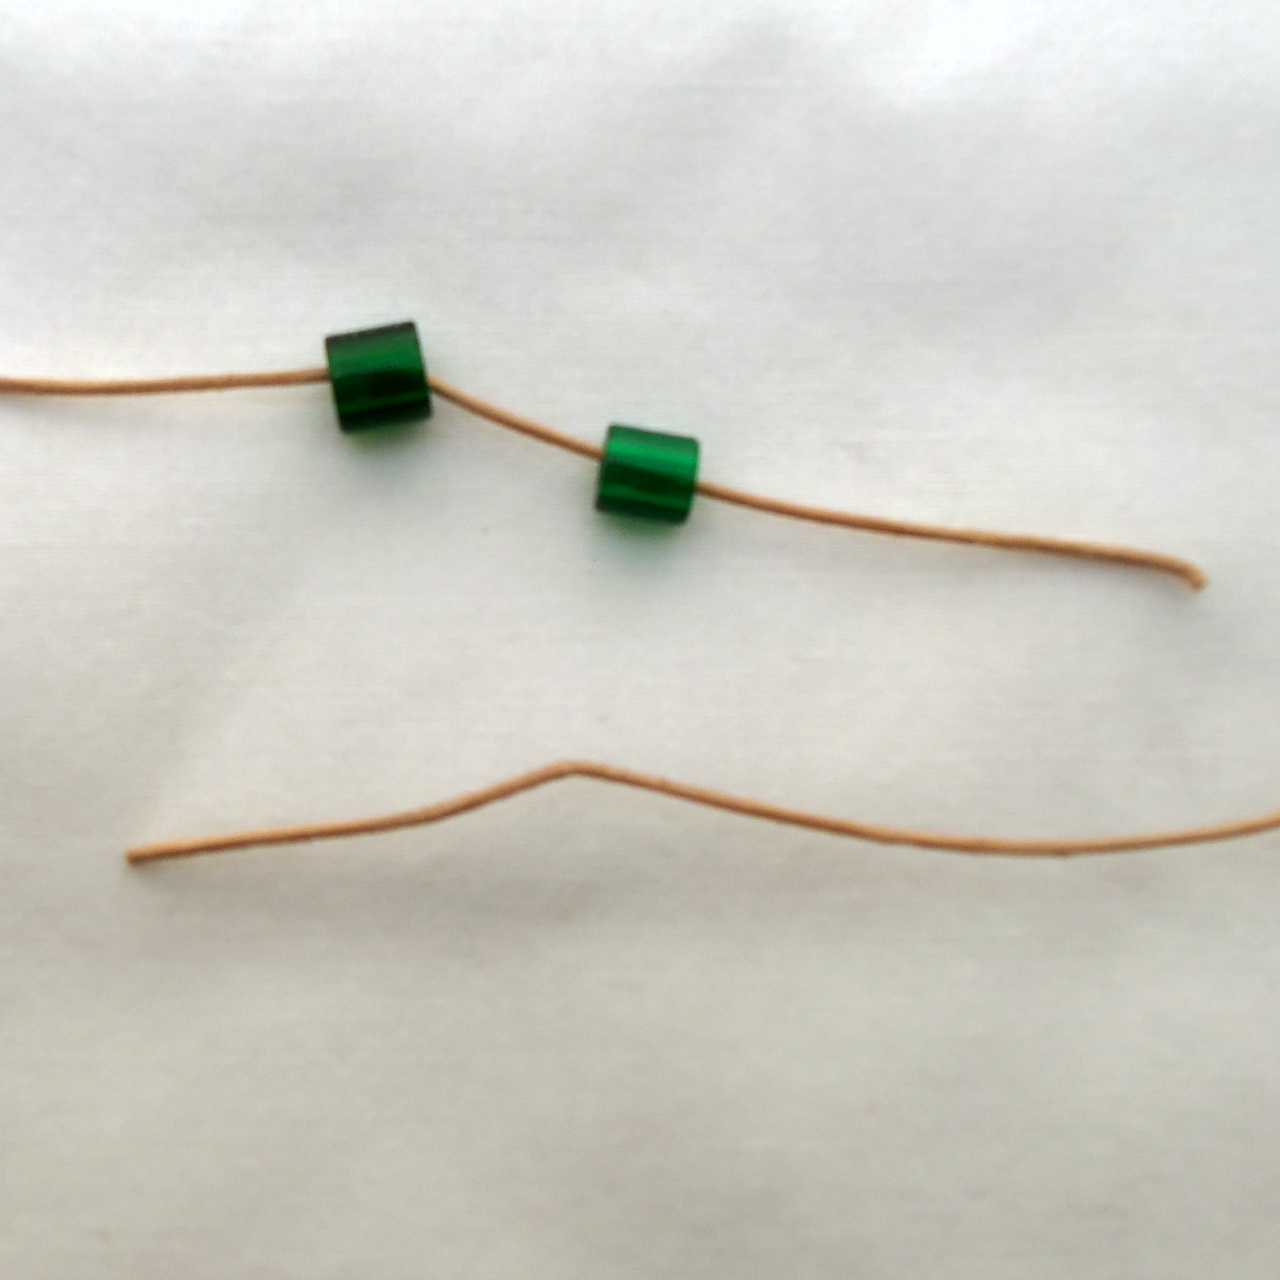
Step 2: Thread the other end of your core cord through the guide beads, going the opposite direction.

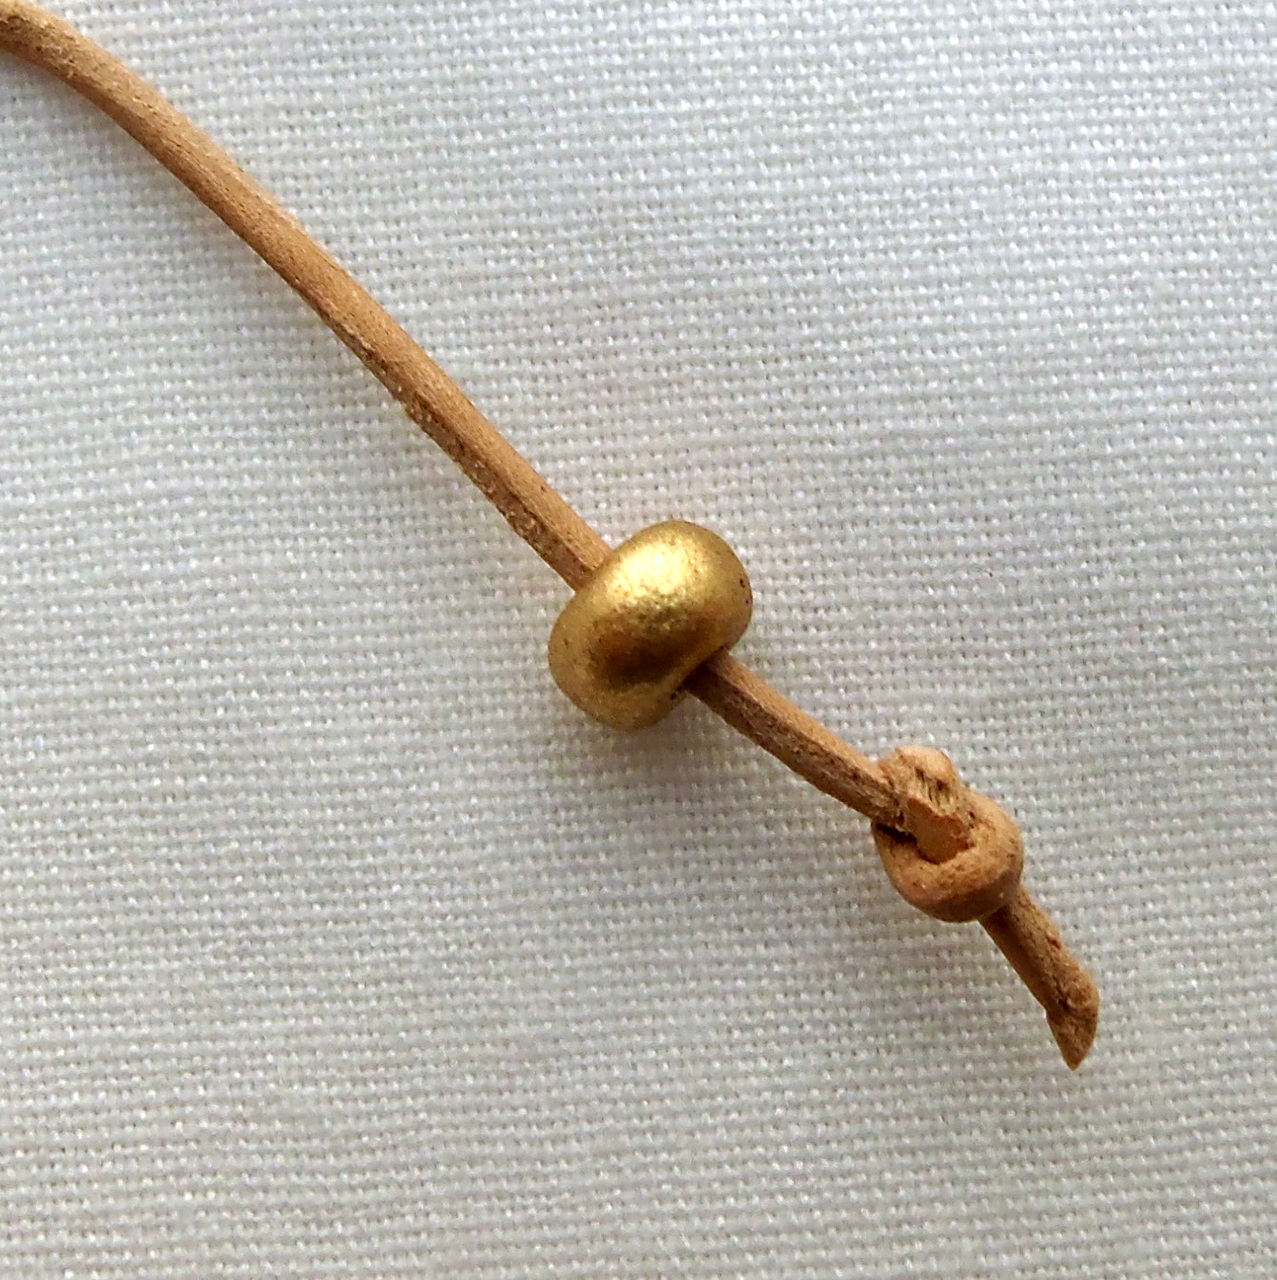
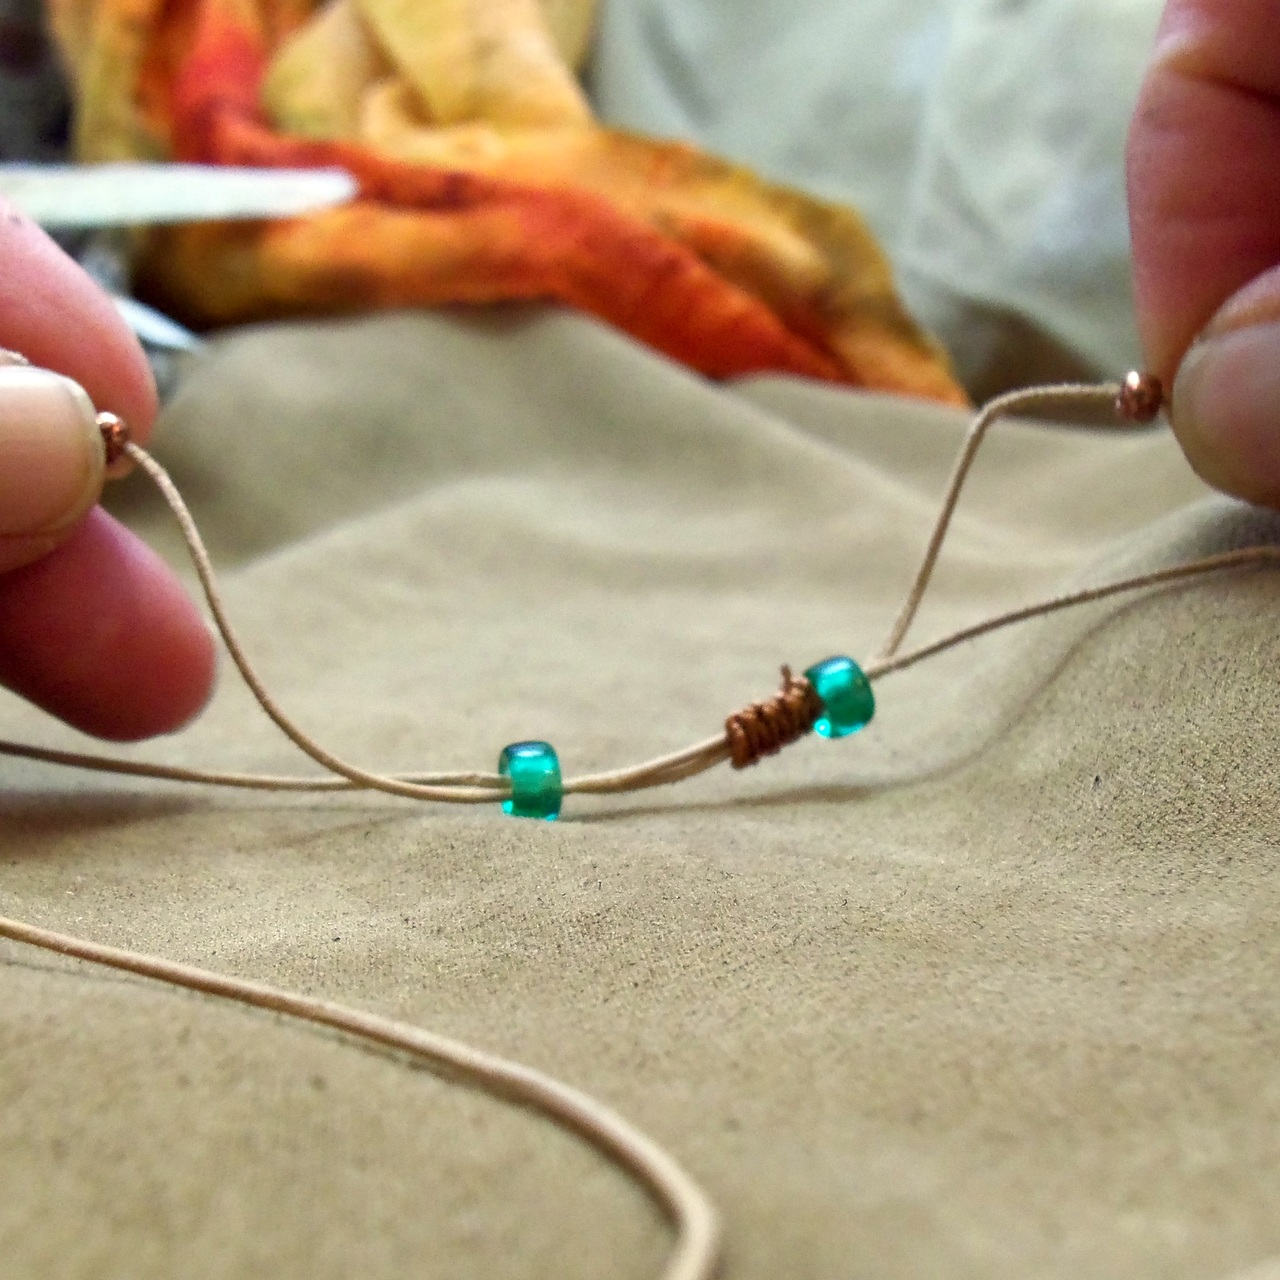
Step 3: String a smaller bead onto one end of your core cord.
Step 4: Knot the end of your core cord close to the end of the cord.
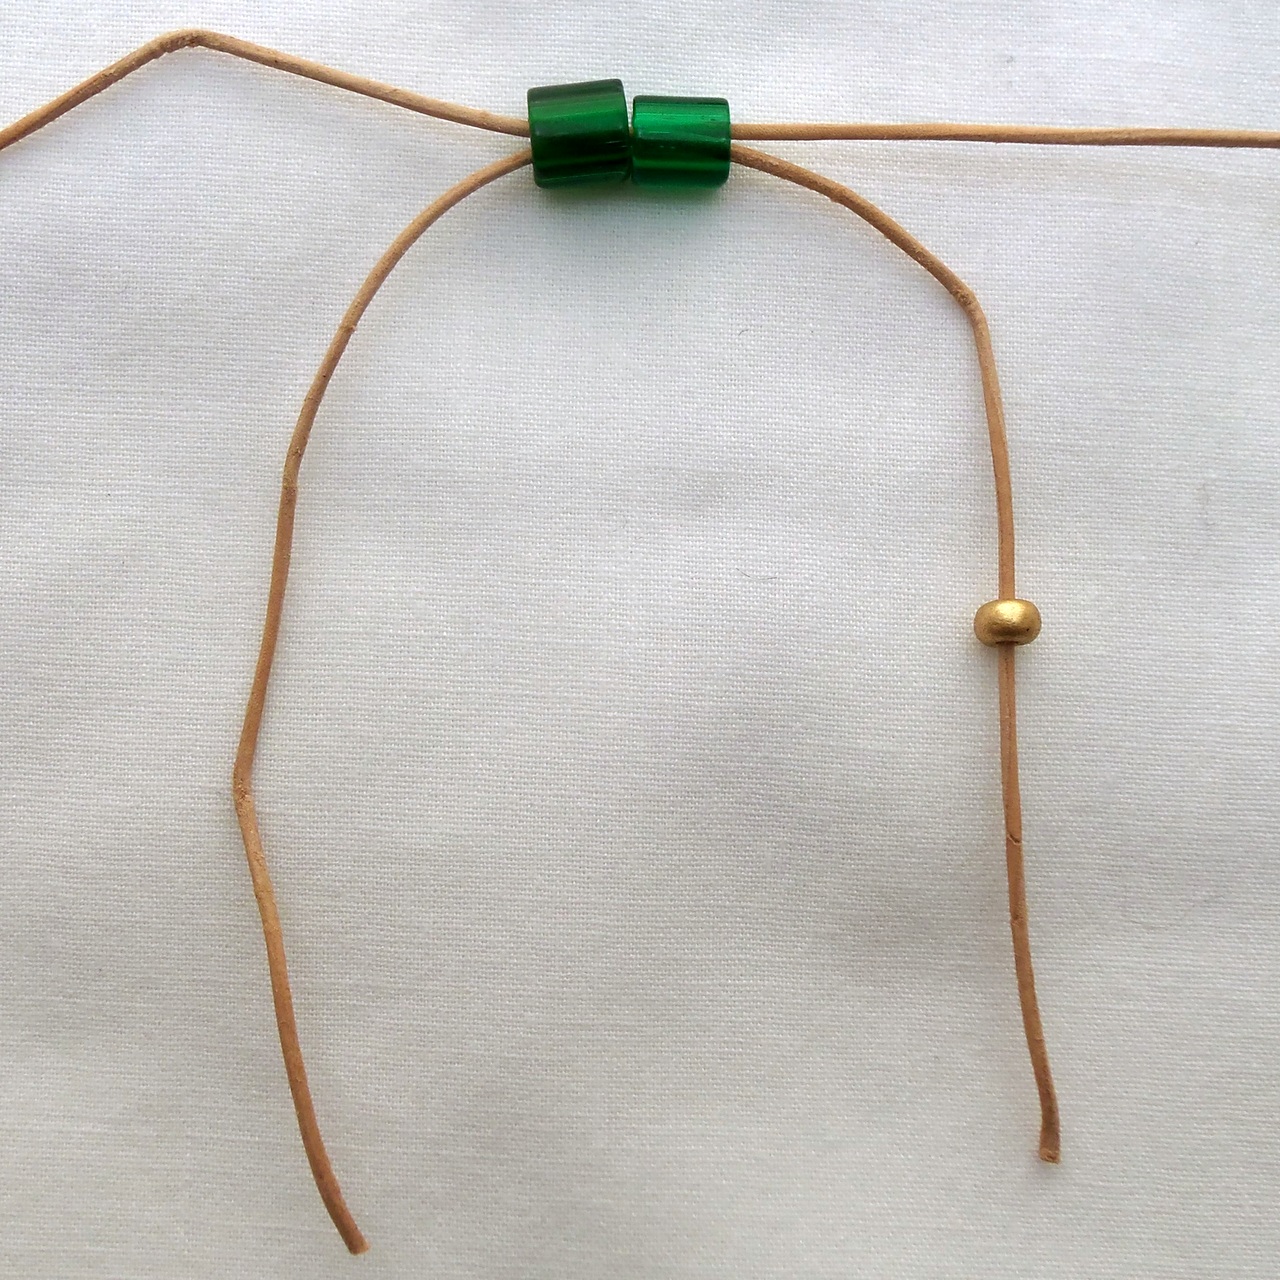
Step 5: Tighten the knot. I like to use a pair of pliers to hold the end of the cord while tightening the knot.
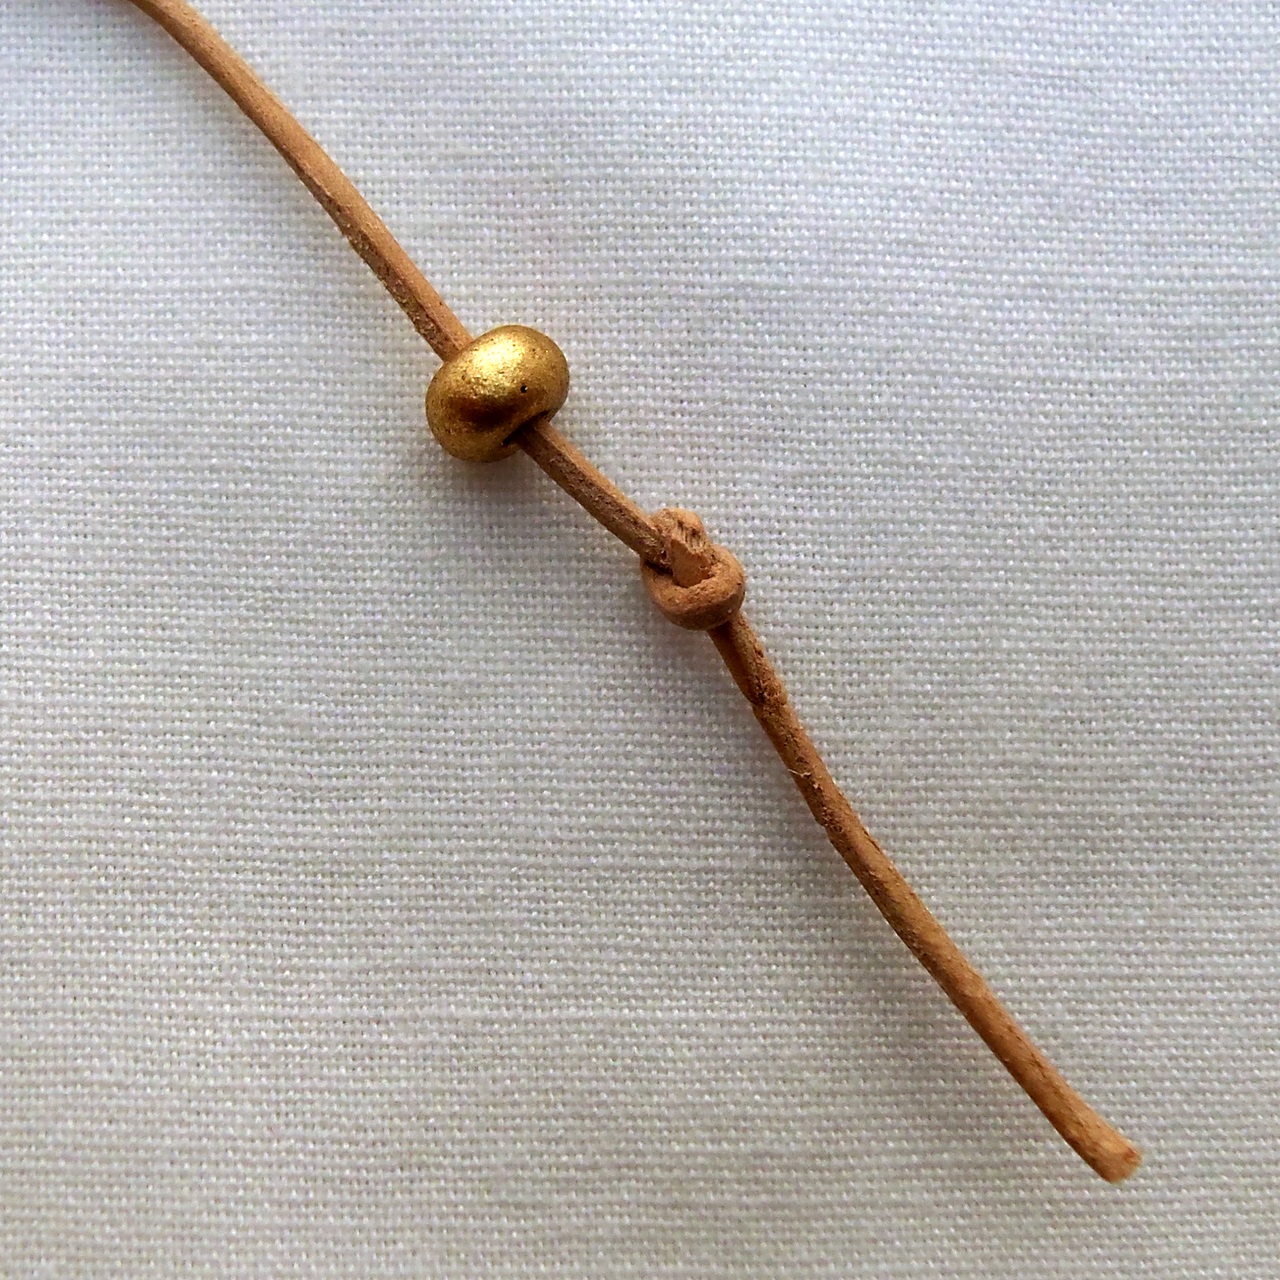
Step 6: Trim the end of the core cord.
Step 7: Repeat steps 3 – 6 on the other end of the core cord.
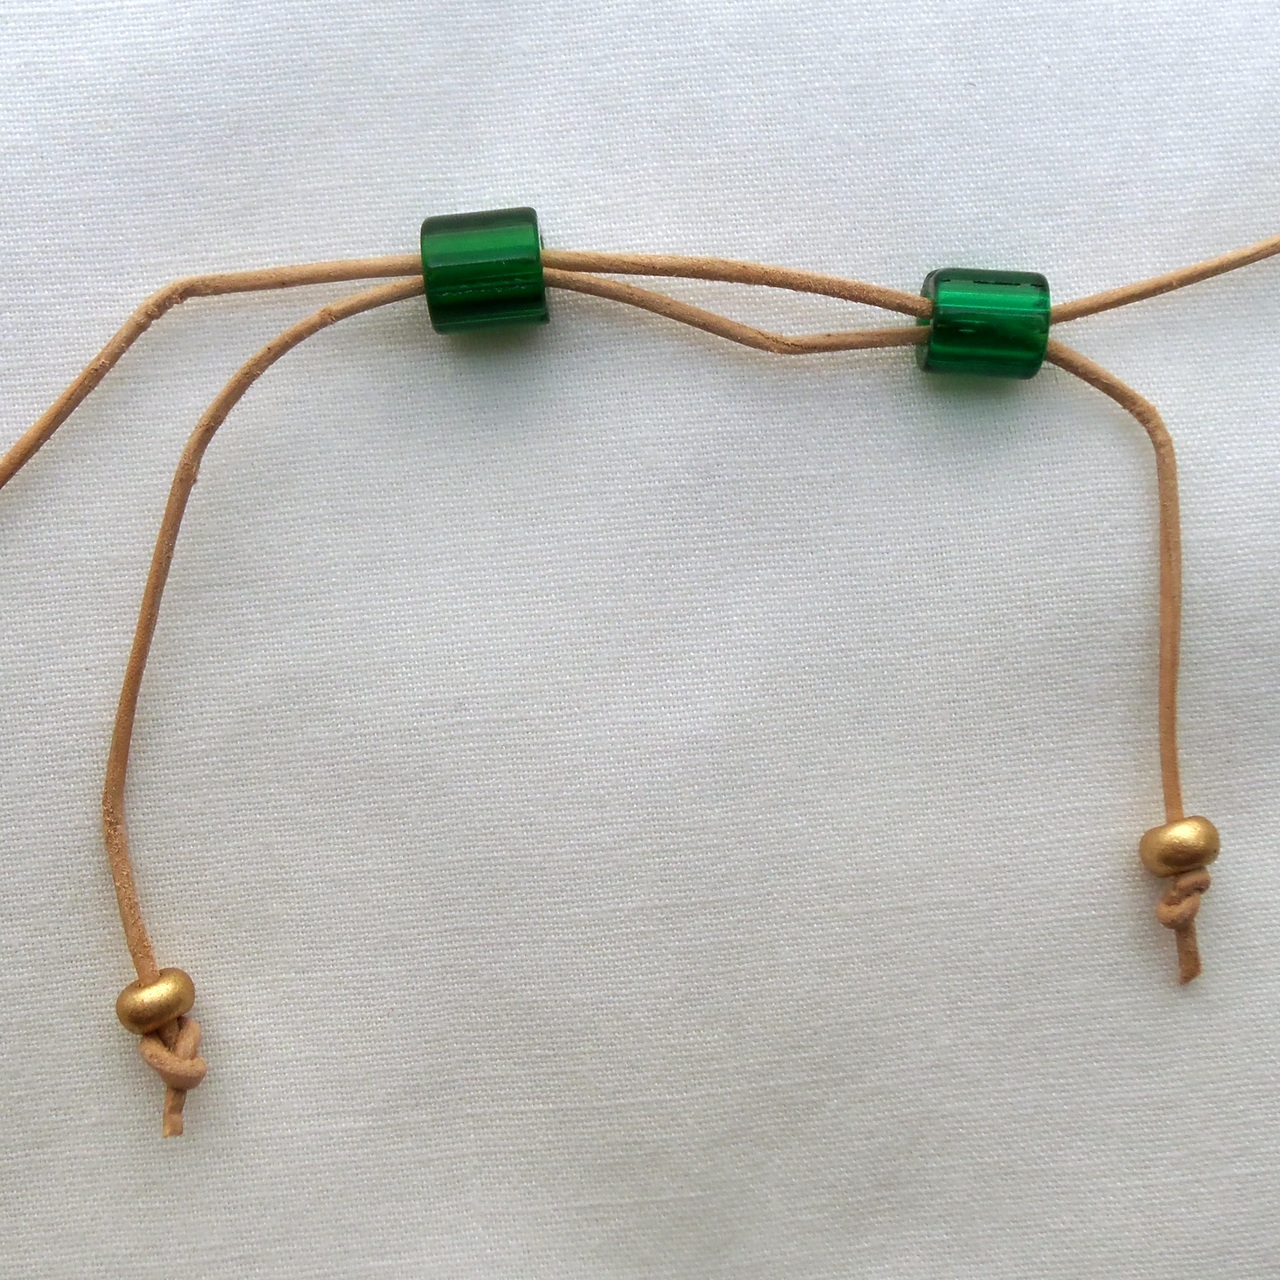
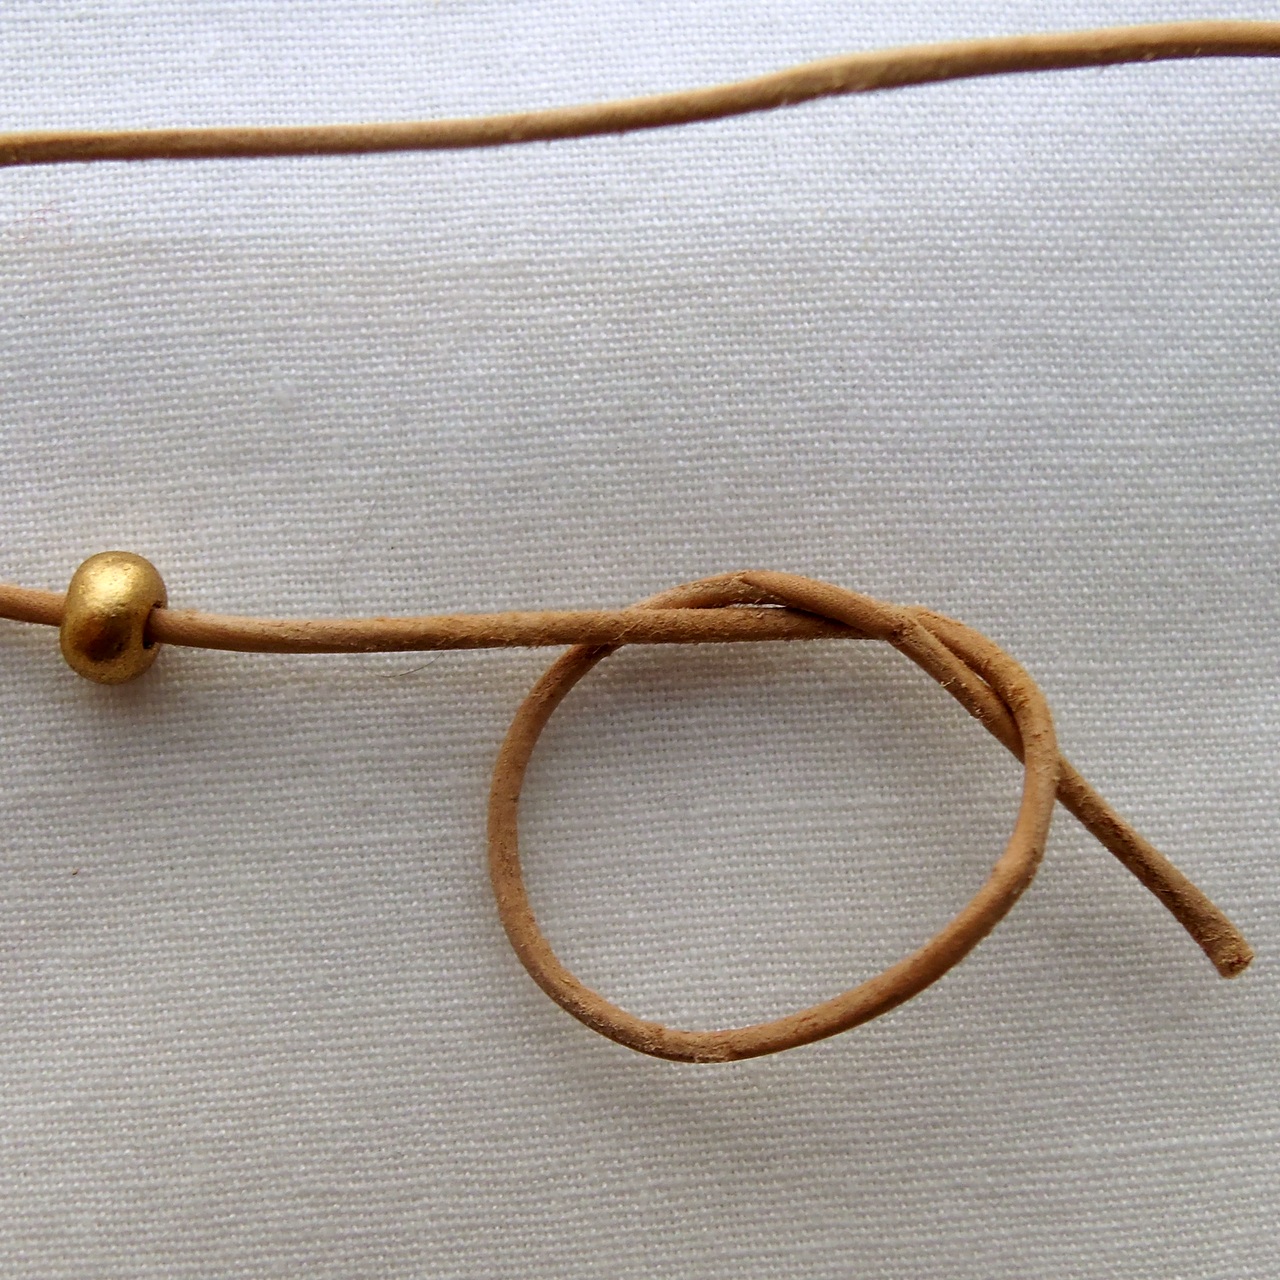
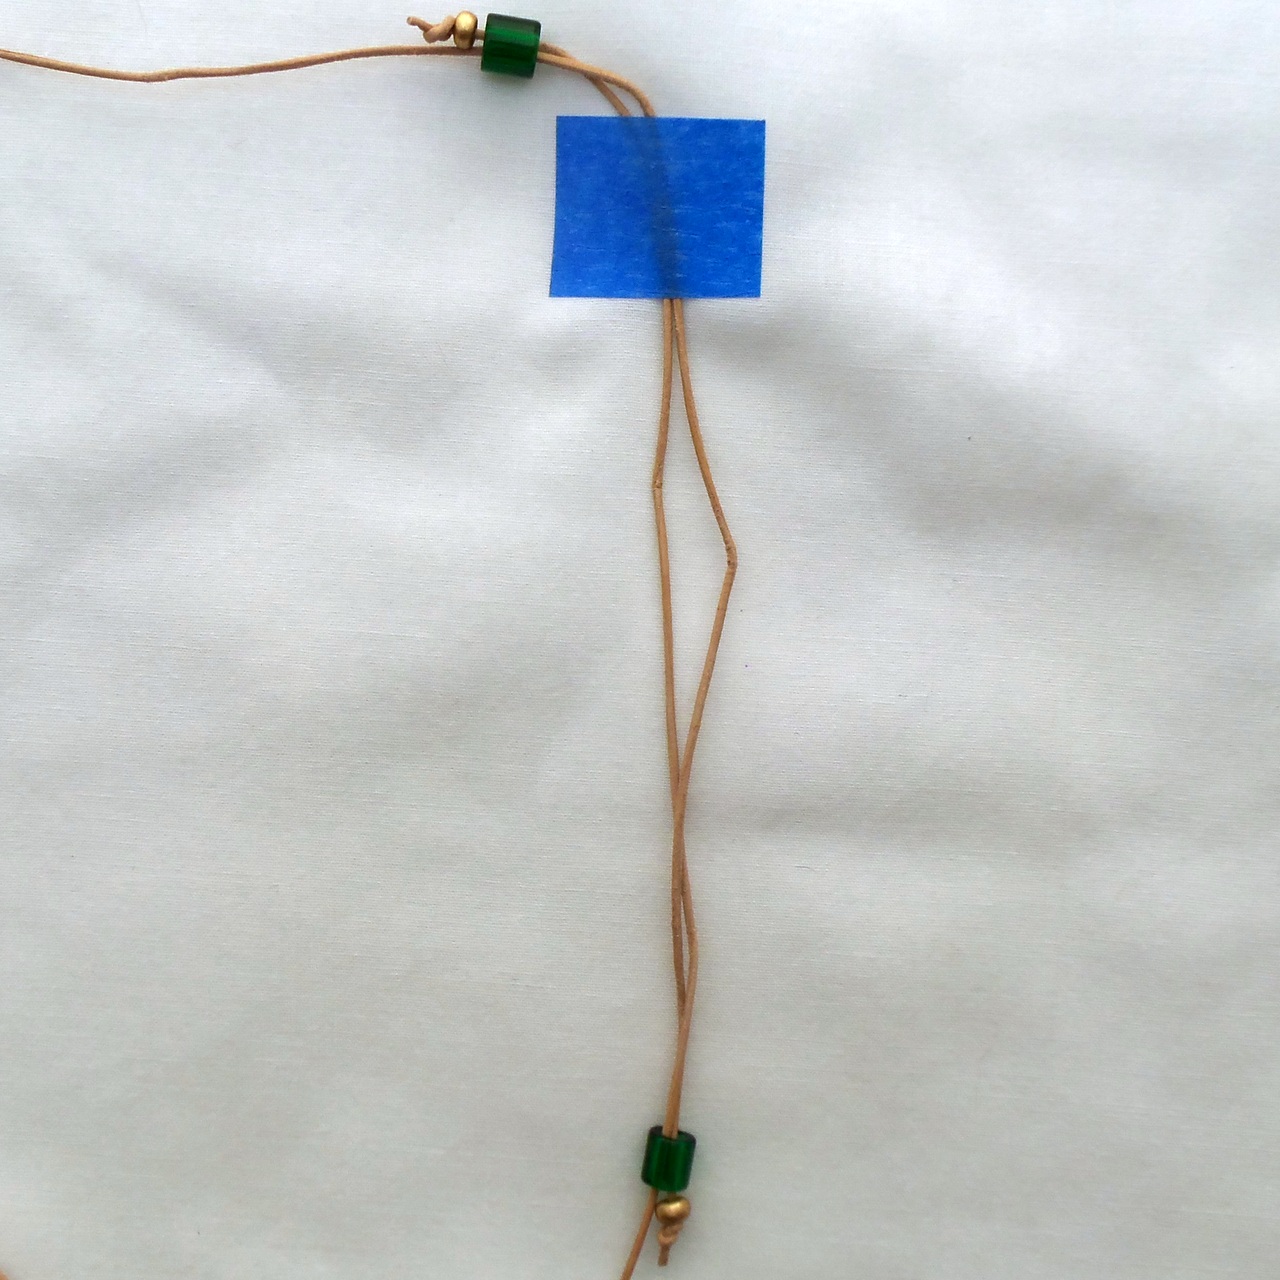
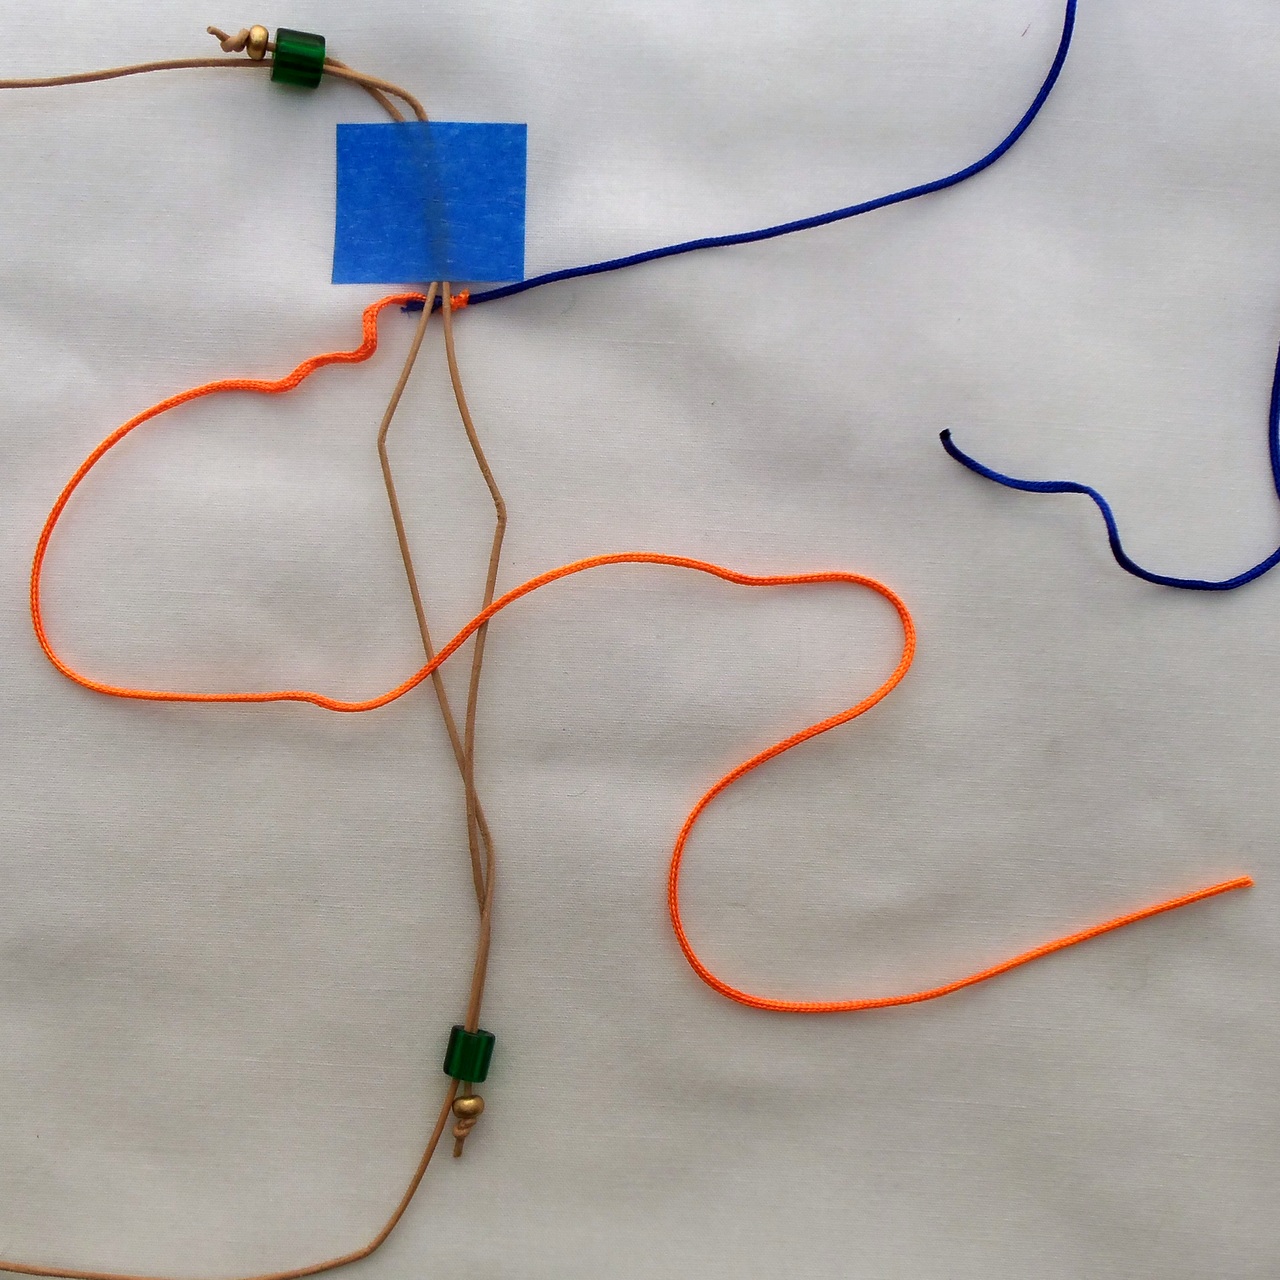
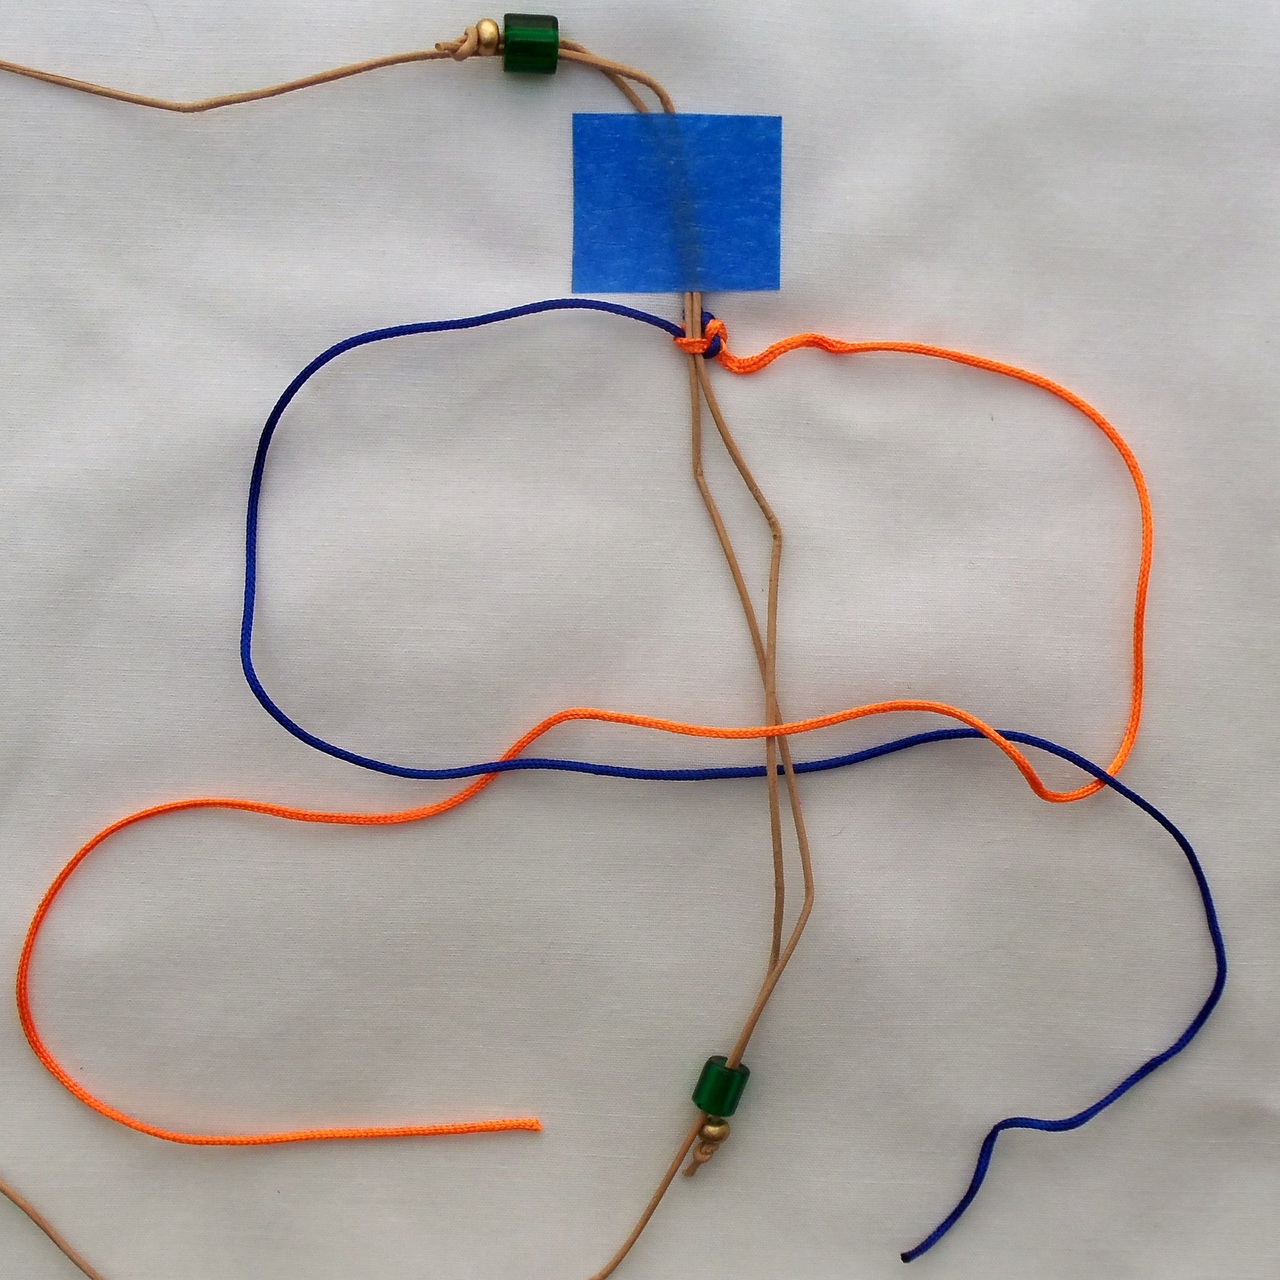
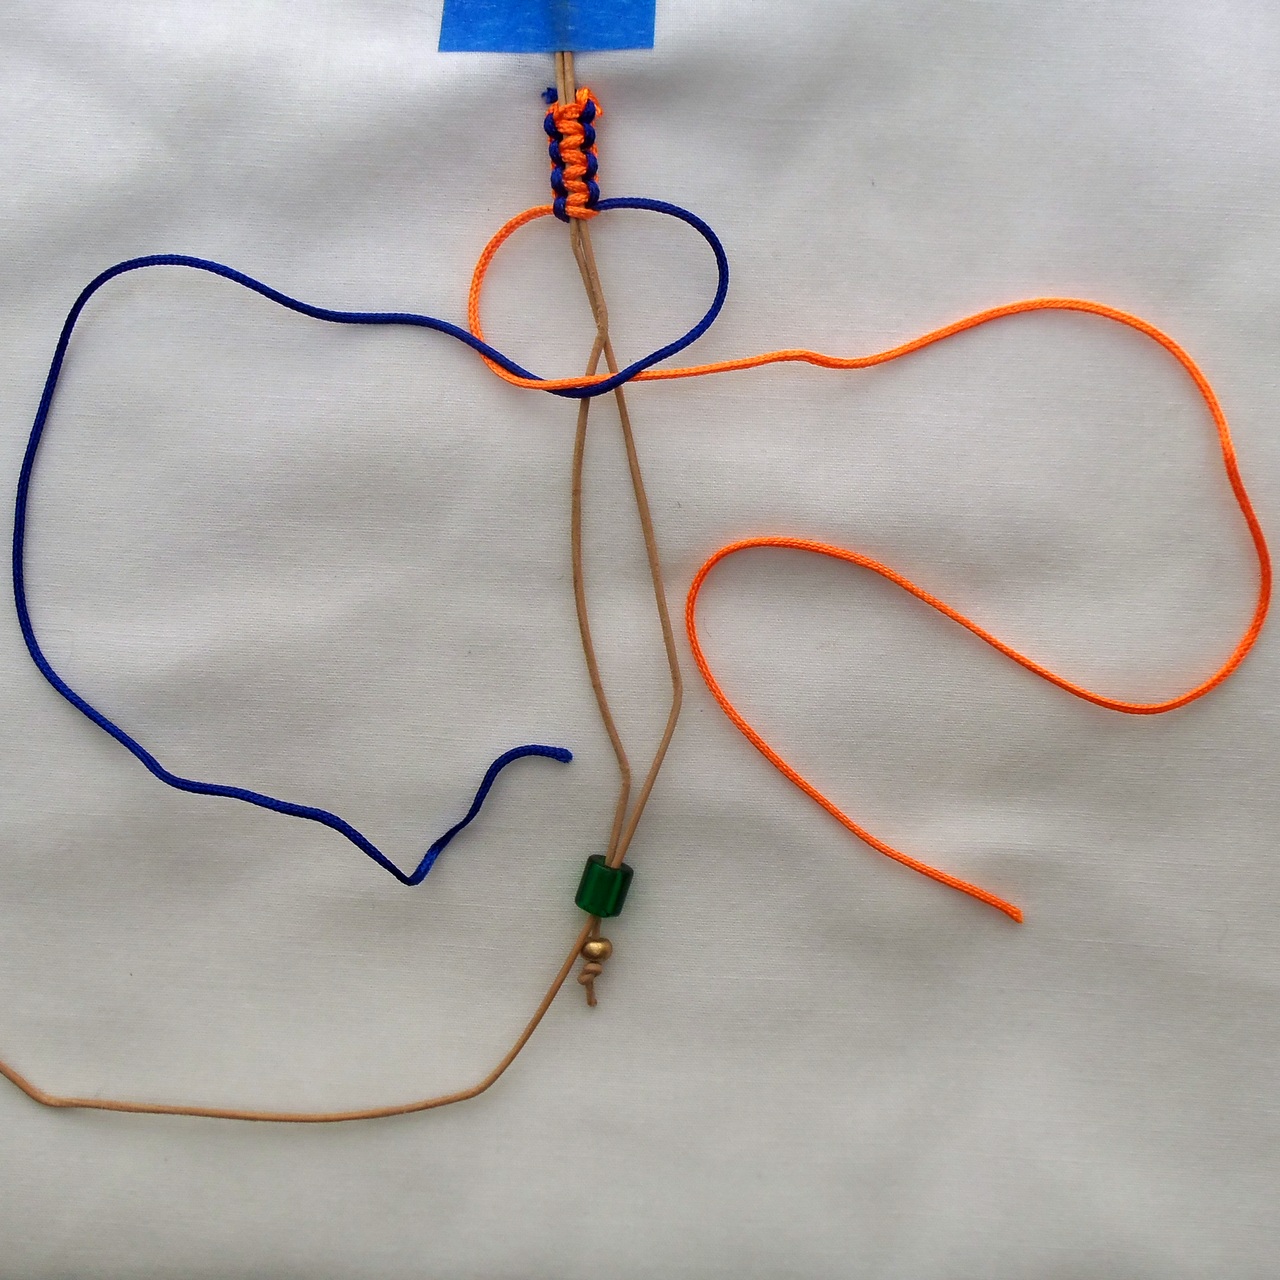
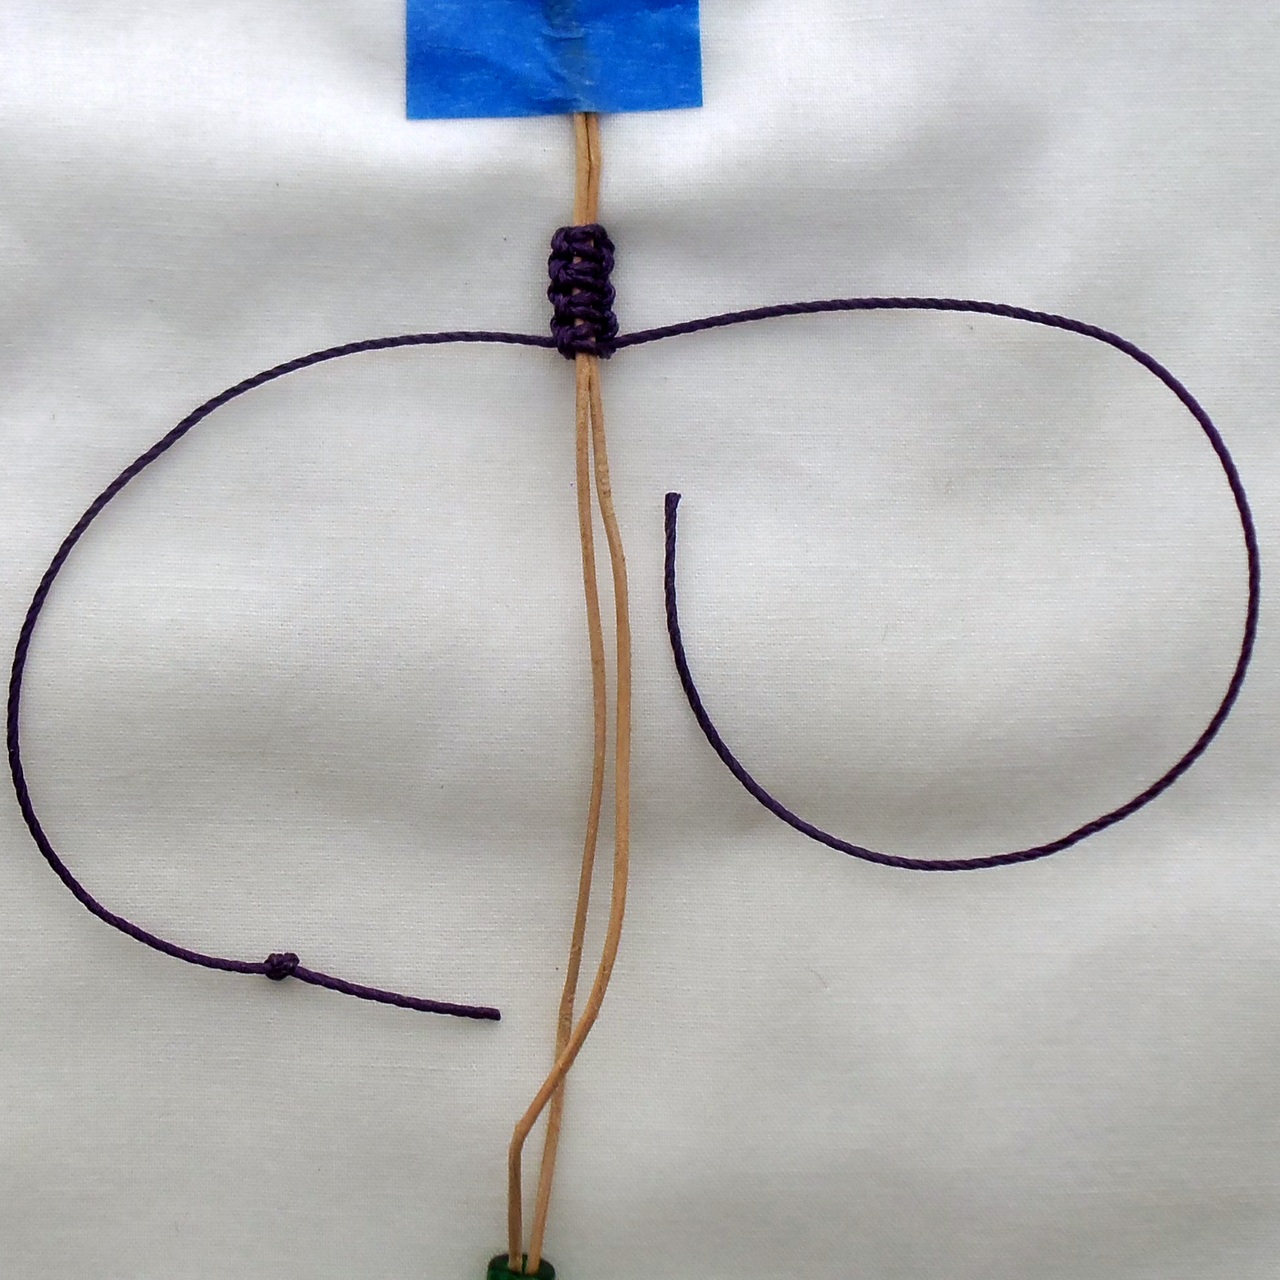
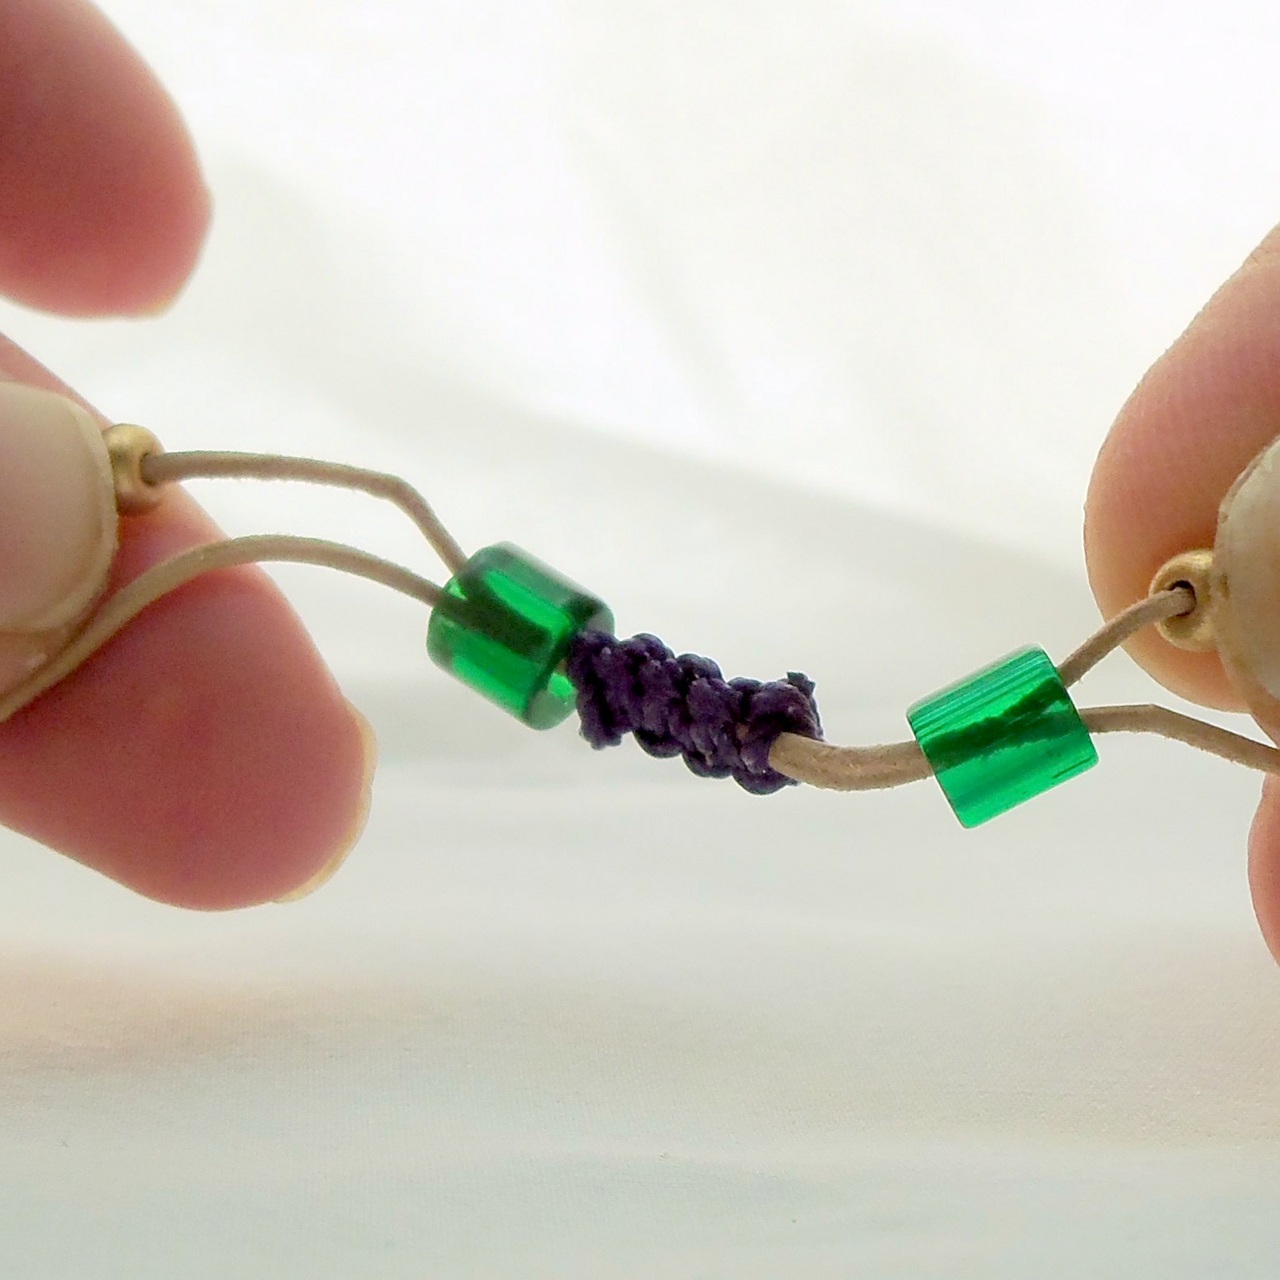
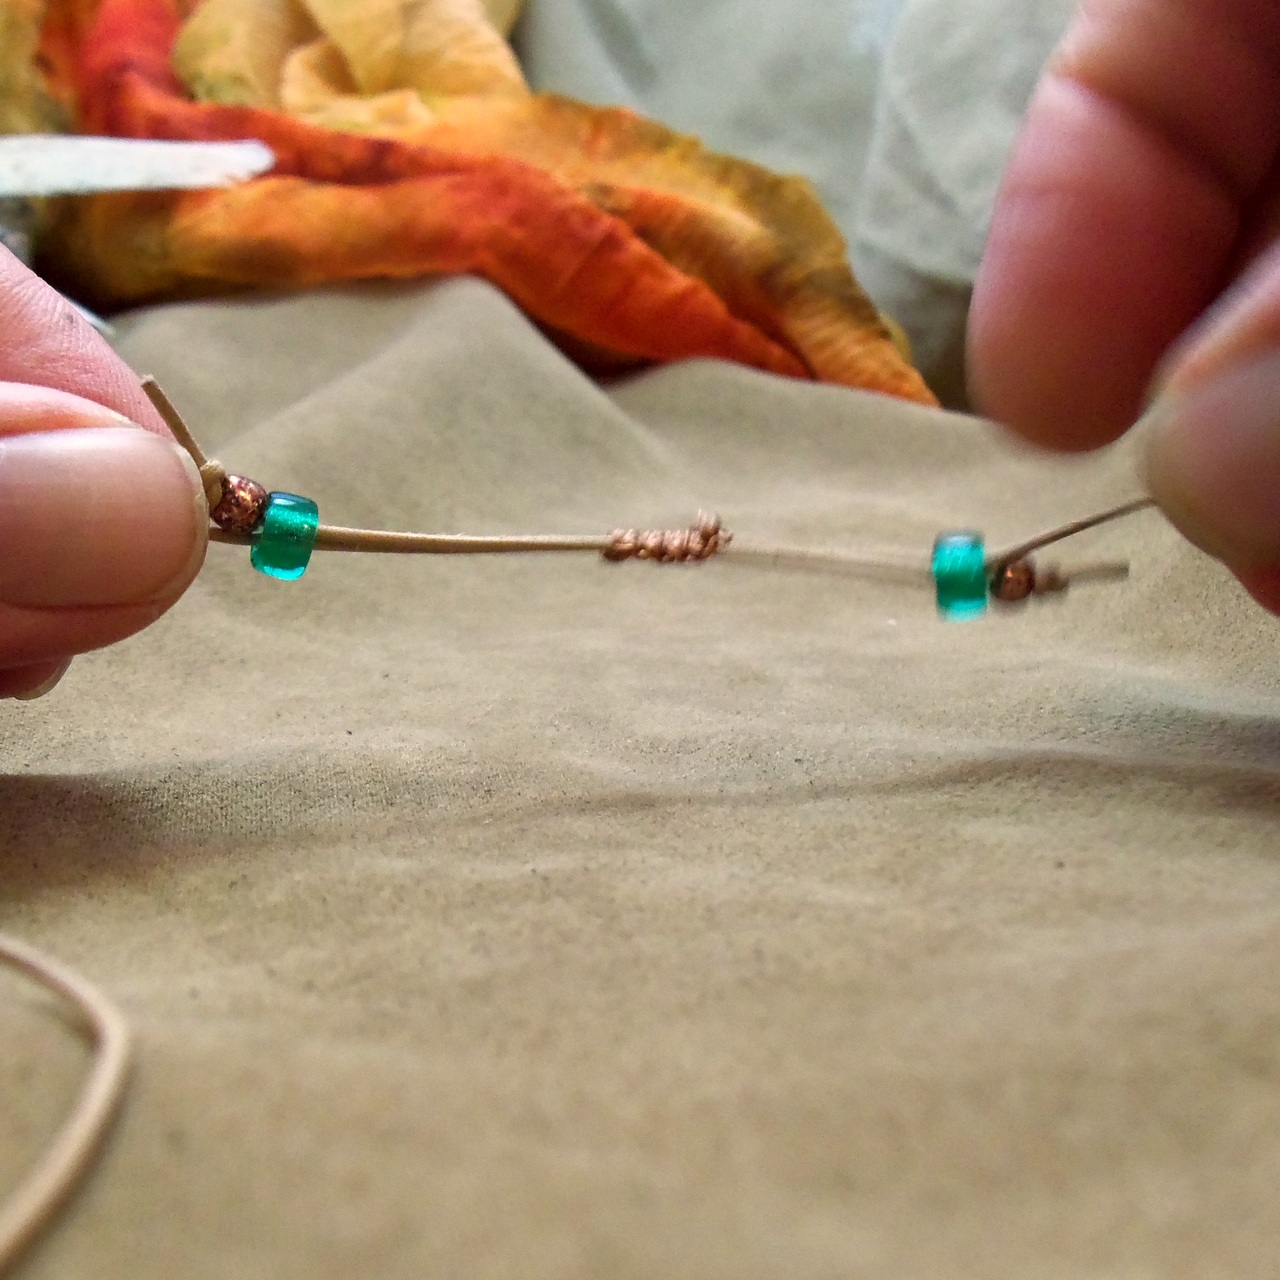
Step 8: Pull the beads away from each other to give yourself a few inches of overlapping core cord to work with. Pin or tape down your work.
Macramé Basic Square Knots
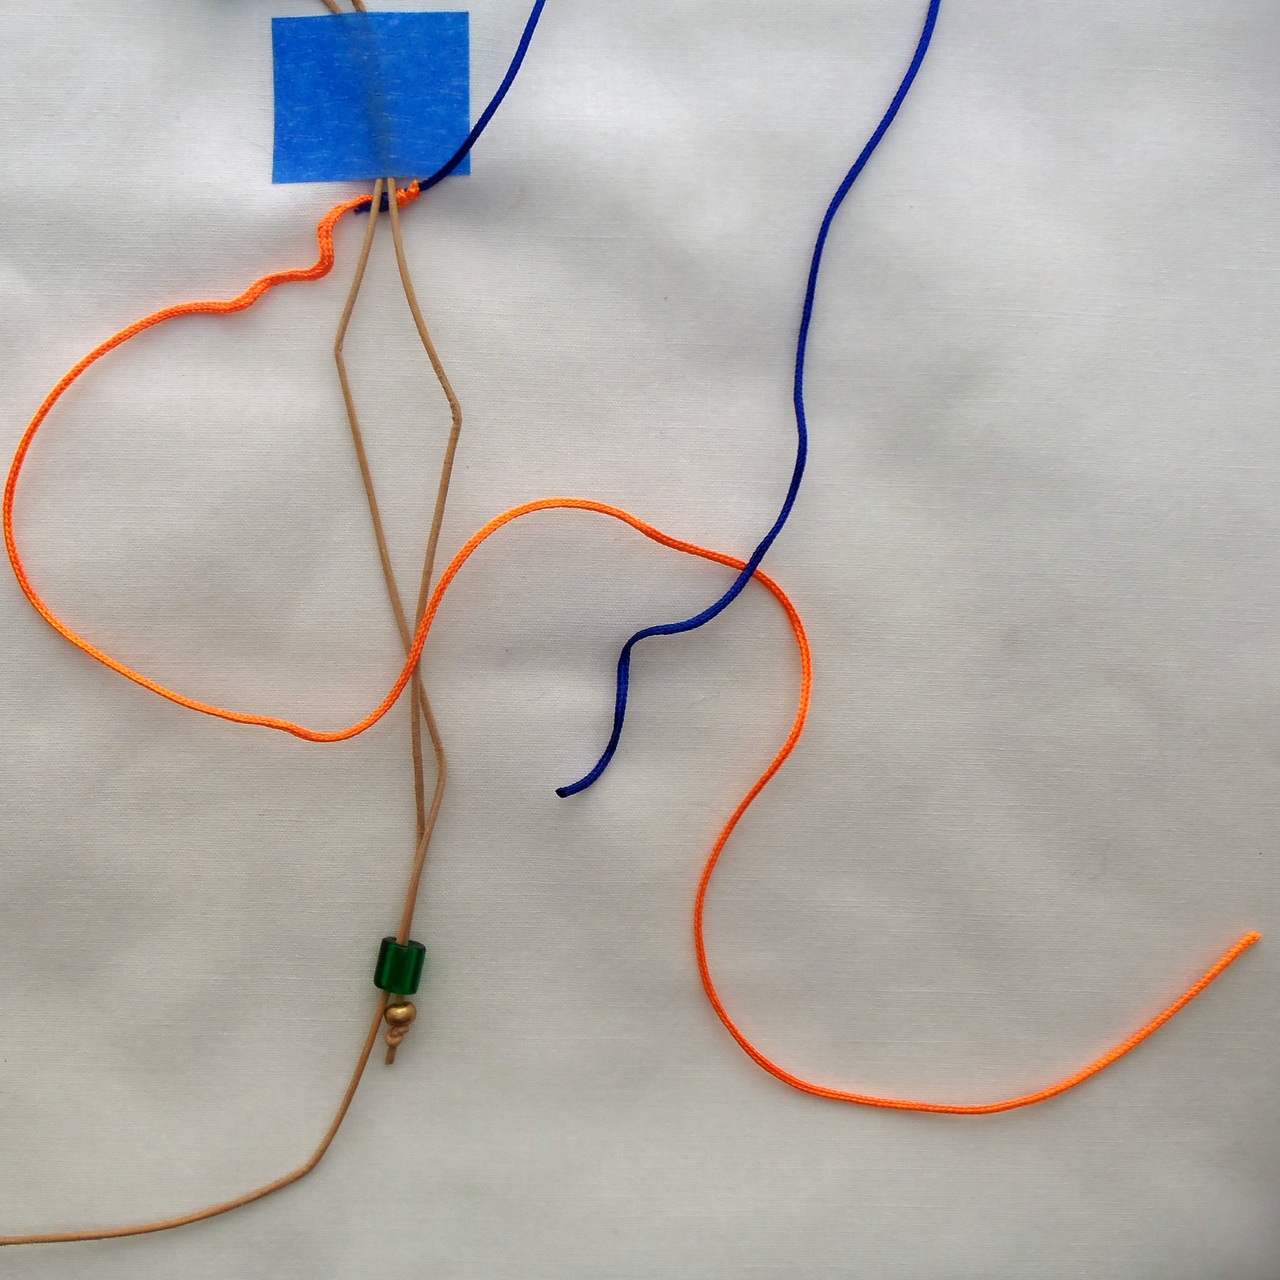
Step 9: Thread your macramé cord under your core cord. I am using two colors of macramé cord joined together to make the photos easier to follow.

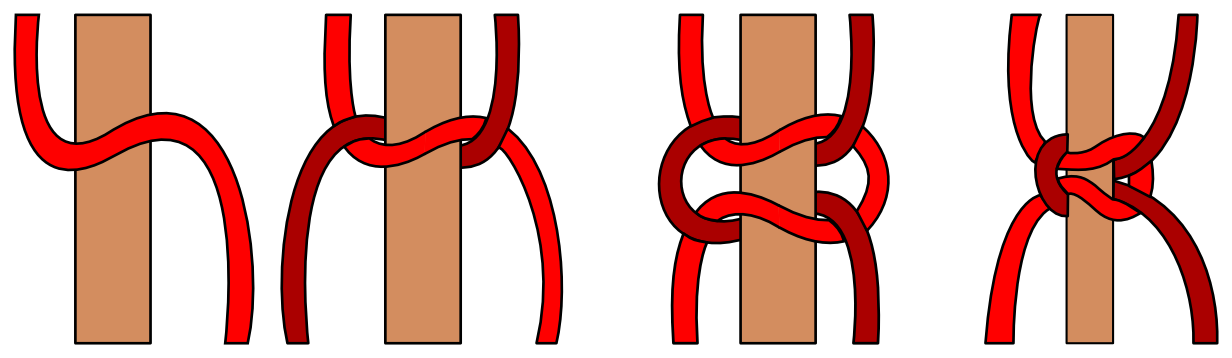
Step 10: Pull the left end of your macramé cord over the top of your core cord.
Step 11: Bring the right end of your macramé cord over top of left side of the cord.
Step 12: Thread the right end of your macramé cord under the core cord.

Step 12: Pull the right end of your macramé cord up through the loop formed by the left cord.
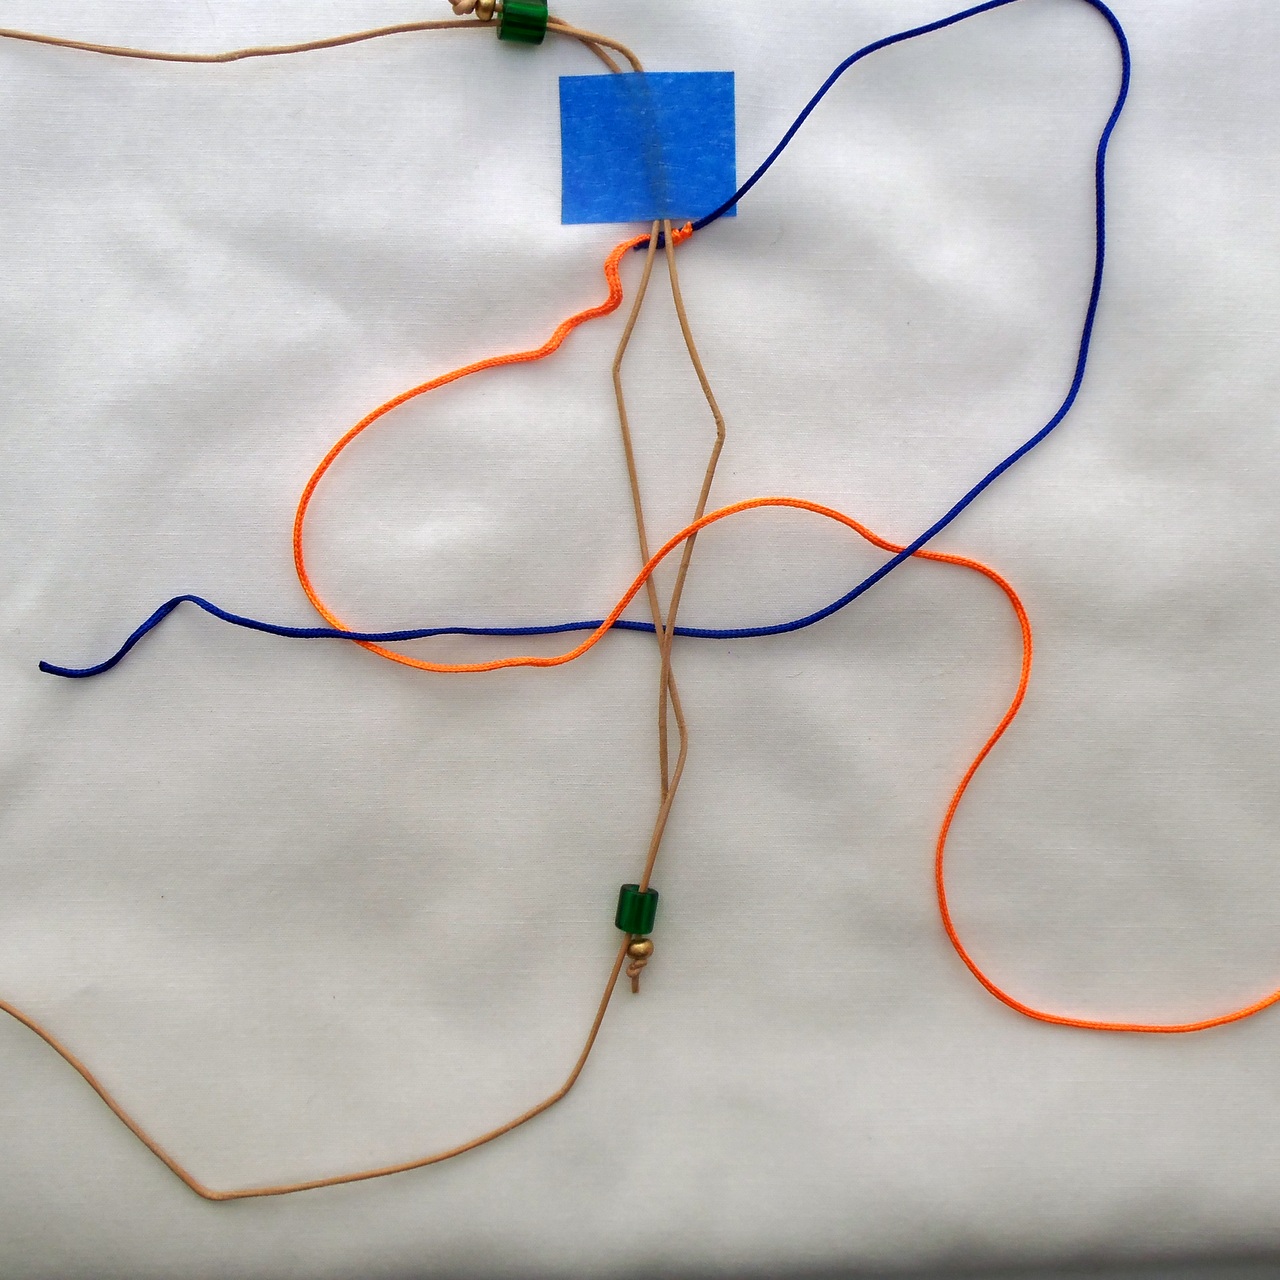
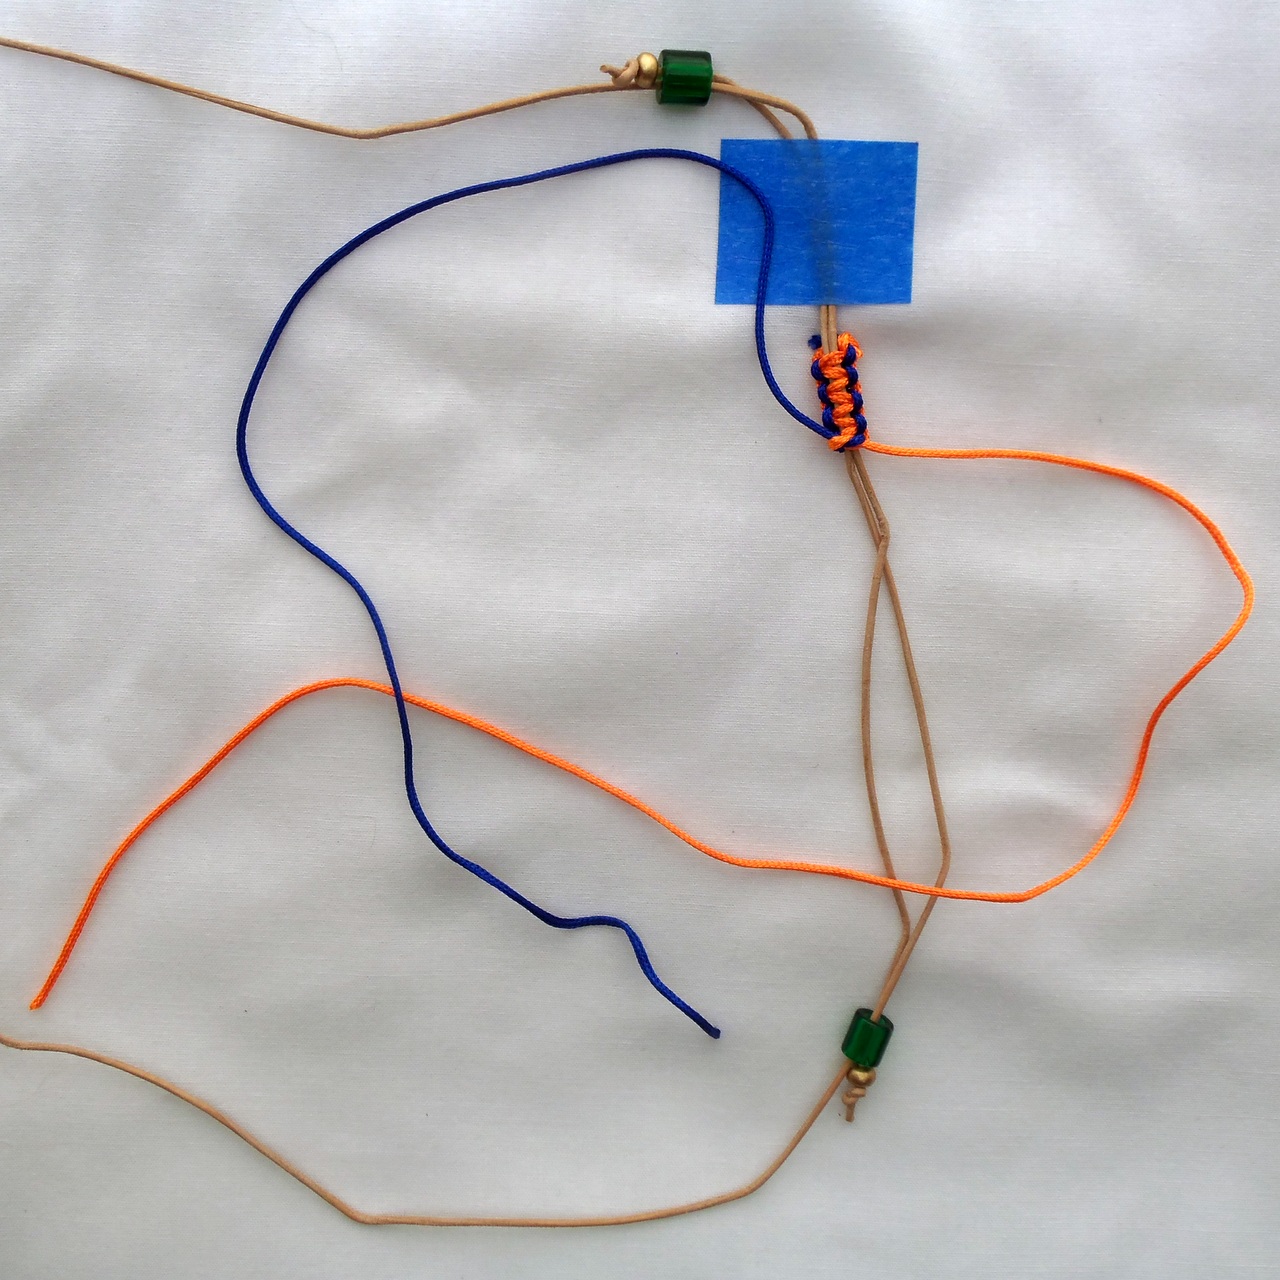
Step 13: Snug the first half of the square knot. Don’t tighten it too tight or the core cord won’t be able to slide through the macramé to adjust the necklace. It needs to be tight enough to hold the core cord in place, but loose enough to pull the core cord through.
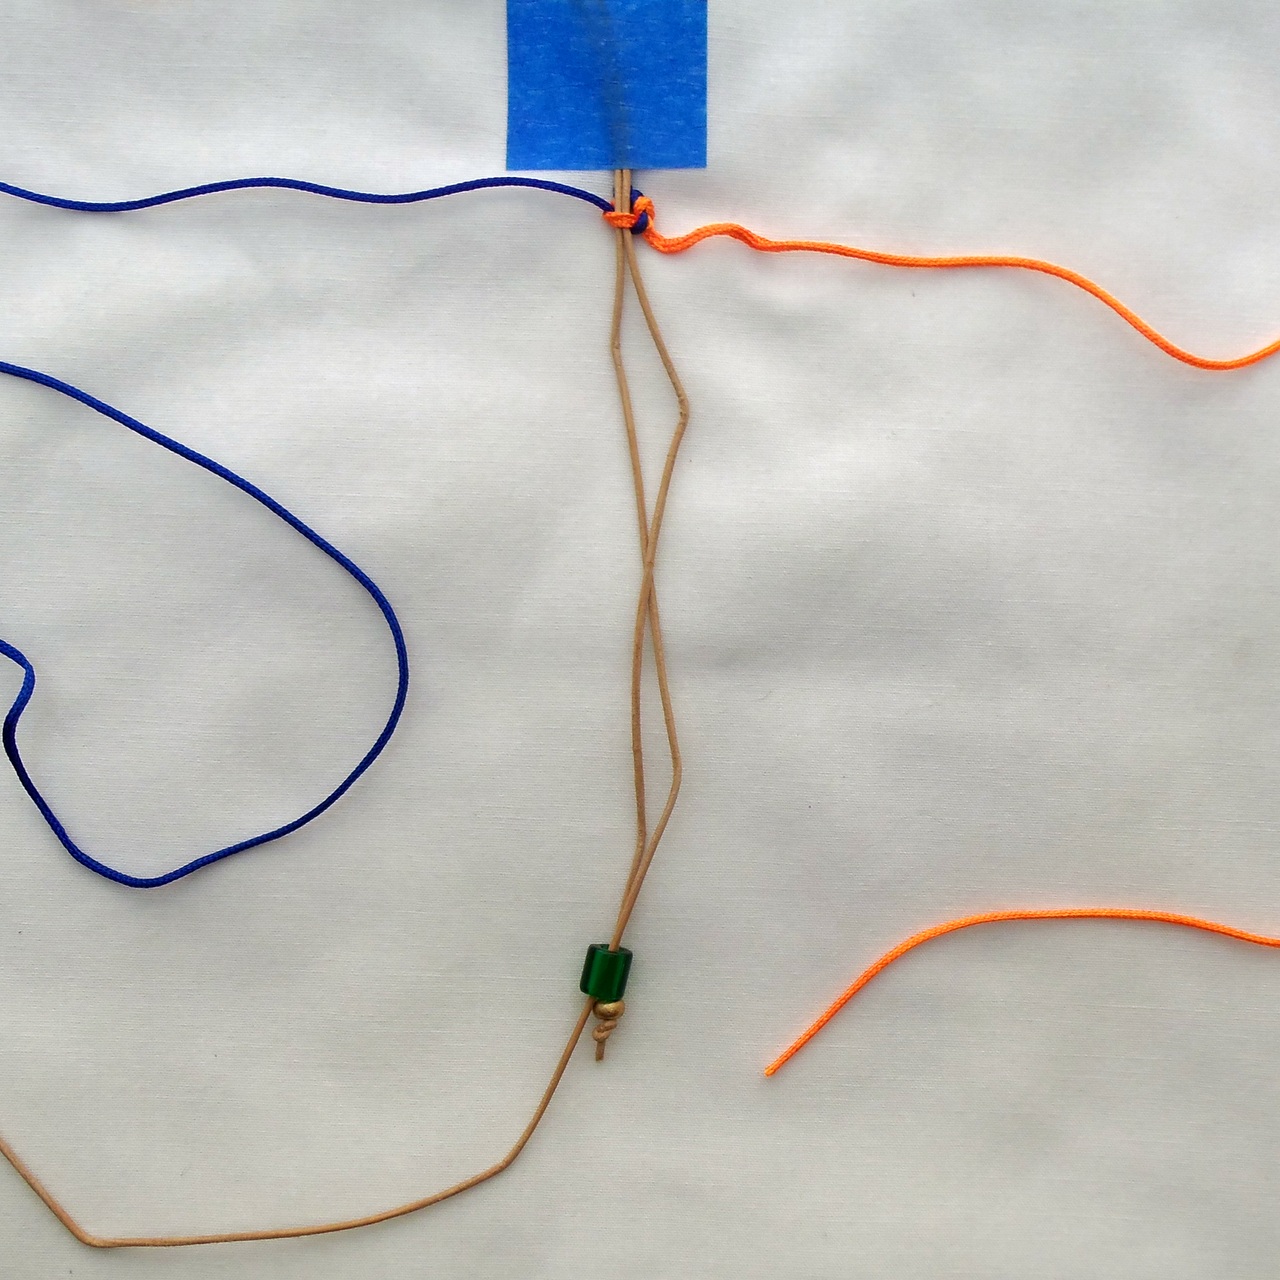
Step 14: Bring the right cord over the core cord. Thread the left cord over the right cord, under the core cord, and up through the loop formed by the right cord.
Step 15: Snug the knot, remembering not to make it so tight the core cord won’t be able to slide through the macramé. Your first square knot is completed.

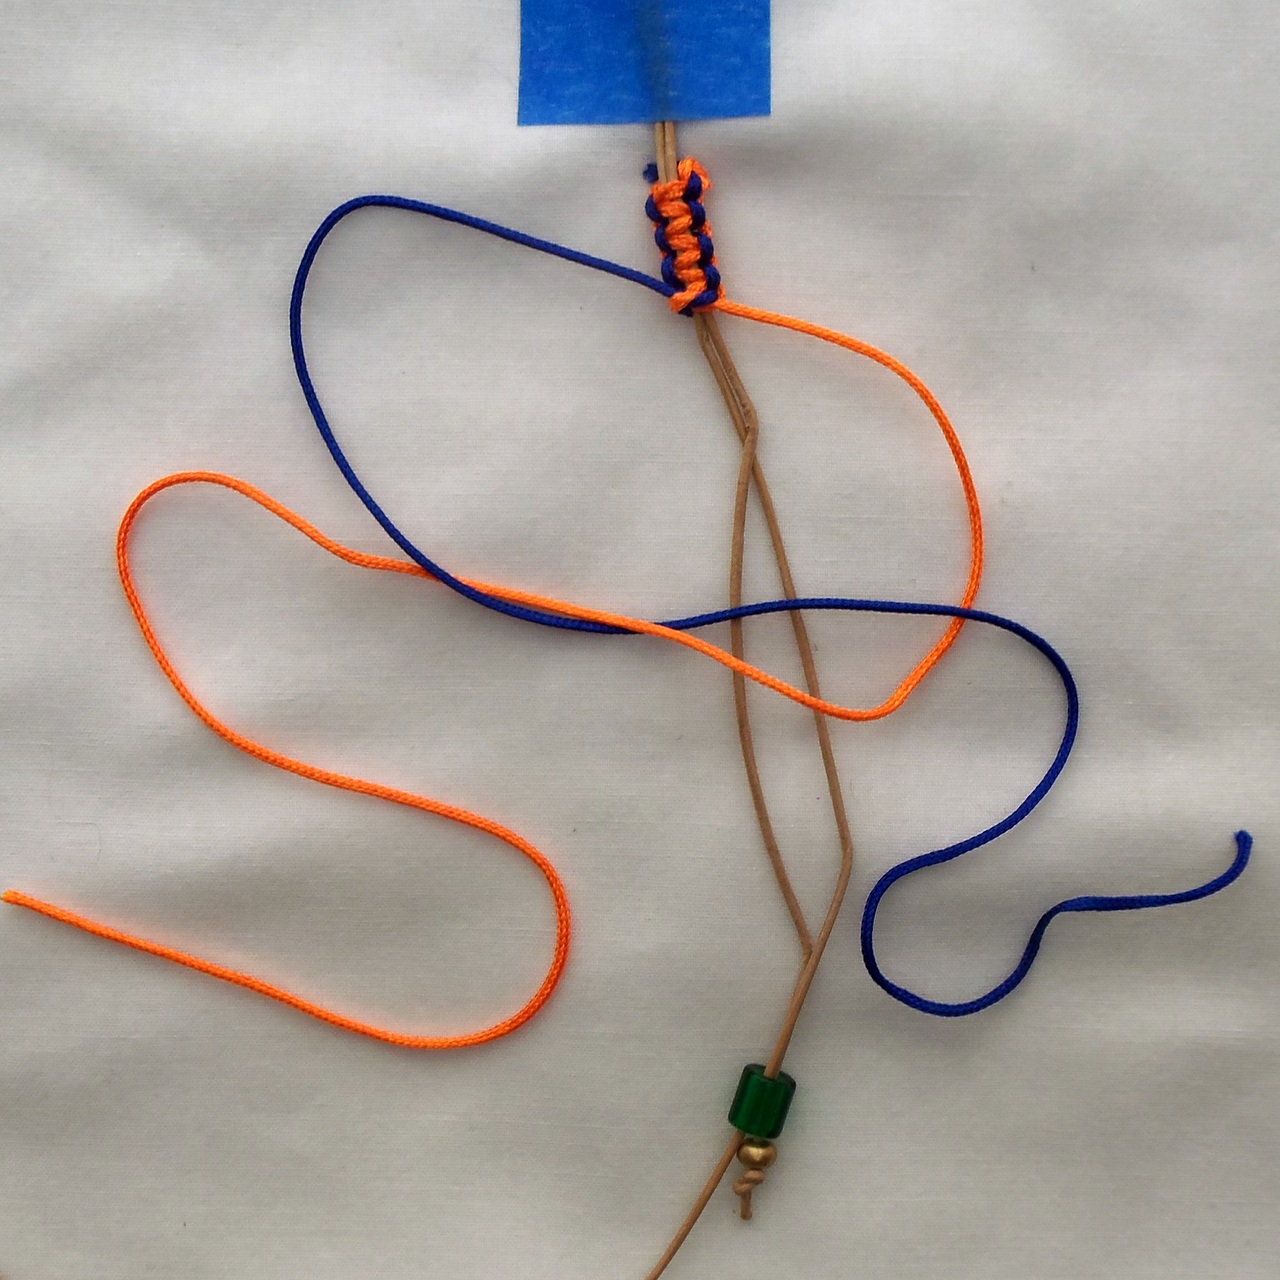
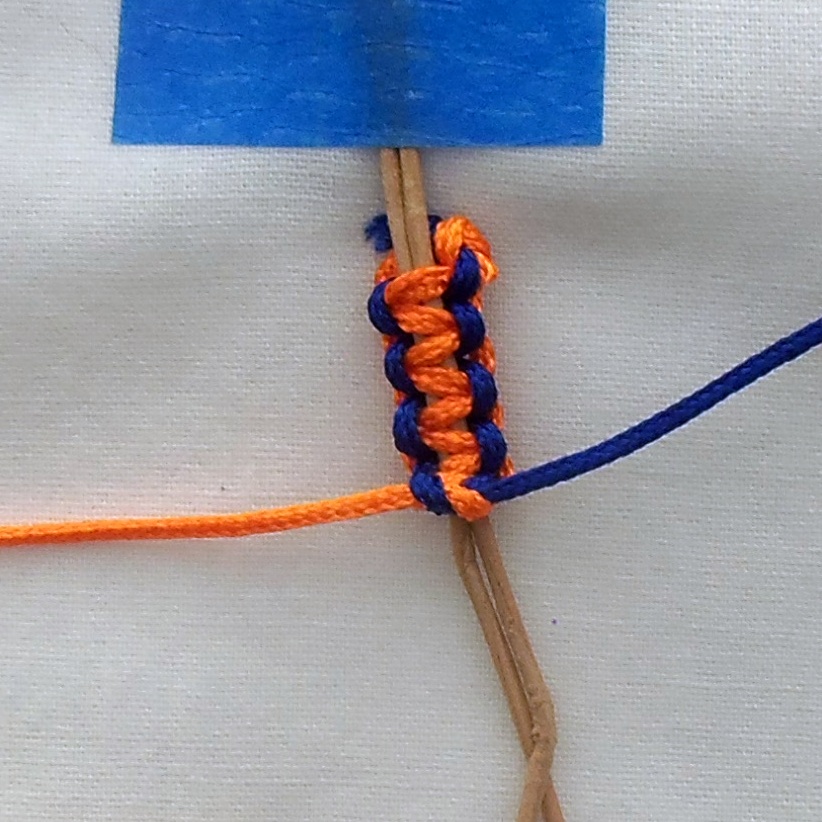
Step 16: Repeat steps 10 – 15 four or five more times, making several more square knots.
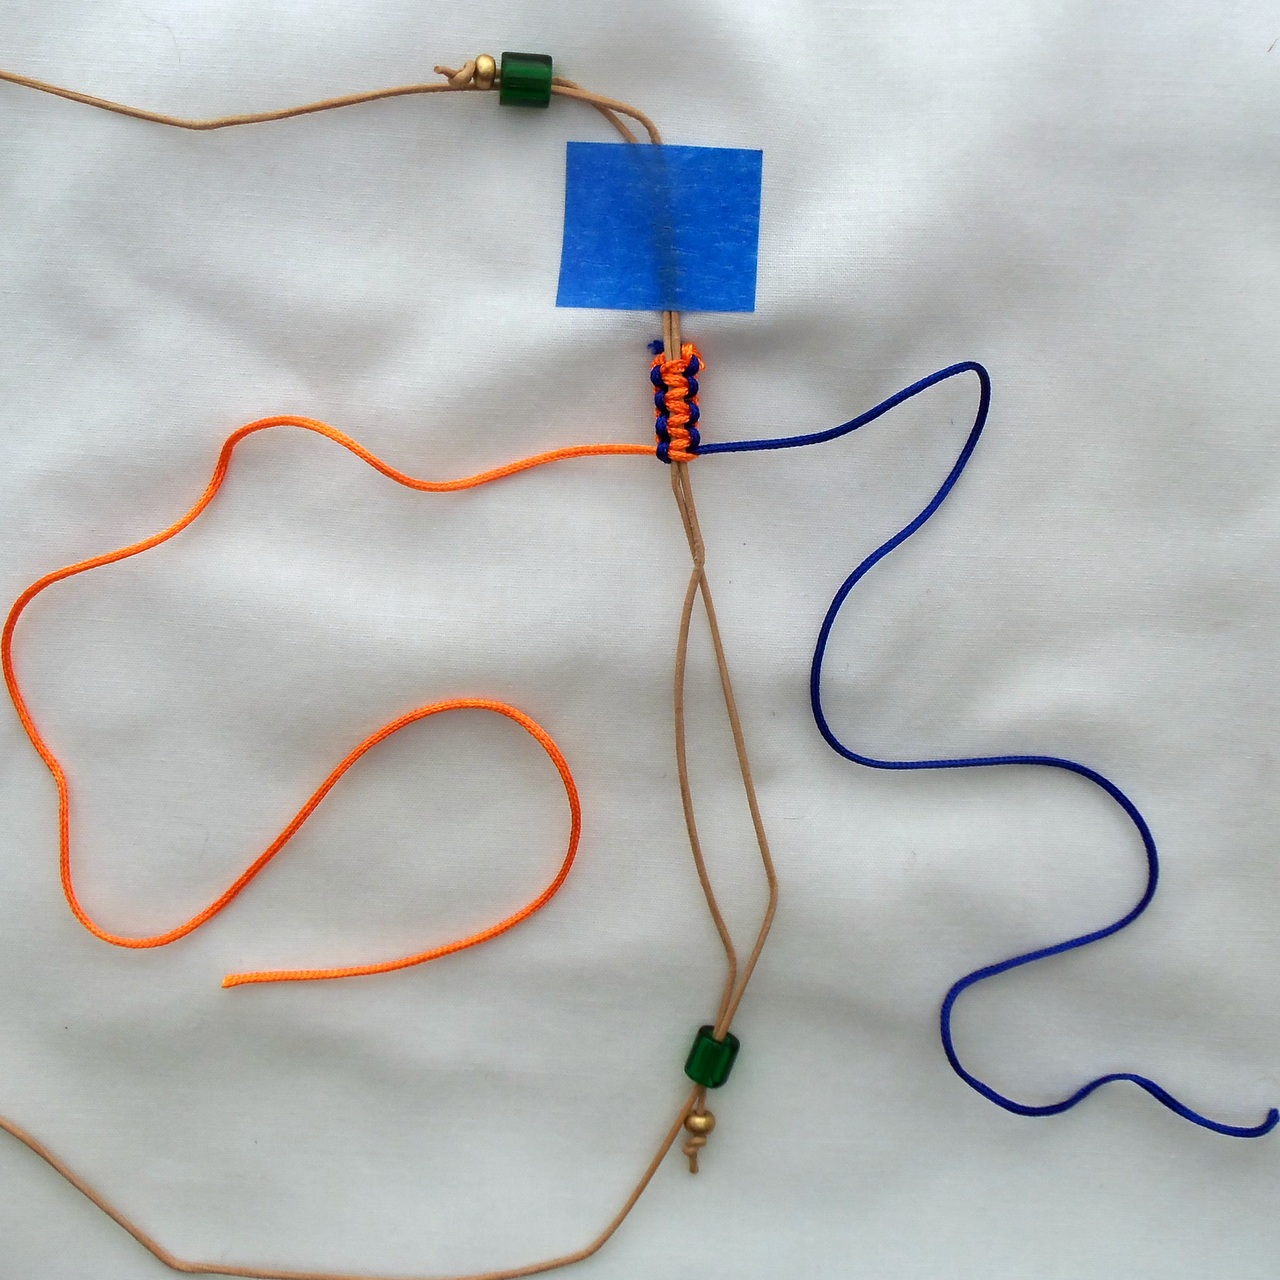
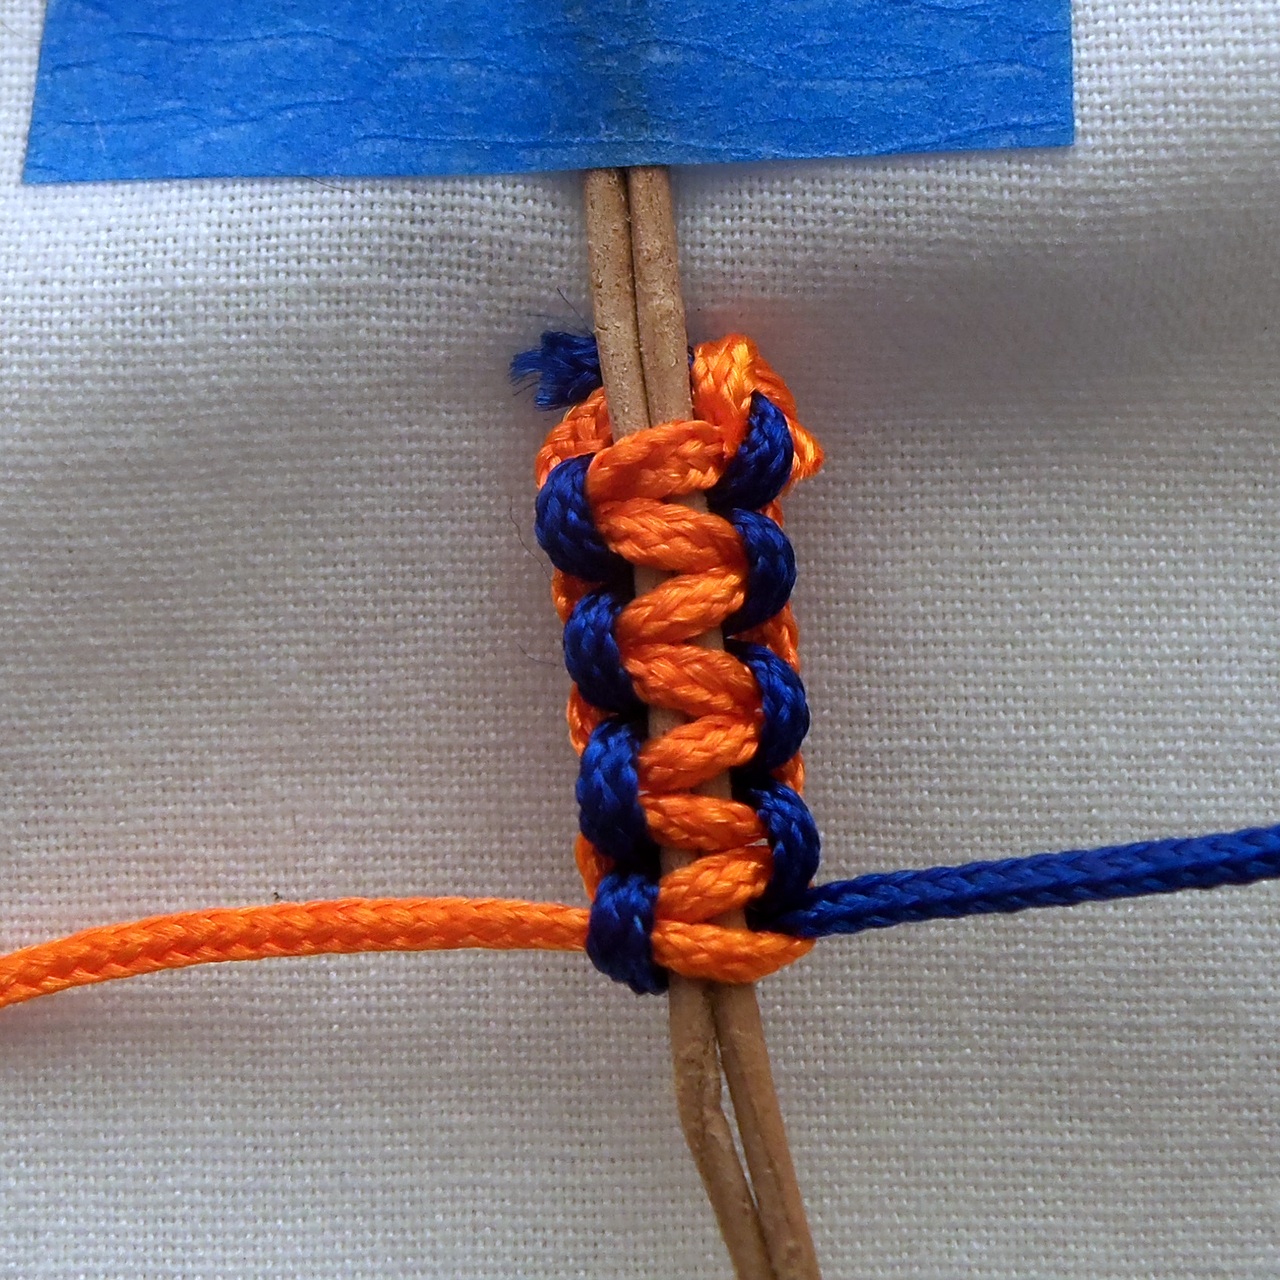
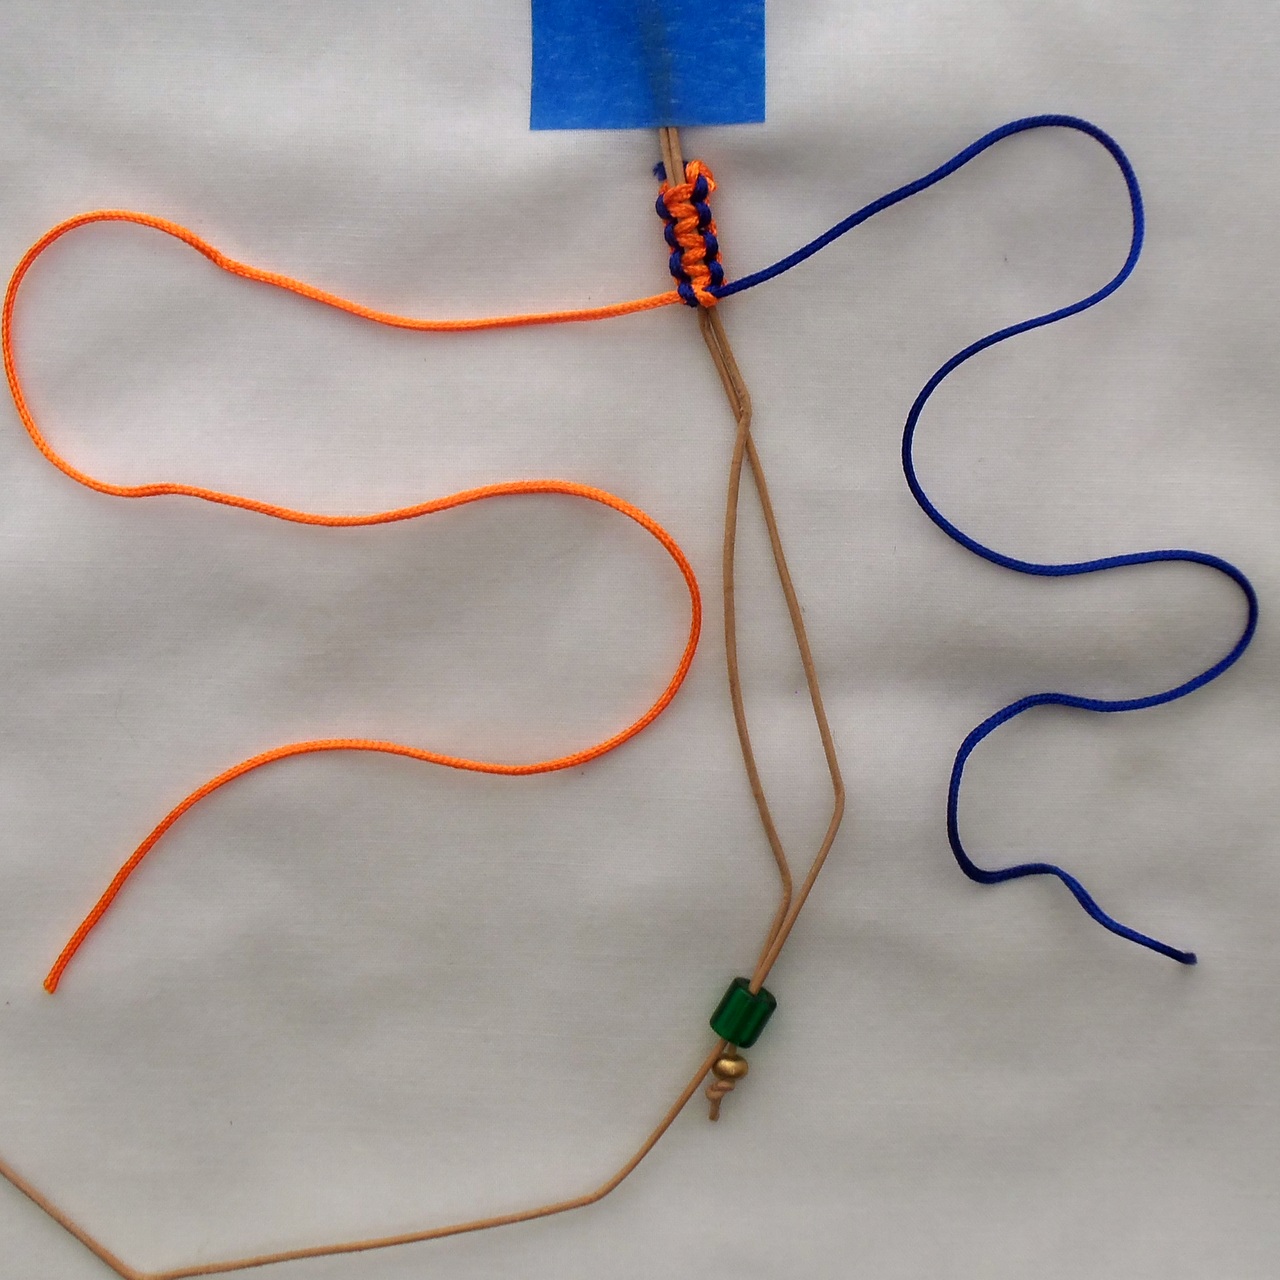
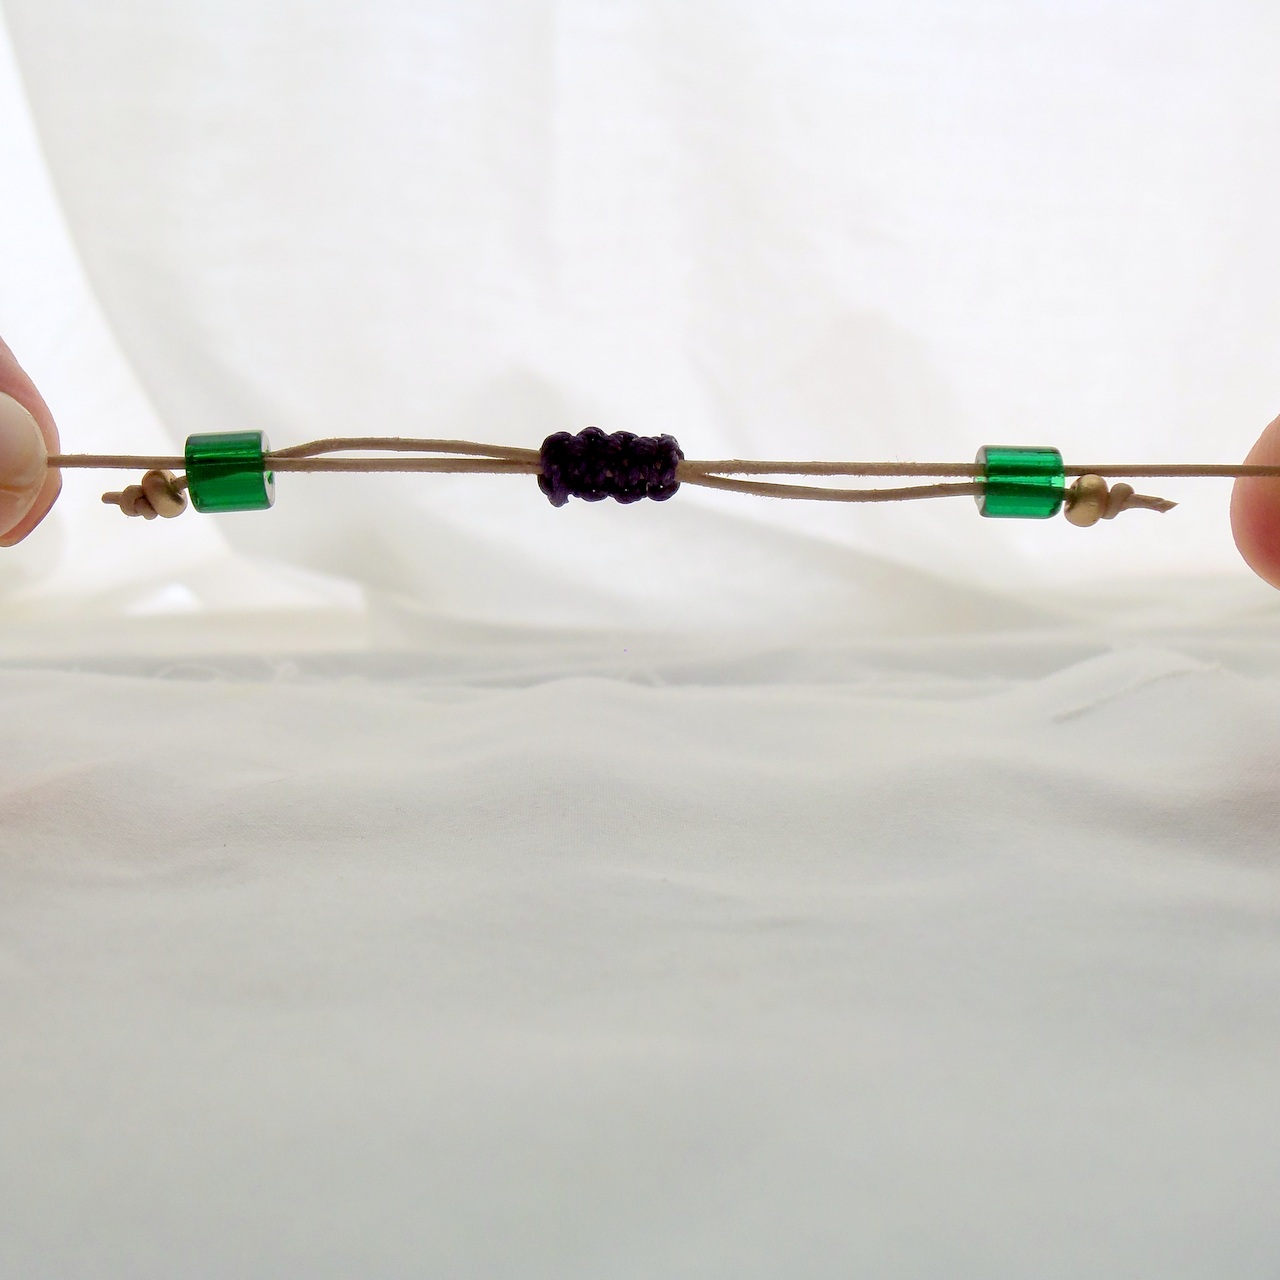
Close-up of the finished macramé square knots (I did a total of four knots).
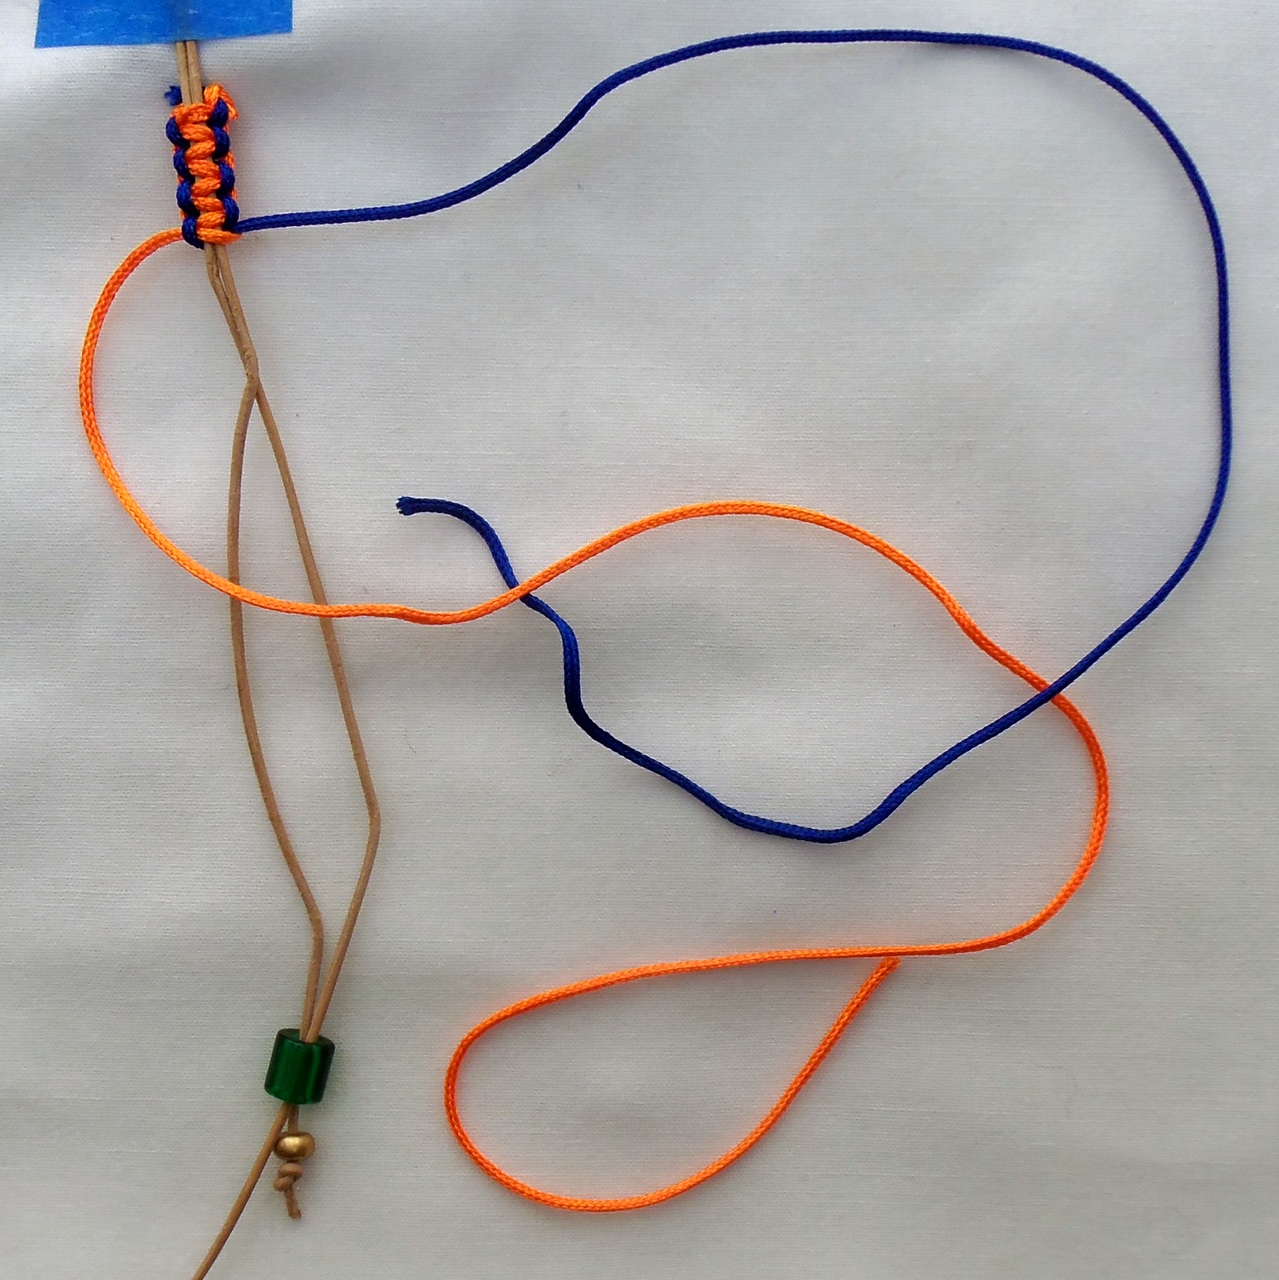
Step 17: Now to secure it with a simple square knot. Bring the left cord over the core cord. Thread the right cord over and through the left cord.
Step 18: Tighten up the first half of the knot.
Step 19: Bring the right cord over the core cord. Thread the left cord over and through the right cord.
Step 20: Start to tighten up the square knot. Right here I put a tiny dab of glue on the first half of the knot so when I tighten the second half of the knot the glue is sandwiched between and helps glue the knot securely.
Step 21: Tighten up the knot, really tight to help it hold.
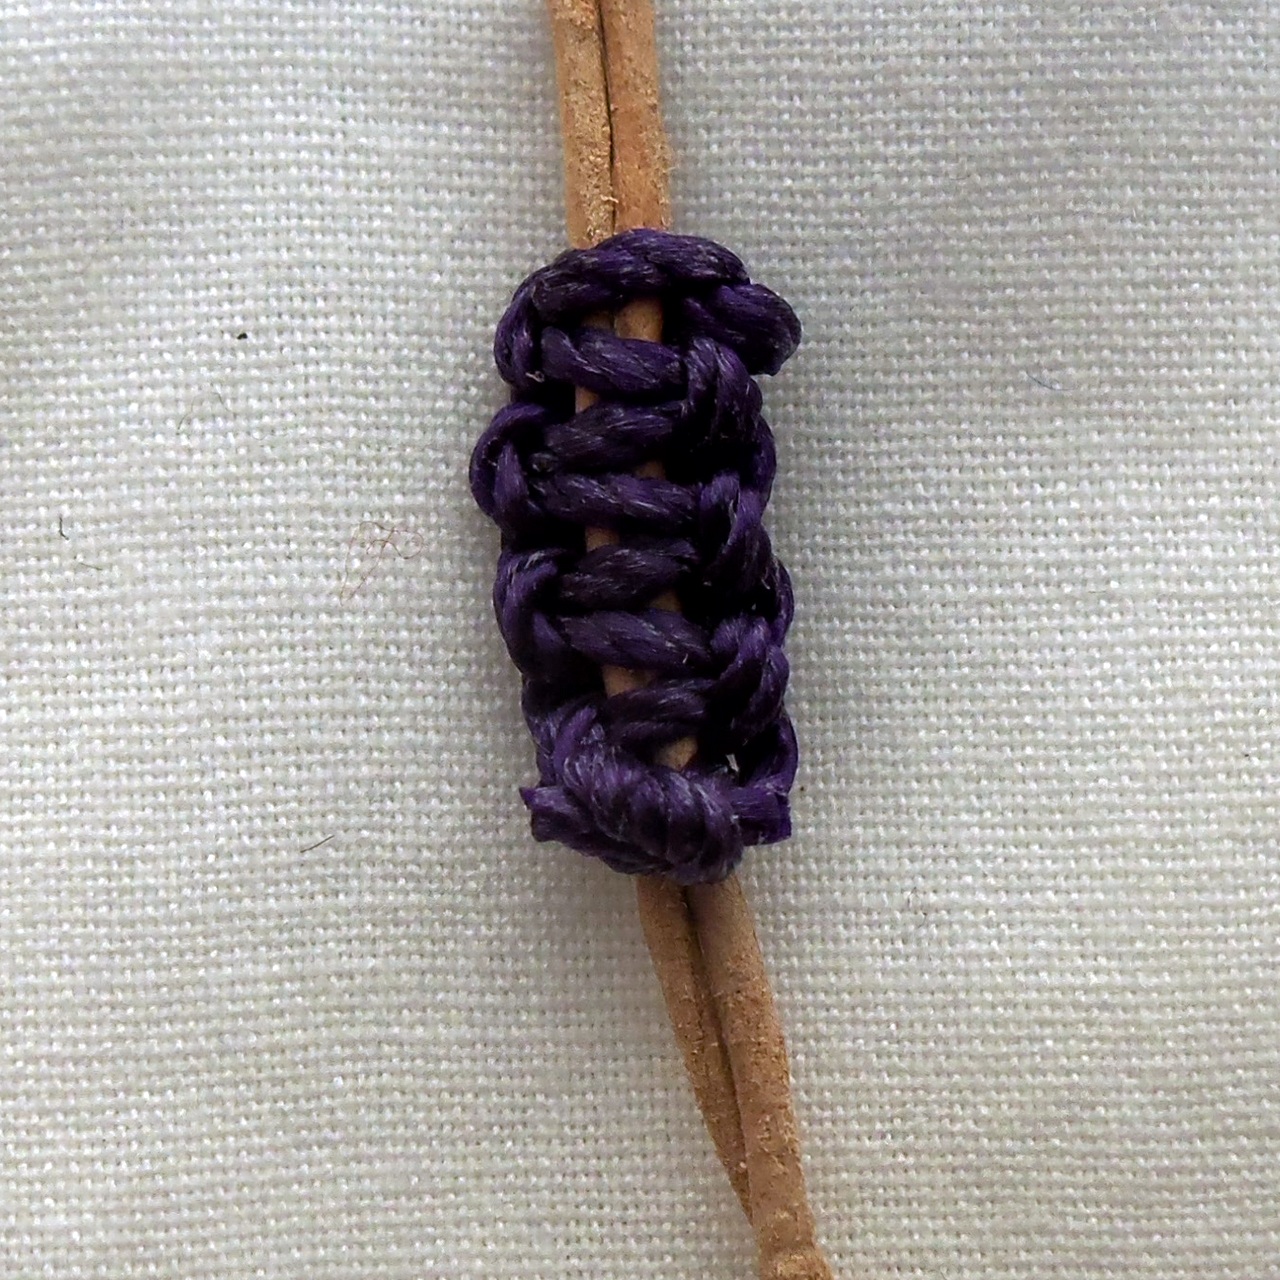
Close-up of the finished simple square knot. Let the glue dry before clipping the ends off close to the knot.
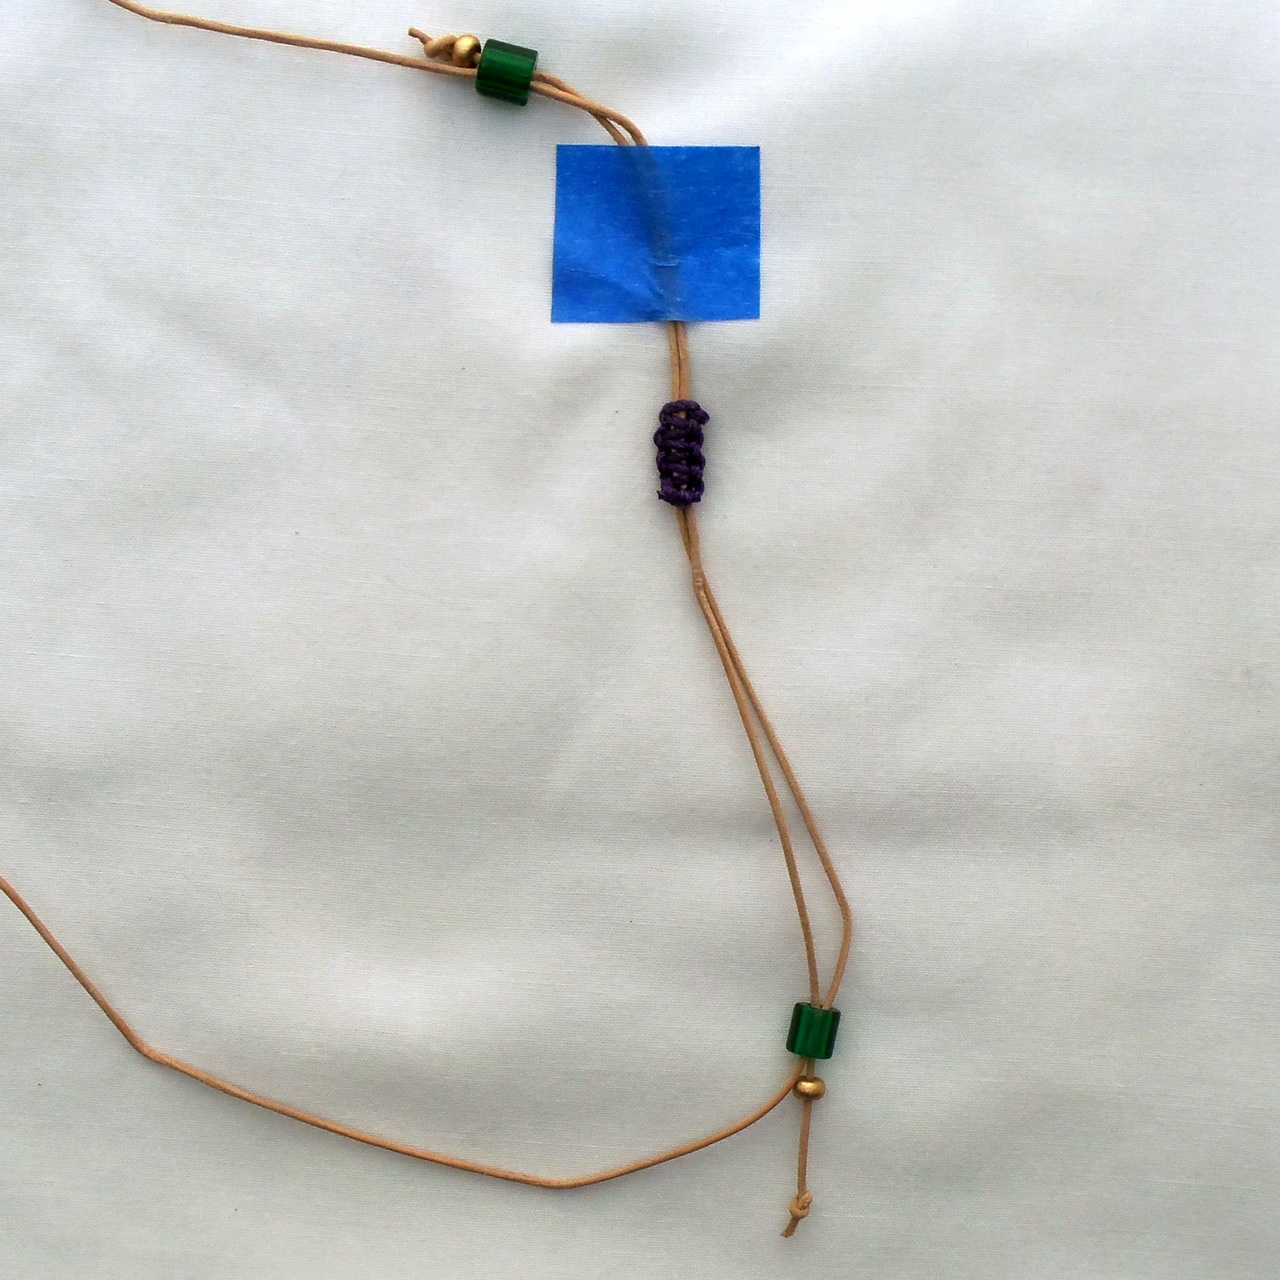
Finished work
Here is my finished macramé, using the Super-Lon cord I actually used for this necklace.
Close-up of the finished macramé.

The finished necklace adjustment slider, secured with a simple square knot and trimmed.
Close-up of the finished and secured macramé.
The finished necklace, ready to wear!

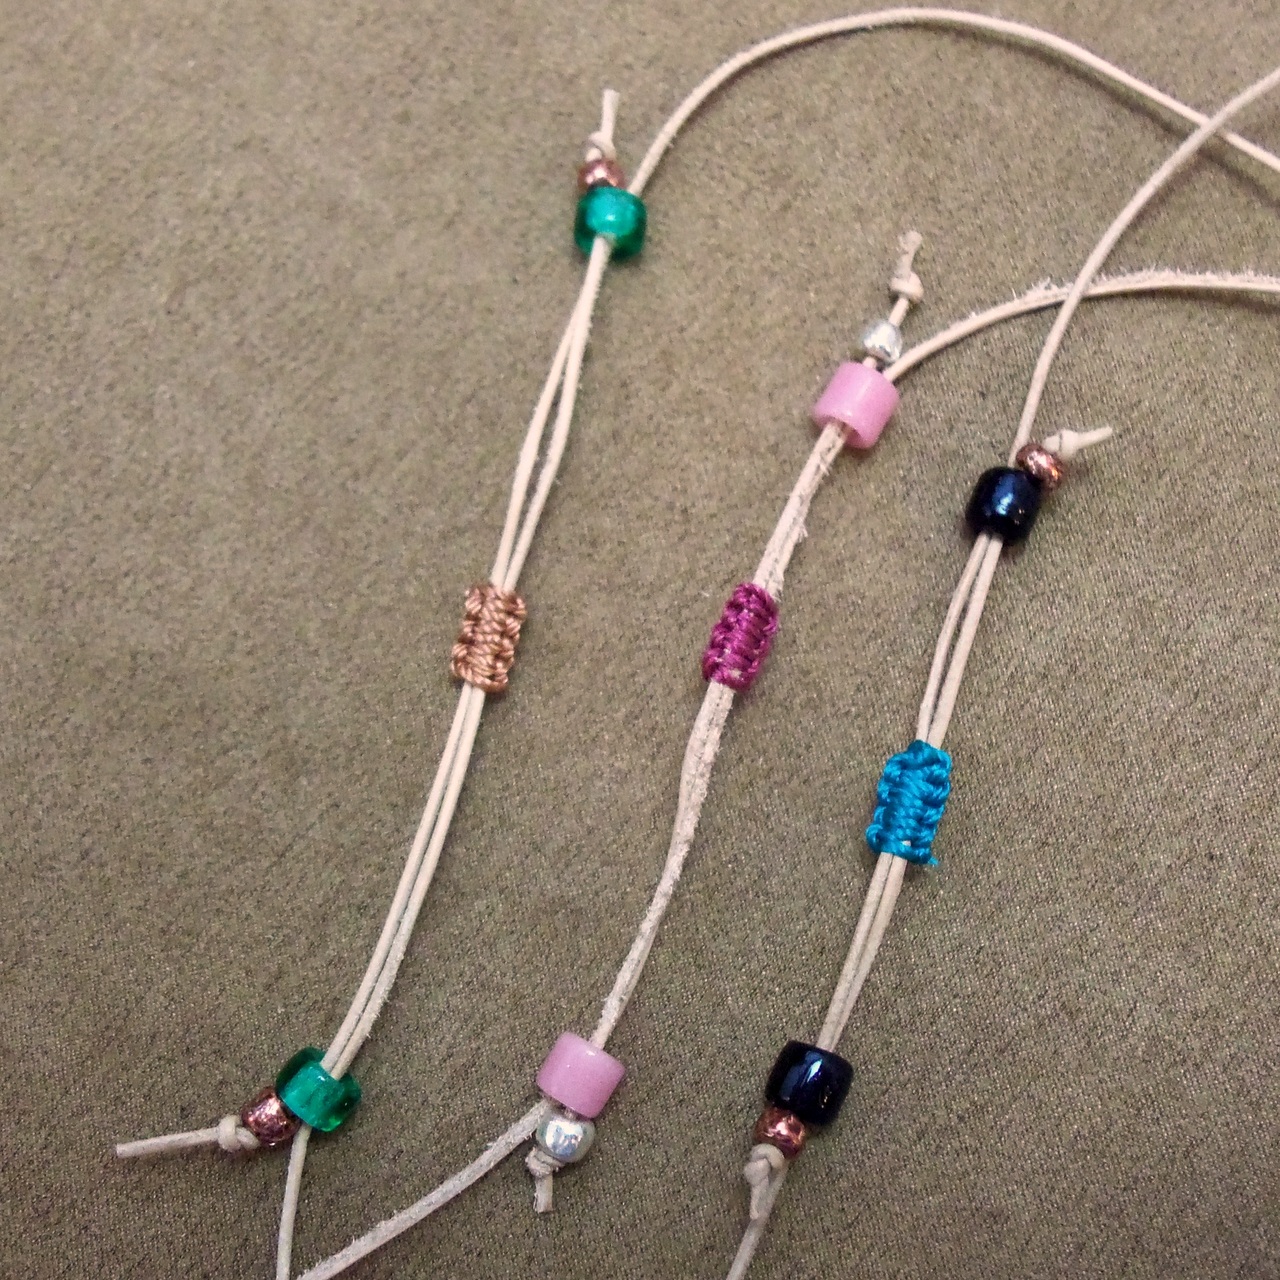
Several more sliders on other necklace projects.
Using the adjustment slider
Pull on the ends, holding the small beads, to make the necklace smaller. You may need to slide the macramé section to center it. Make sure to slide the guide beads down to the knots when you’re done adjusting.
Pull on the main necklace cord to make the necklace longer.
Useful Resources
- Notes on Macramé: See “How to tie a square knot” at the bottom of the page. Shows a lovely illustration of a square knot.
- Basic Macramé Knots
- Simple Square Knot