Introduction
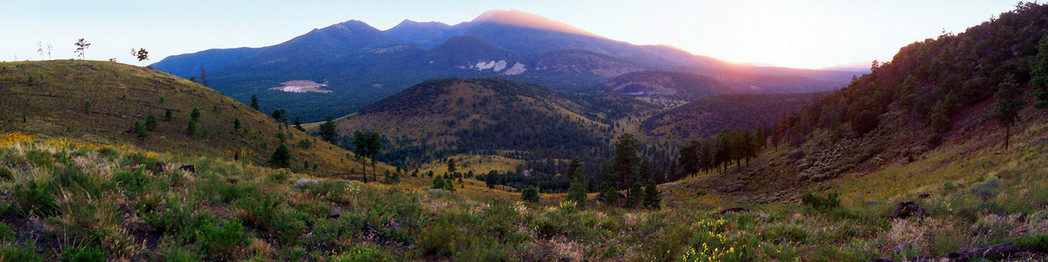
 This is the first in a series of crocheted baskets inspired by Navajo rug designs and colors. The texture of the Red Heart Super Saver aran weight yarn I’d purchased for a different crocheted basket project reminded me a bit of the texture of the Navajos’ woven wool rugs. I realized when I finished the first brightly colored “Bodega Basket” that I really wanted baskets that match my earthy, Southwestern-tinged décor (which prominently features a Navajo storm pattern rug).
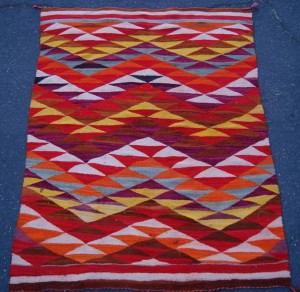
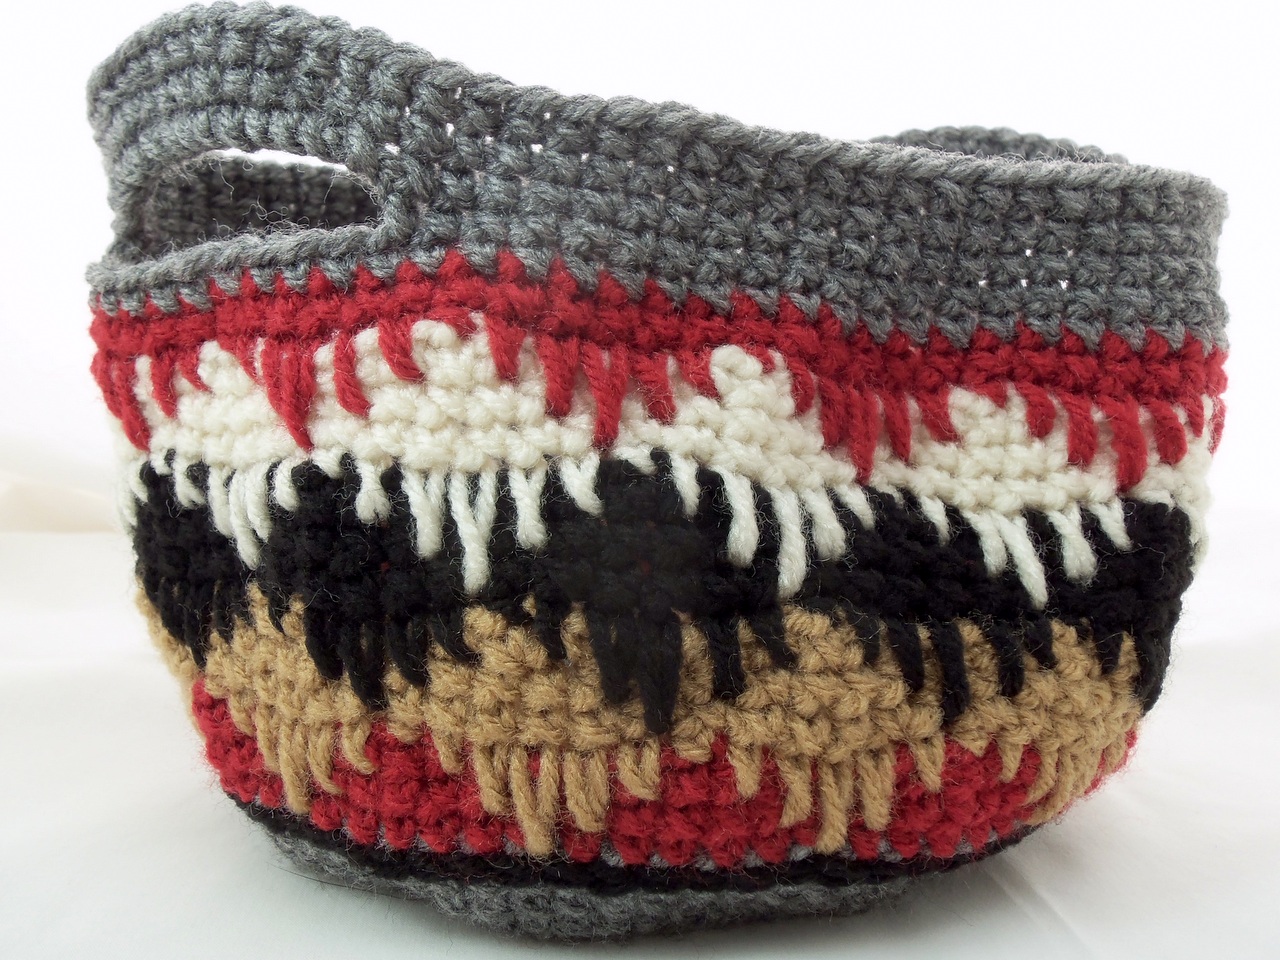
This basket was inspired by “eye dazzler” designs, which are generally very “busy” in a controlled manner, featuring dense zigzag lines, triangles/diamonds, and jagged outlines. The rug shown above was one of several I looked at for inspiration for this design. There are other several eye dazzler rugs pinned on my Pinterest Navajo Rugs board.
If you enjoy this pattern, please consider a small donation through Paypal.
Materials and Techniques
This project uses Red Heart Super Saver Economy yarn, which is a heavy worsted, aran weight acrylic yarn. It has a nice “wooly” feel to it, is easy to work with, and results in a fairly clean design. These colors were chosen because they are close to the core traditional colors used by most Navajo weavers. There are alternative recommendations listed at the end of this tutorial.
- A: Grey Heather (0400)
- B: Ranch Red (0332)
- C: Warm Brown (0336)
- D: Black (0312)
- E: Aran (0313)
- 5.0mm crochet hook
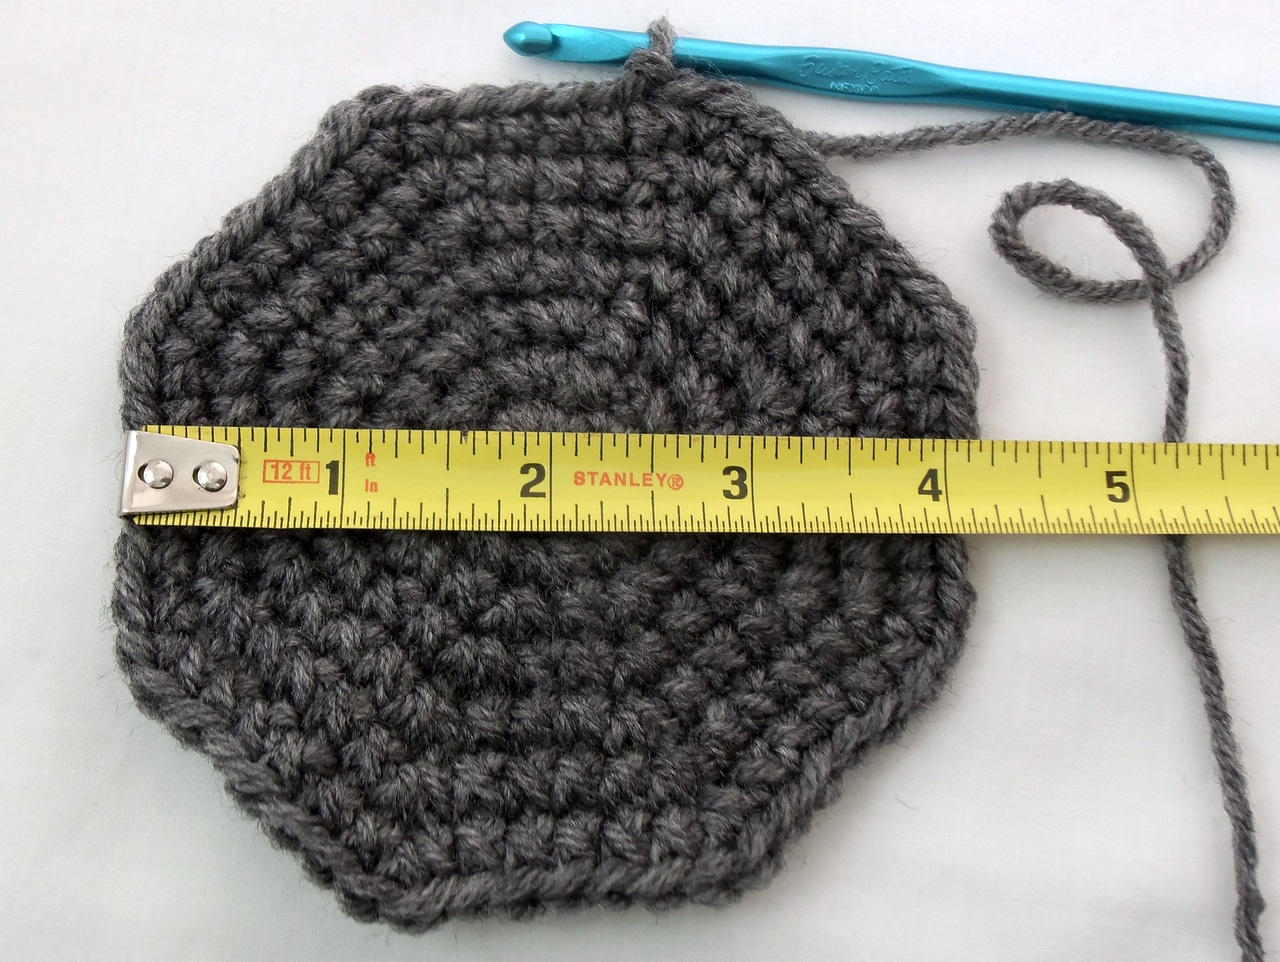
(or as needed to obtain gauge of a 4″ diameter for a seven row circle of single crochet)
- Tapestry needle
The stitches and techniques you will use for this project include:
- Single crochet stitch
- Spike stitch
- Surface crochet
- Crochet in the round
This pattern uses U.S. crochet terminology.
Gauge and Size
A circle of seven single crochet rows should be about 4″, but the gauge is not critical. Tighter stitches will make your basket sturdier. When I stitch tightly, my seven row circle is generally around 3.5″ to 3.75″.
This pattern will yield a basket between 6″ and 7″ in diameter. Later in this post I will discuss making larger (or smaller!) baskets from this pattern.
Pattern
Rows 1 – 7
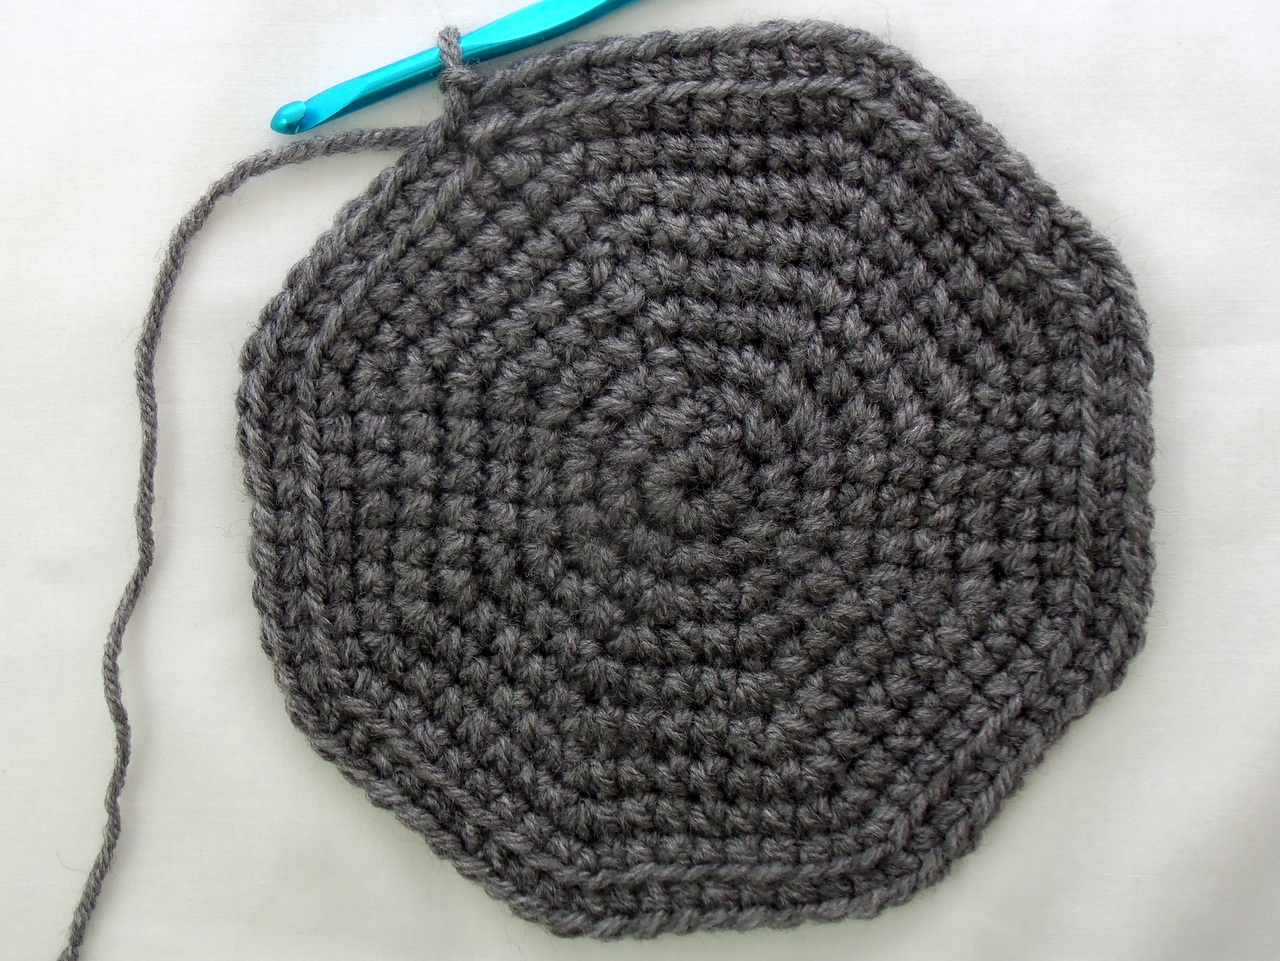
Row 1: With color A (Grey Heather) make a magic circle. Chain one and stitch eight single crochet into the magic circle, and join to the first stitch.

Rows 2 – 7: Crochet in the round, increasing each row by eight stitches:
- Row 2: 2 single crochets in each stitch (16 stitches)
- Row 3:2 single crochets in every other stitch, i.e., SC 1, SC 2 in same stitch, repeat to end (24 stitches)
- Row 4: 2 single crochets in every third stitch (32 stitches)
- Row 5: 2 single crochets in every fourth stitch (40 stitches)
- Row 6: 2 single crochets in every fifth stitch (48 stitches)
- Row 7: 2 single crochets in every sixth stitch (56 stitches)
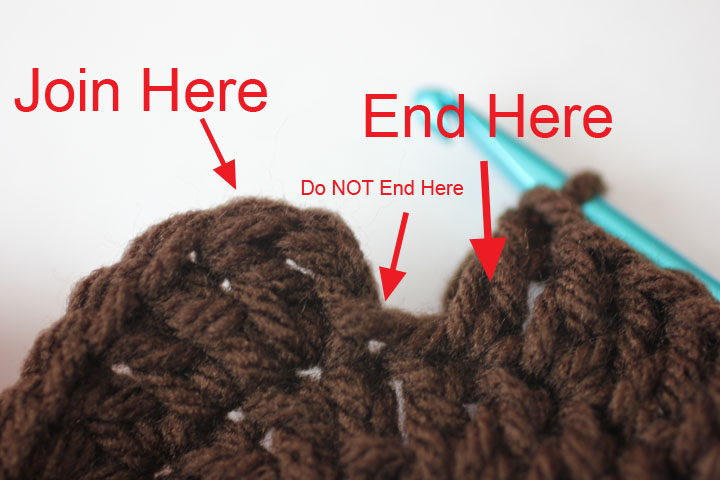 A note on joining and starting a new row: I find the technique of chain one, single crochet into the joining stitch, skip the last stitch, and join to the first stitch (not the chain) makes a much smoother seam. Repeat Crafter Me has a nice photo of this technique.
When you finish the seventh row, check the gauge.
Rows 8 – 9
Continue crocheting in the round, increasing each row by eight stitches.
- Row 8: 2 single crochets in every seventh stitch (64 stitches)
- Row 9: 2 single crochets in every eighth stitch (72 stitches)
If you haven’t been counting your stitches, count them carefully now to make sure you have 72 stitches. The pattern is not very forgiving of missed or extra stitches. If necessary, increase or reduce over the next couple rows to get the right number.
Row 10
Working in the back loop, put one single crochet in each stitch. This row starts the basket wall, so no more stitch increases. Working in the back loop helps “fold” the fabric upwards and makes a nice raised line.
Rows 11 – 13
Work three more rows of single crochet. We’re getting ready to do a yarn color change, but first let me show you how I handle color changes for this project.
Color Change
I hate knots. This is my method of performing a color change.
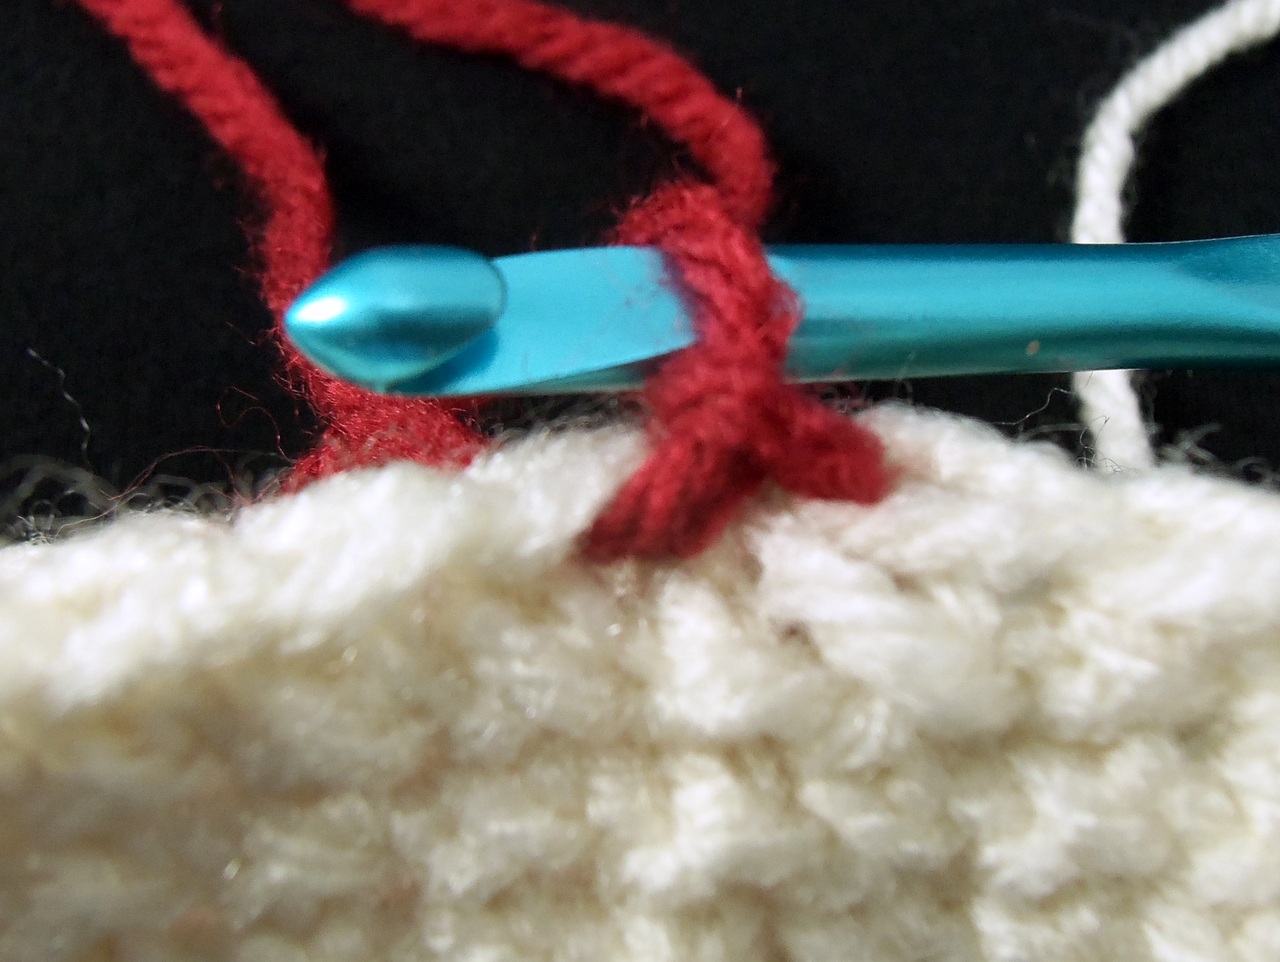
While working the last stitch in the row, drop the yarn when there are still two loops on the hook. Hook the new color.
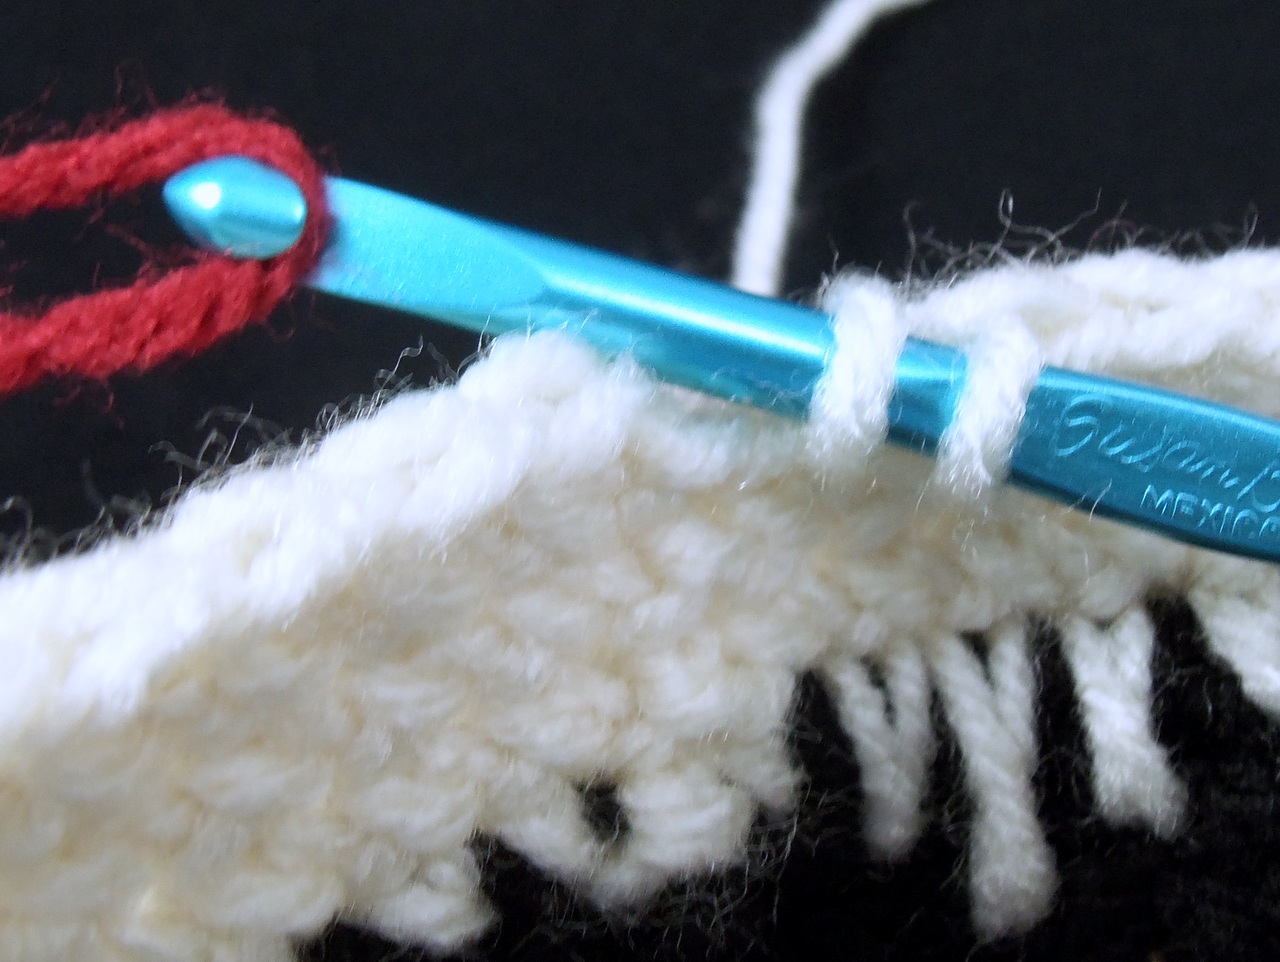
Pull the new color through the loops to finish the stitch.
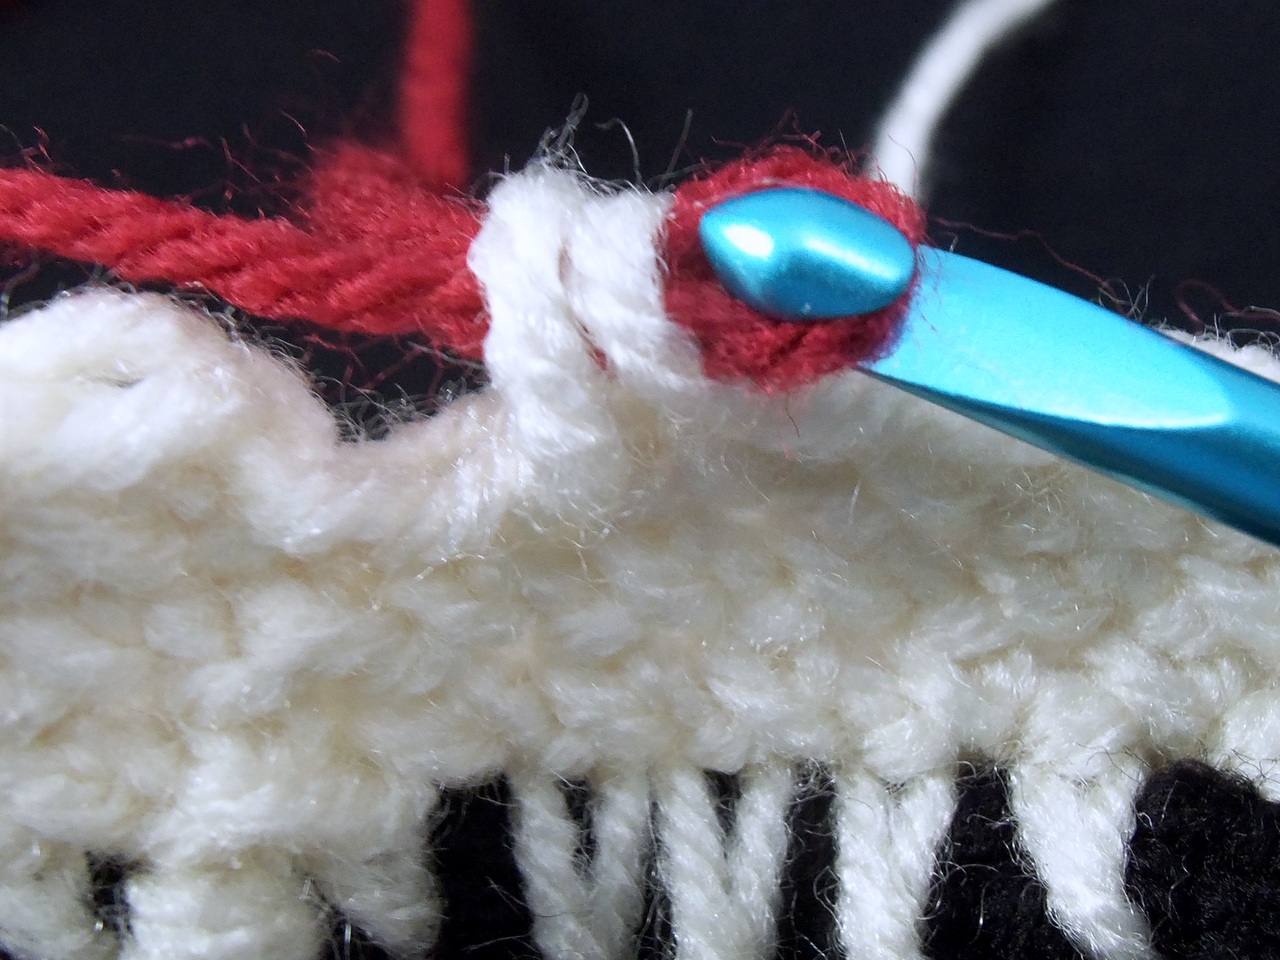
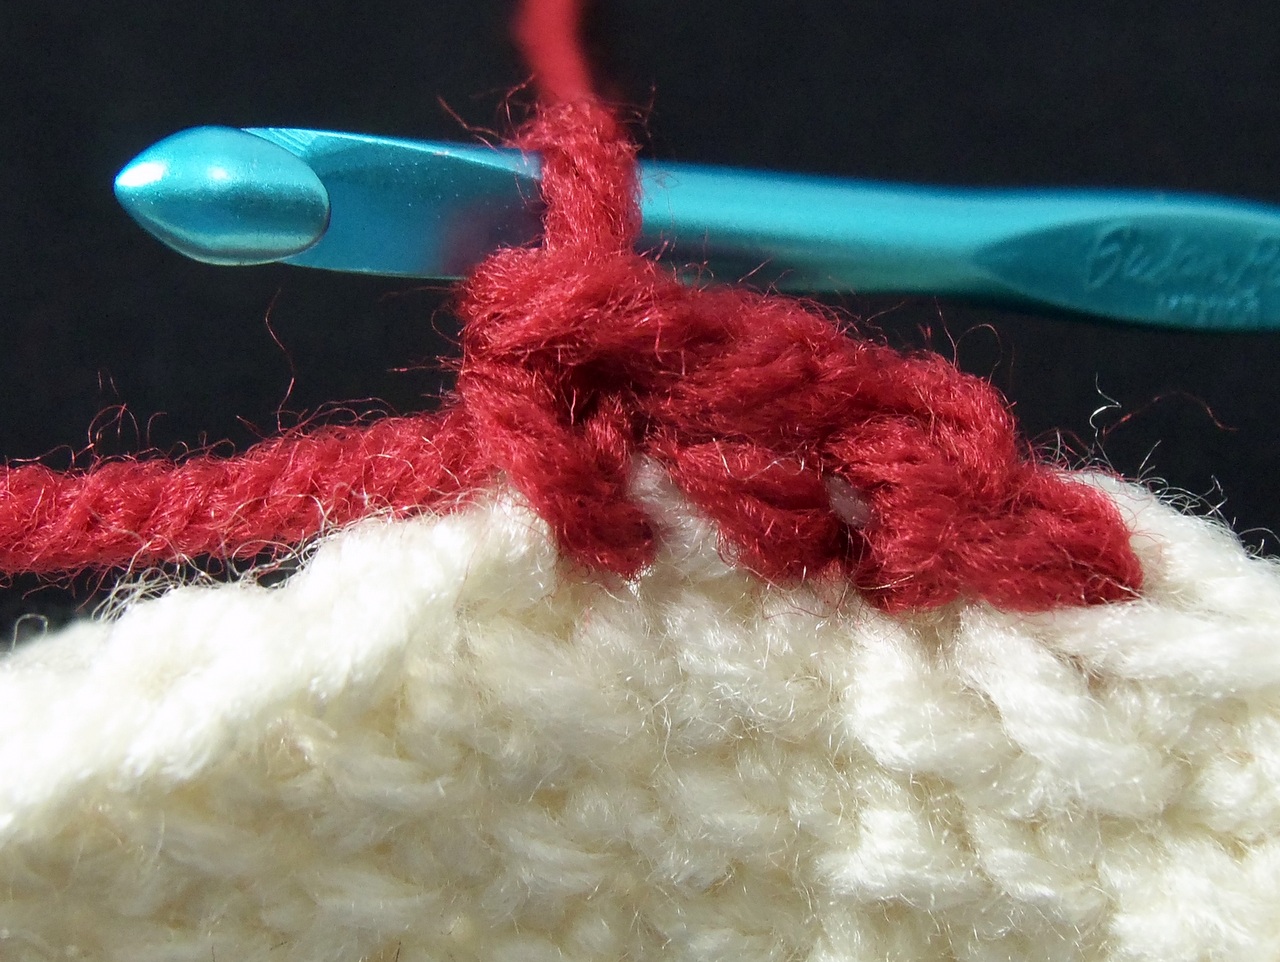
Continue, joining to the first stitch of the row.
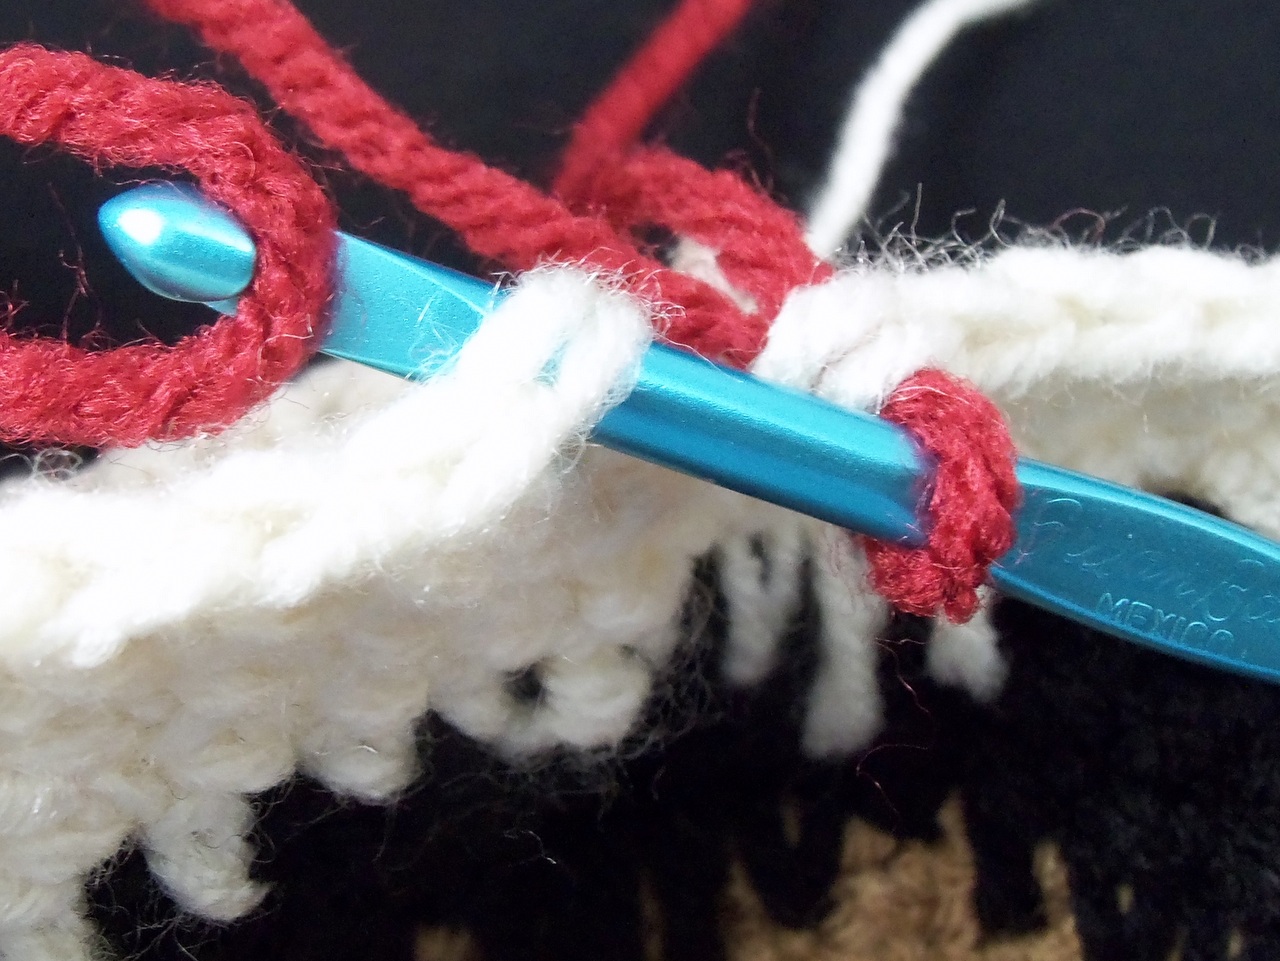
Chain one and continue stitching with the new color.
Rows 14 – 16
End (tie off) color A and join color B using the method shown above or your favorite method. In color B (Ranch Red) work three rows of single crochet.
End (tie off) color B and join color C (Warm Brown) using your favorite method.
Row 17: The Spike Stitch
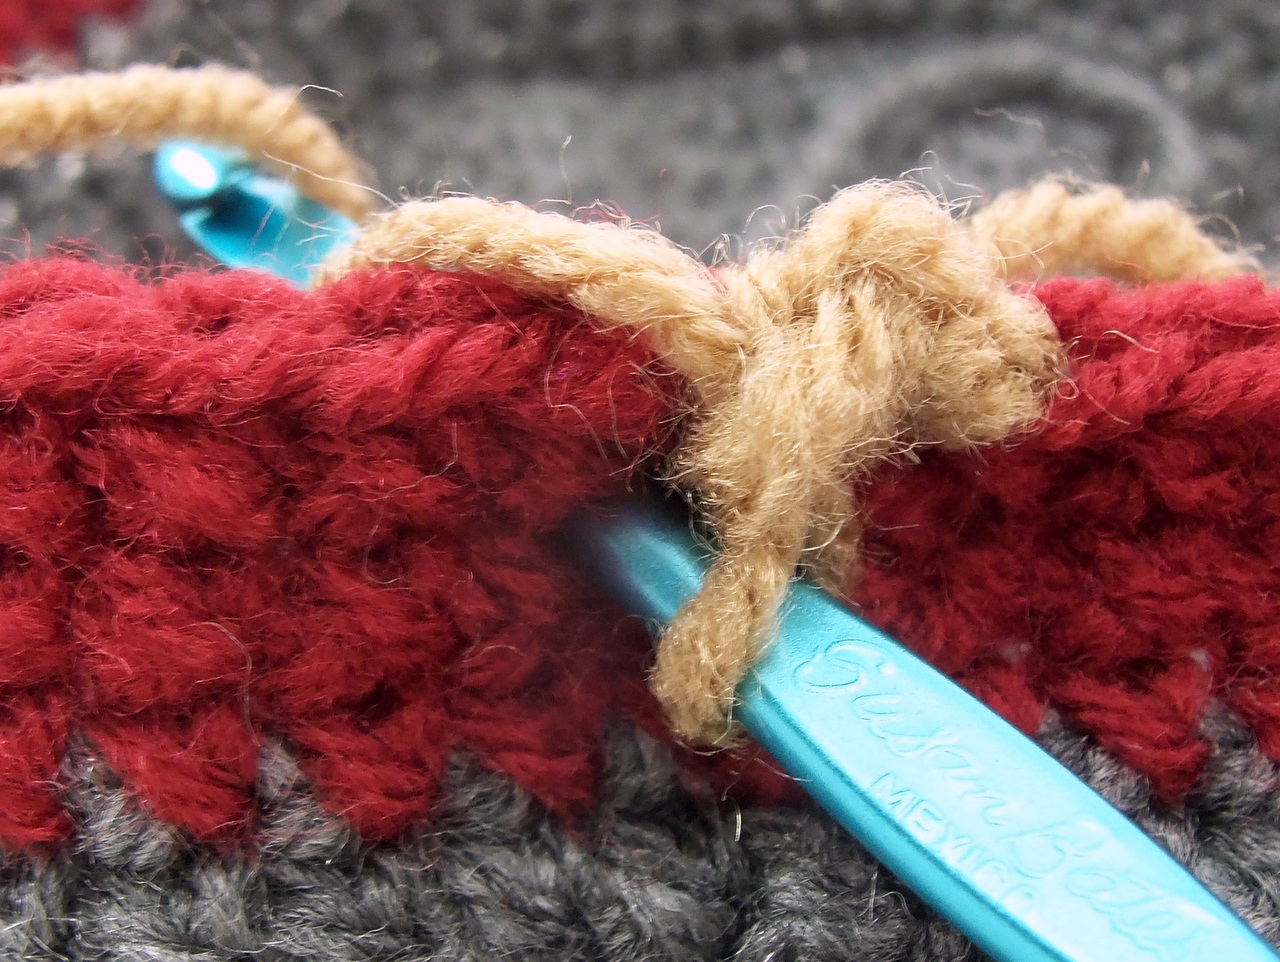
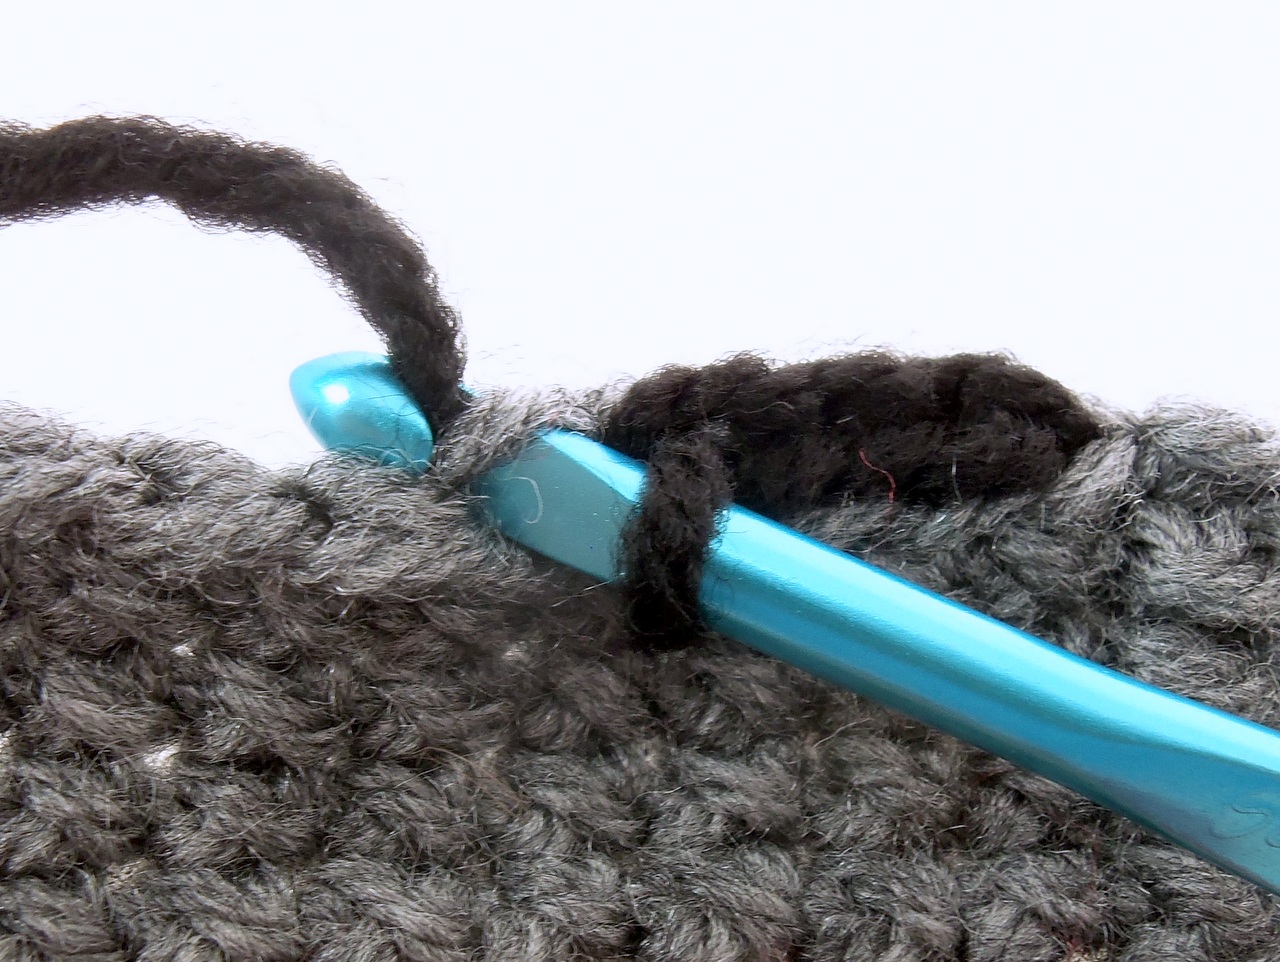
The spike stitch is a single crochet that works through previous rows instead of the loops of the last row. For this pattern, after joining in color C (Warm Brown), single crochet in the first stitch. In the second stitch, we’ll spike stitch into one row down.
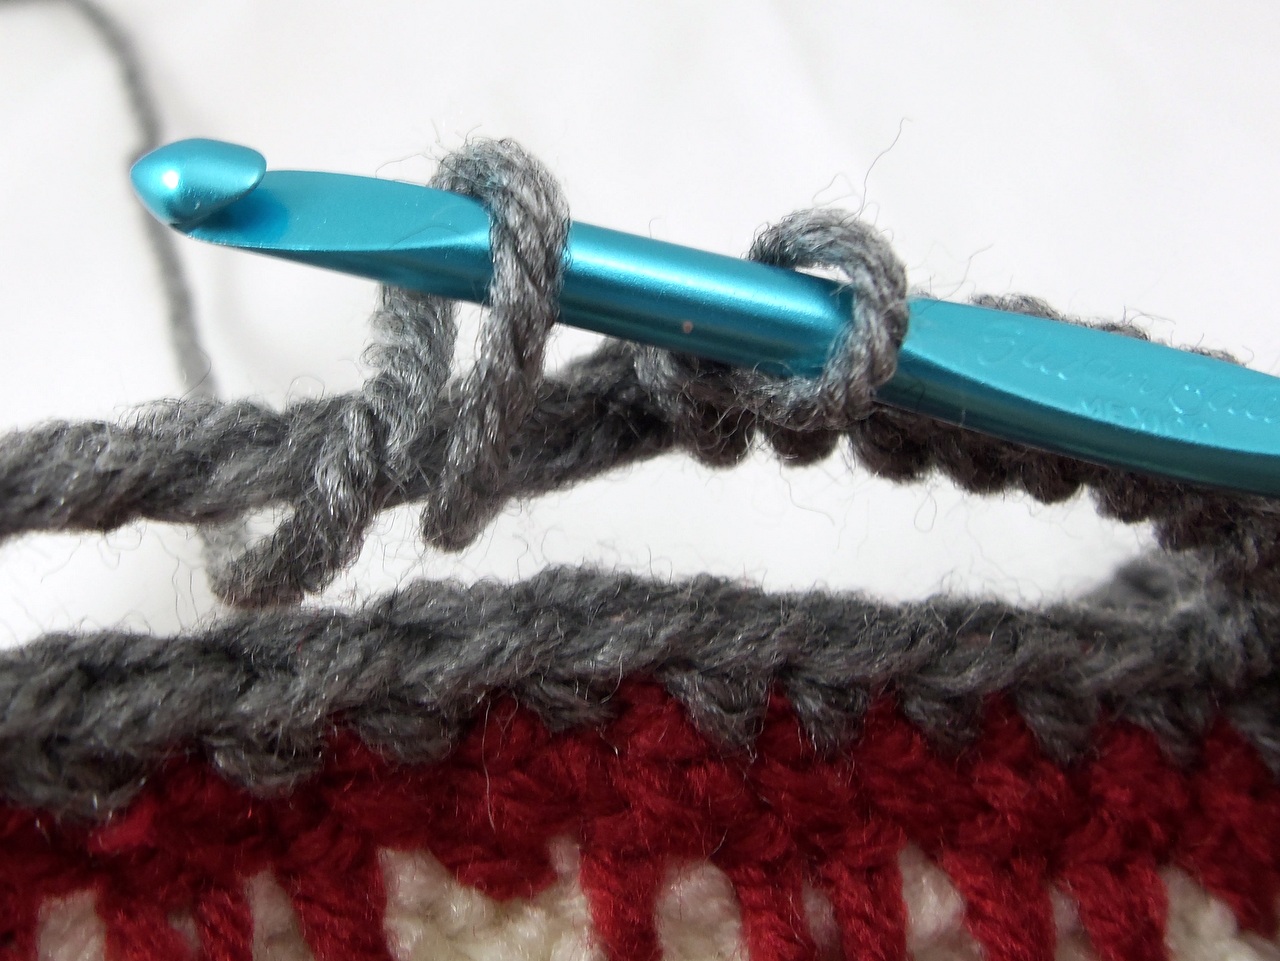
Insert the hook between the last row and the second row down, below the next stitch.
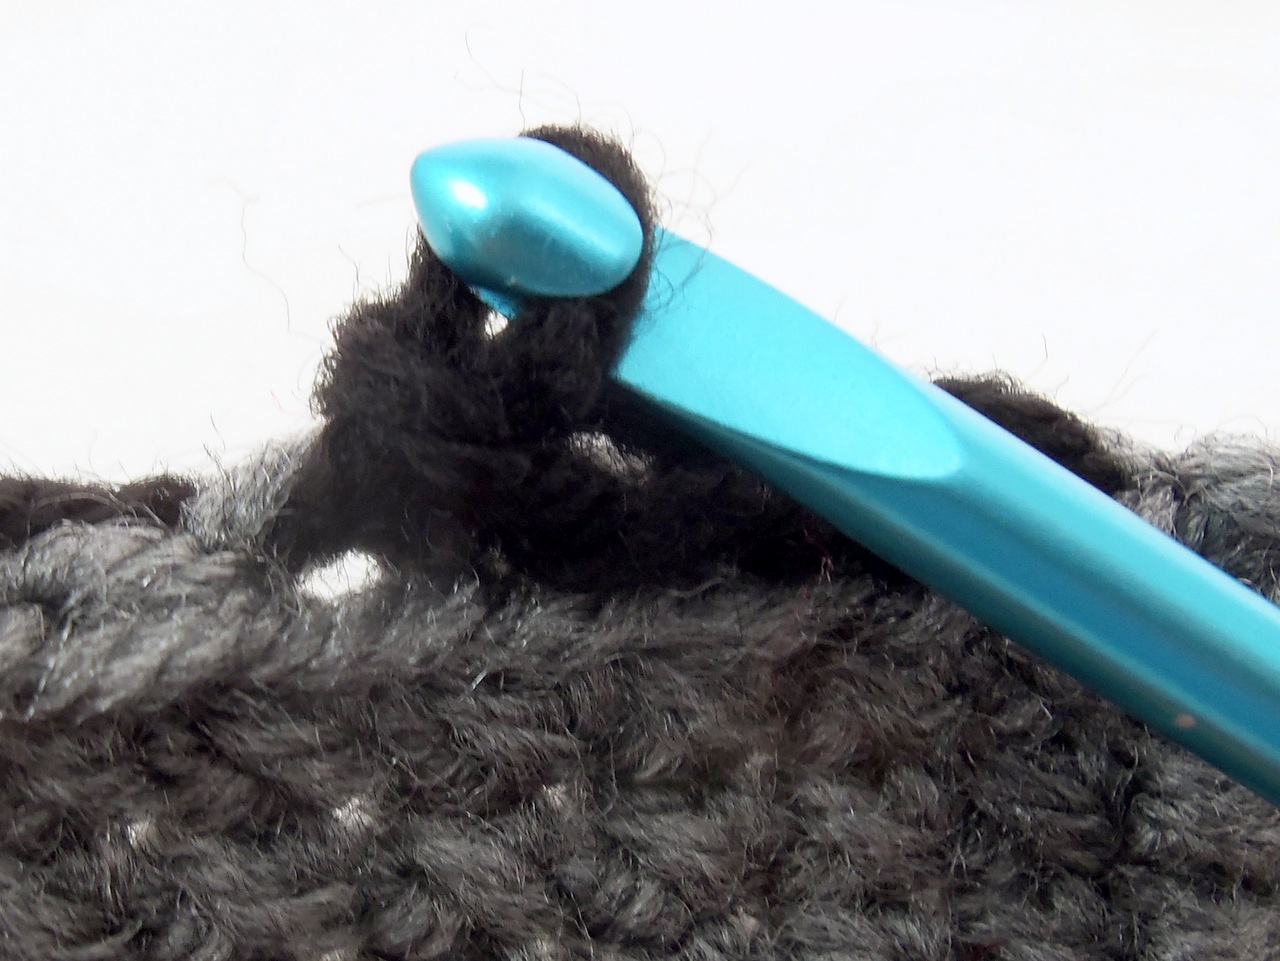
Yarn over.
Pull the yarn through.
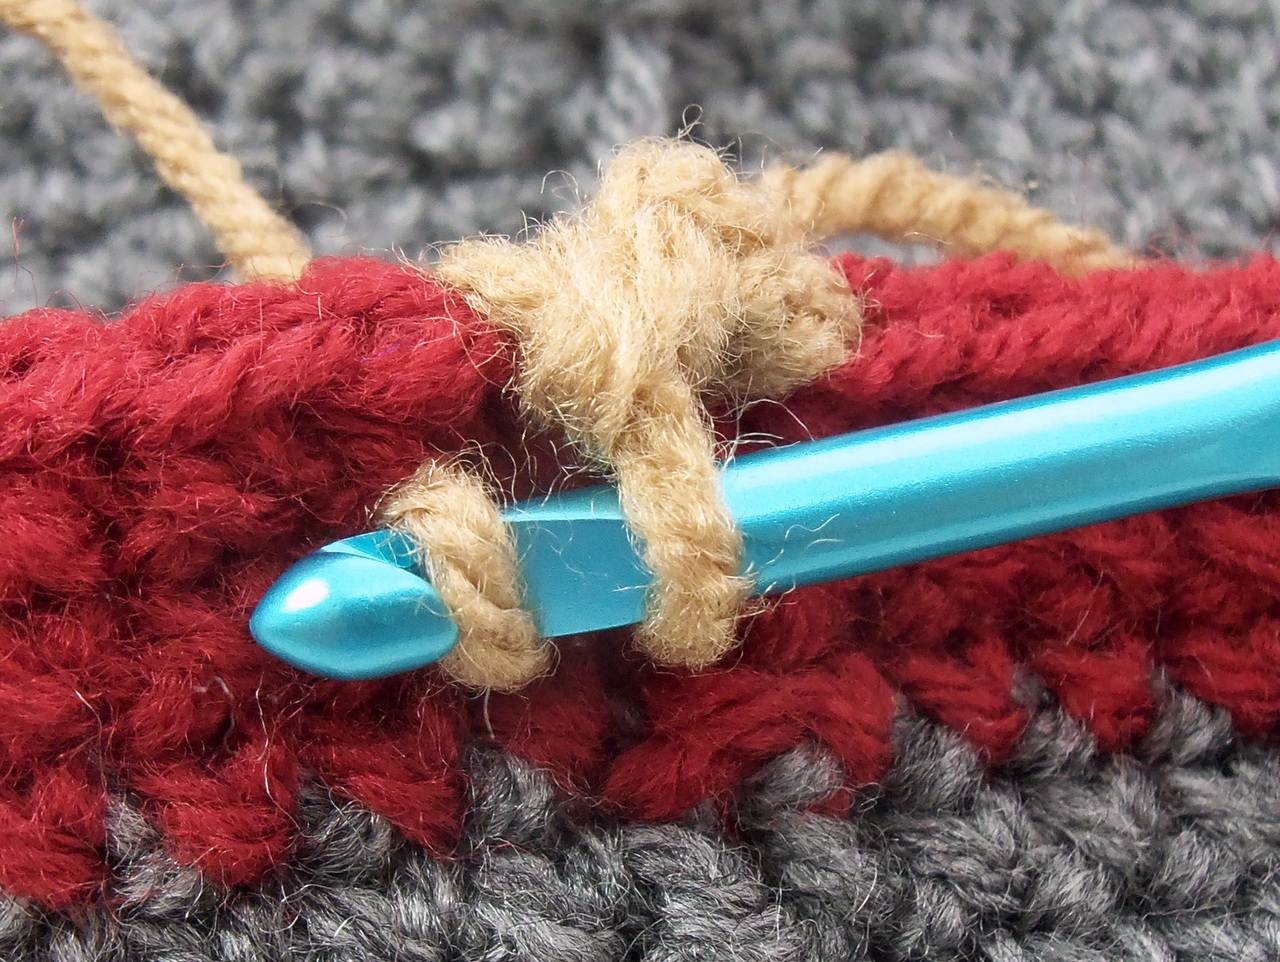
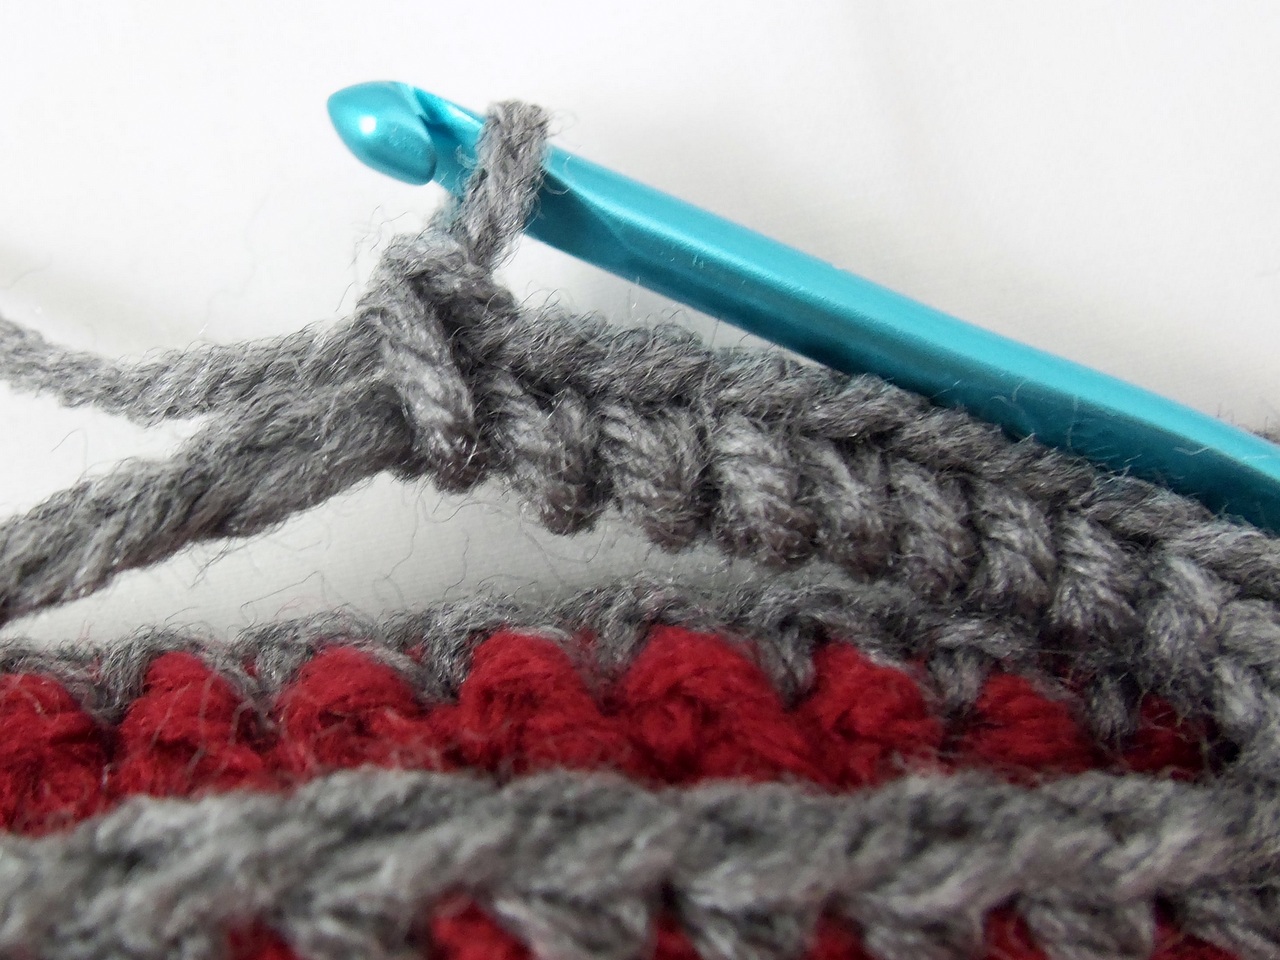
Bring the second loop up level with the first. Be careful not to make it too tight or it will pull the fabric.
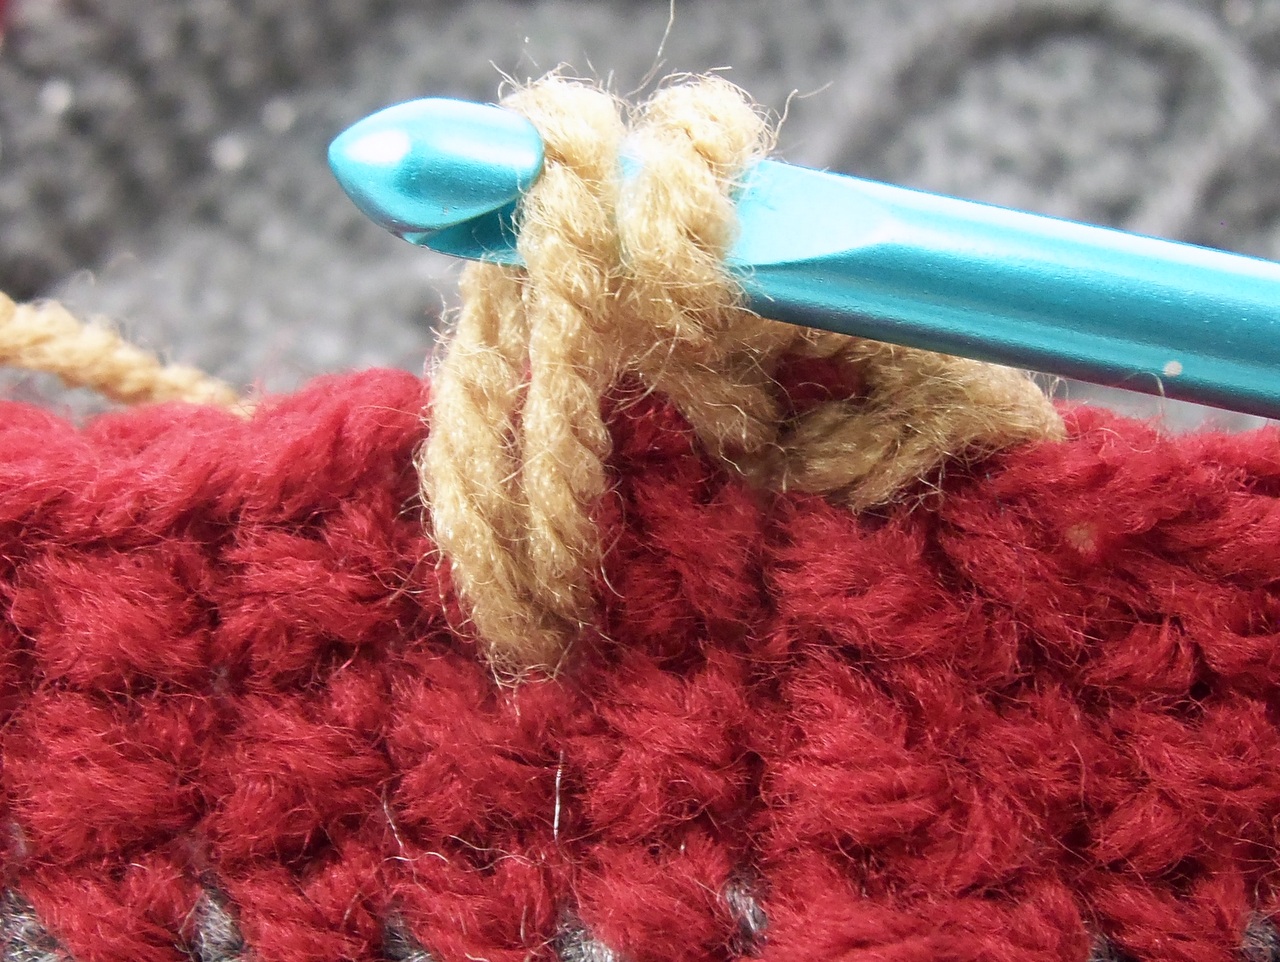
Yarn over and pull through the loops, just like a normal single crochet stitch.

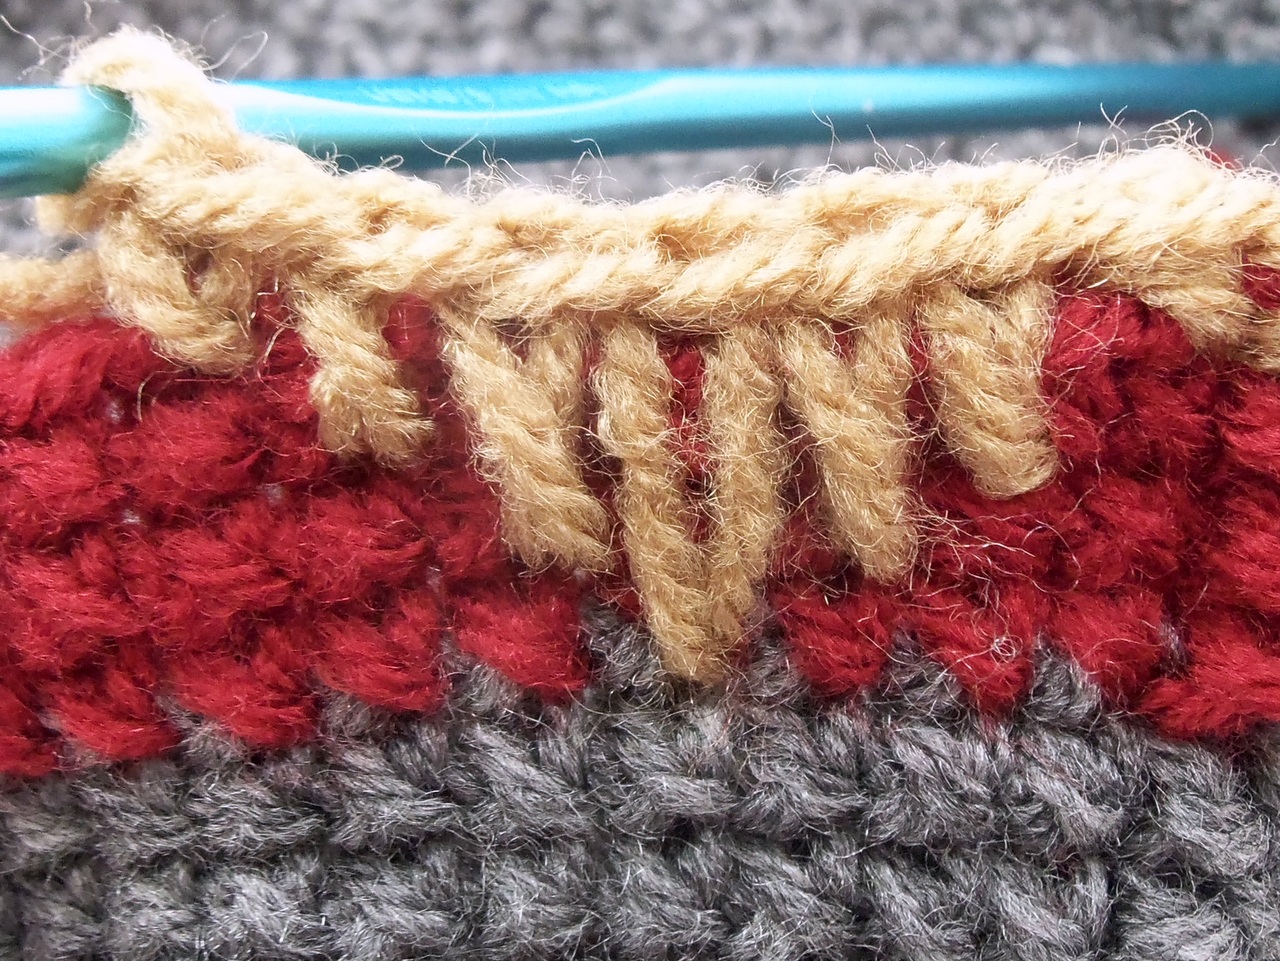
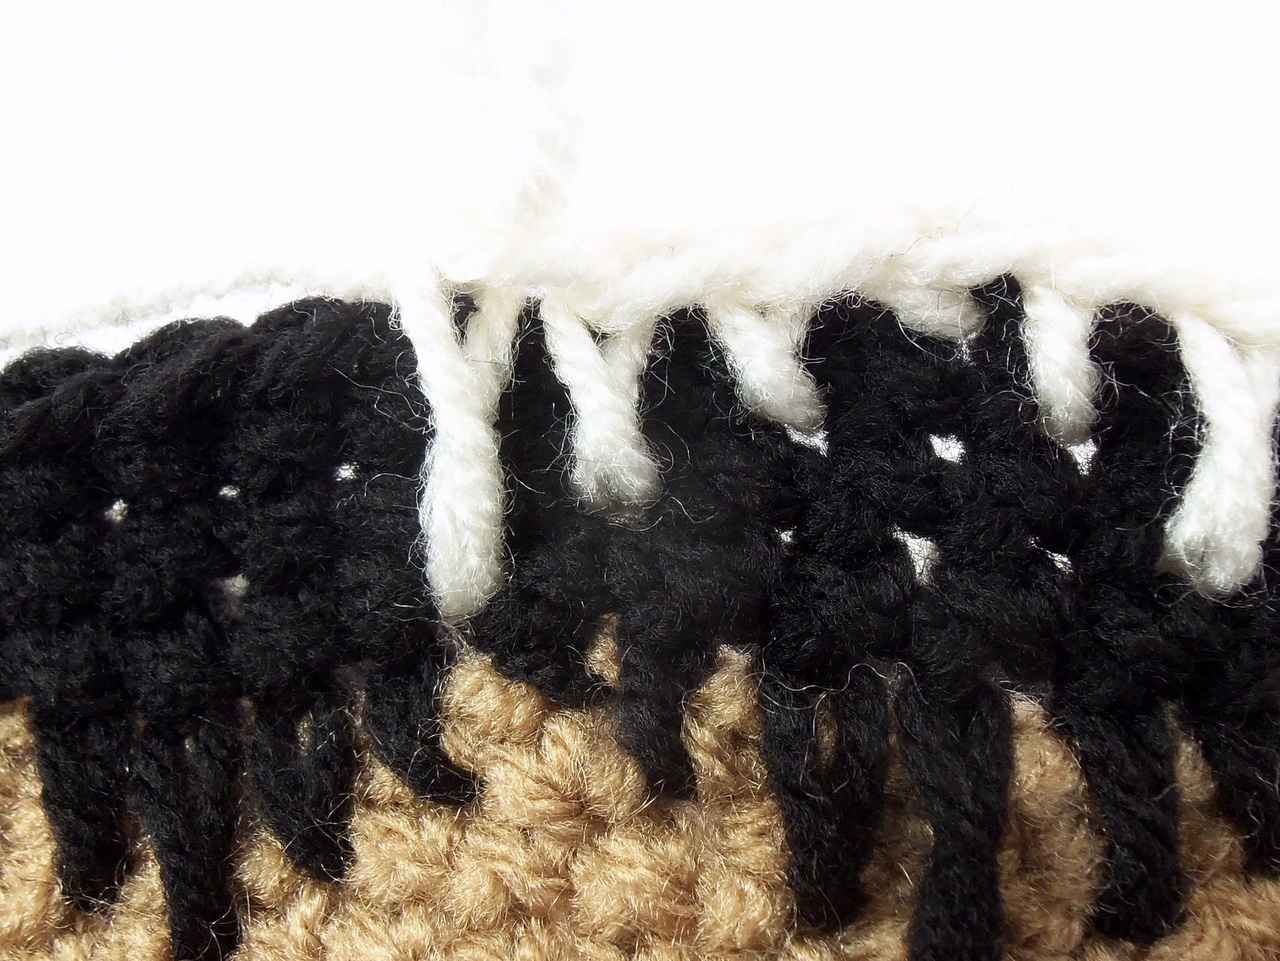
For the next few stitches, finish the down-pointing triangle spike stitch pattern:
- Spike stitch through the second and third rows down.
- Spike stitch through the third and fourth rows down (between the Ranch Red and Grey Heather).
- Spike stitch through the second and third rows down.
- Spike stitch through the last and second row down.
Finally, single crochet into the next stitch to start the next repeat of the pattern.
Continue around, repeating the single crochet, spike stitch one row, spike stitch two rows, spike stitch three rows, spike stitch two rows, spike stitch one row pattern for a total of twelve repeats of the pattern.
Tip: Tightening Spike Stitches
The challenge with the spike stitch is to get it tight enough without making it so tight it pulls the fabric and distorts the pattern. Here’s my method.
After pulling the yarn through, hold the hook so it’s in line with both loops, as close to where the loops are as possible.
Pull the yarn from behind, tightening both loops to the desired tension.
Carefully swivel the hook up, keeping it close to the first loop while pulling the second loop up, allowing the yarn to slide freely.

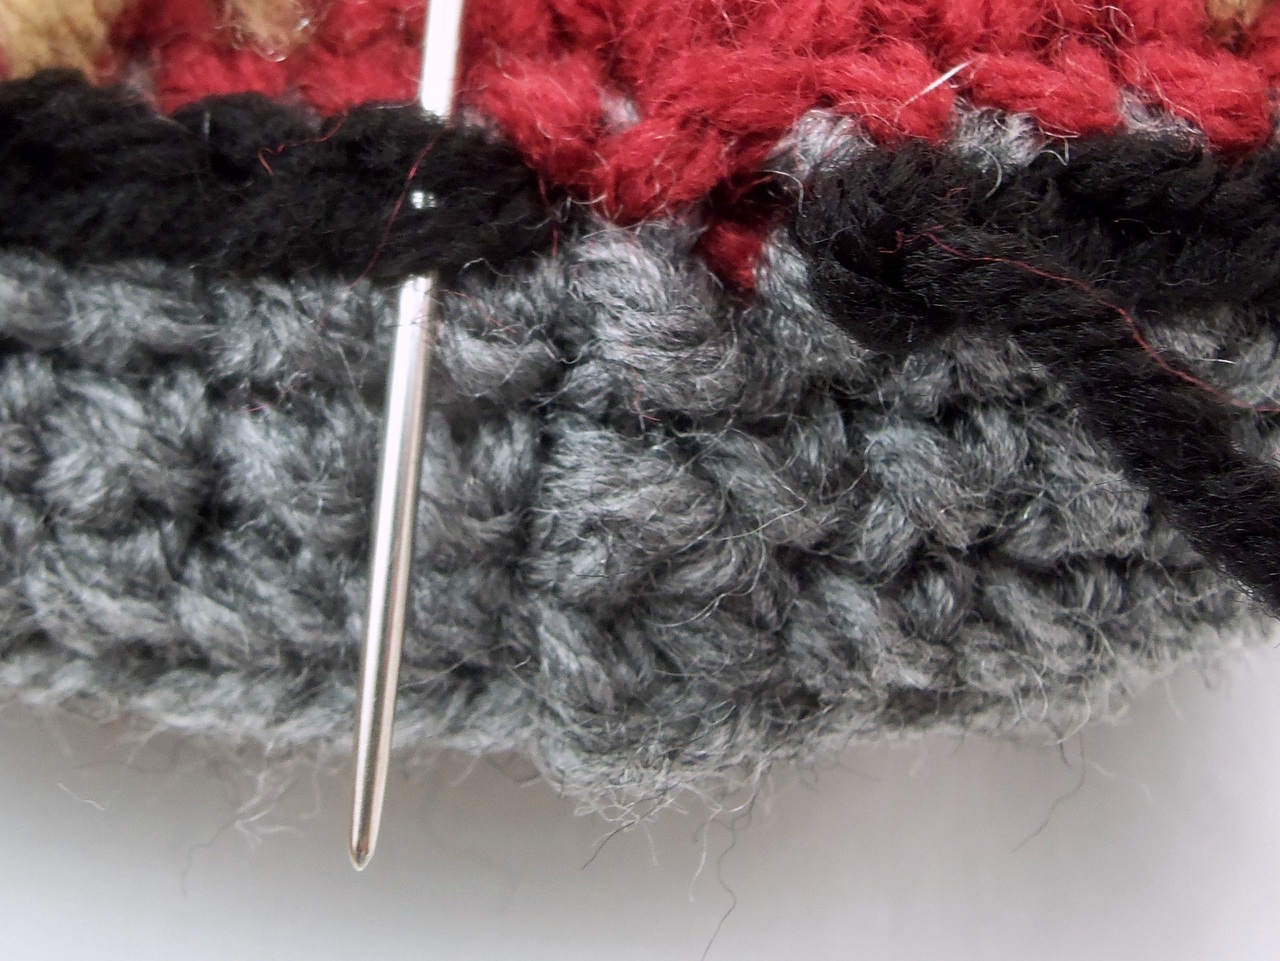
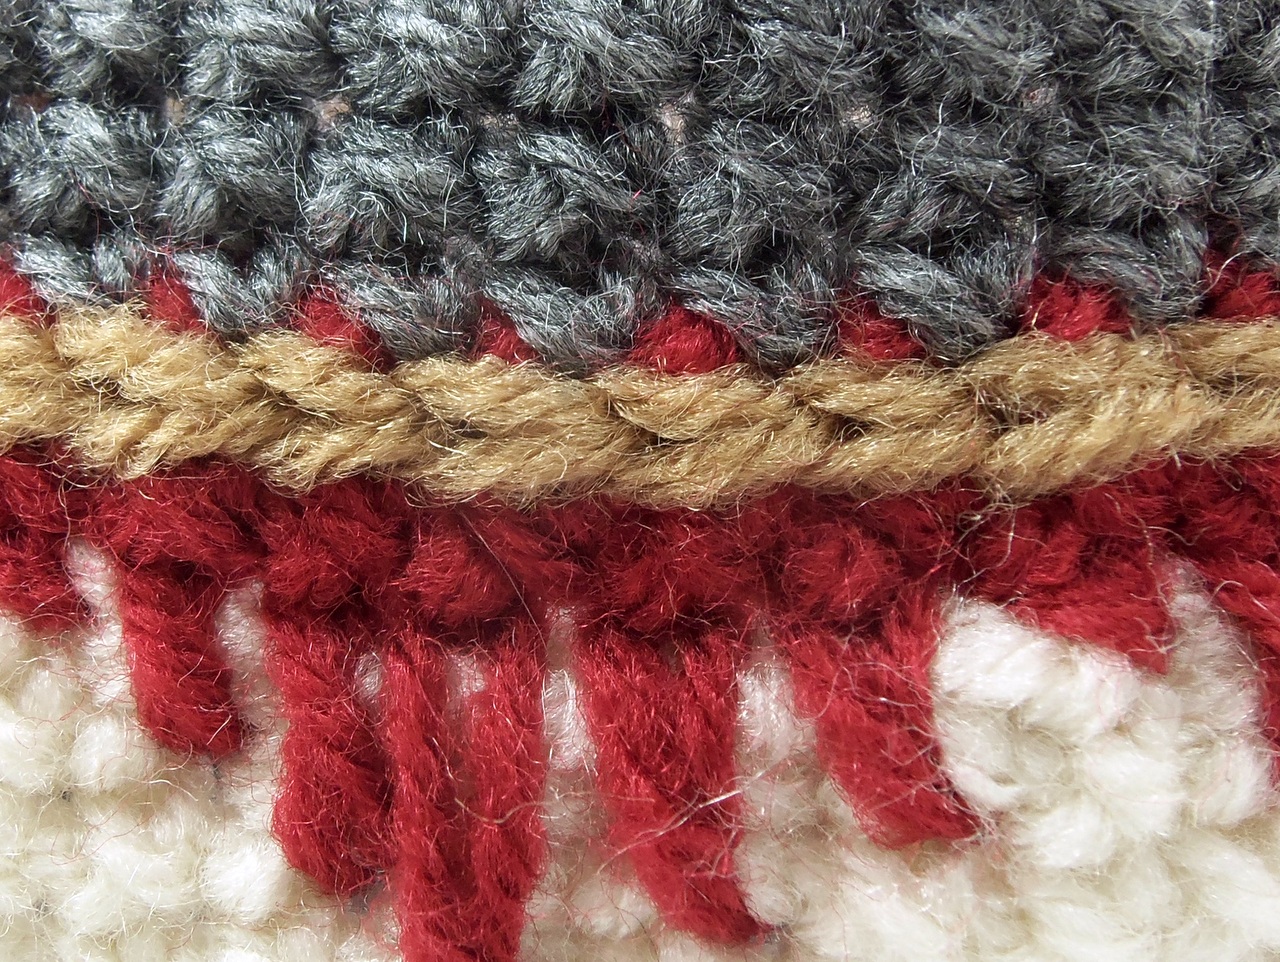
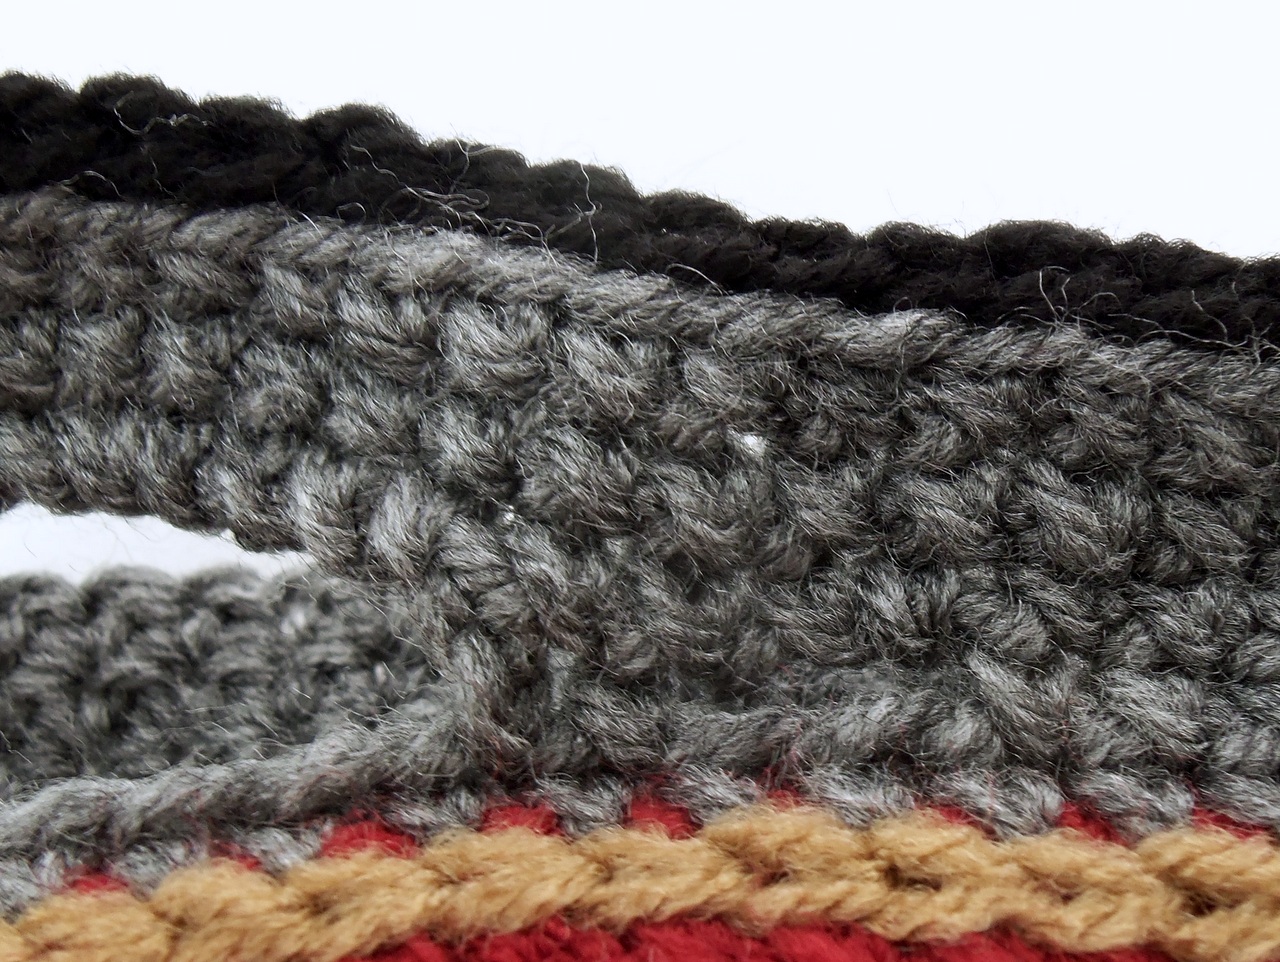
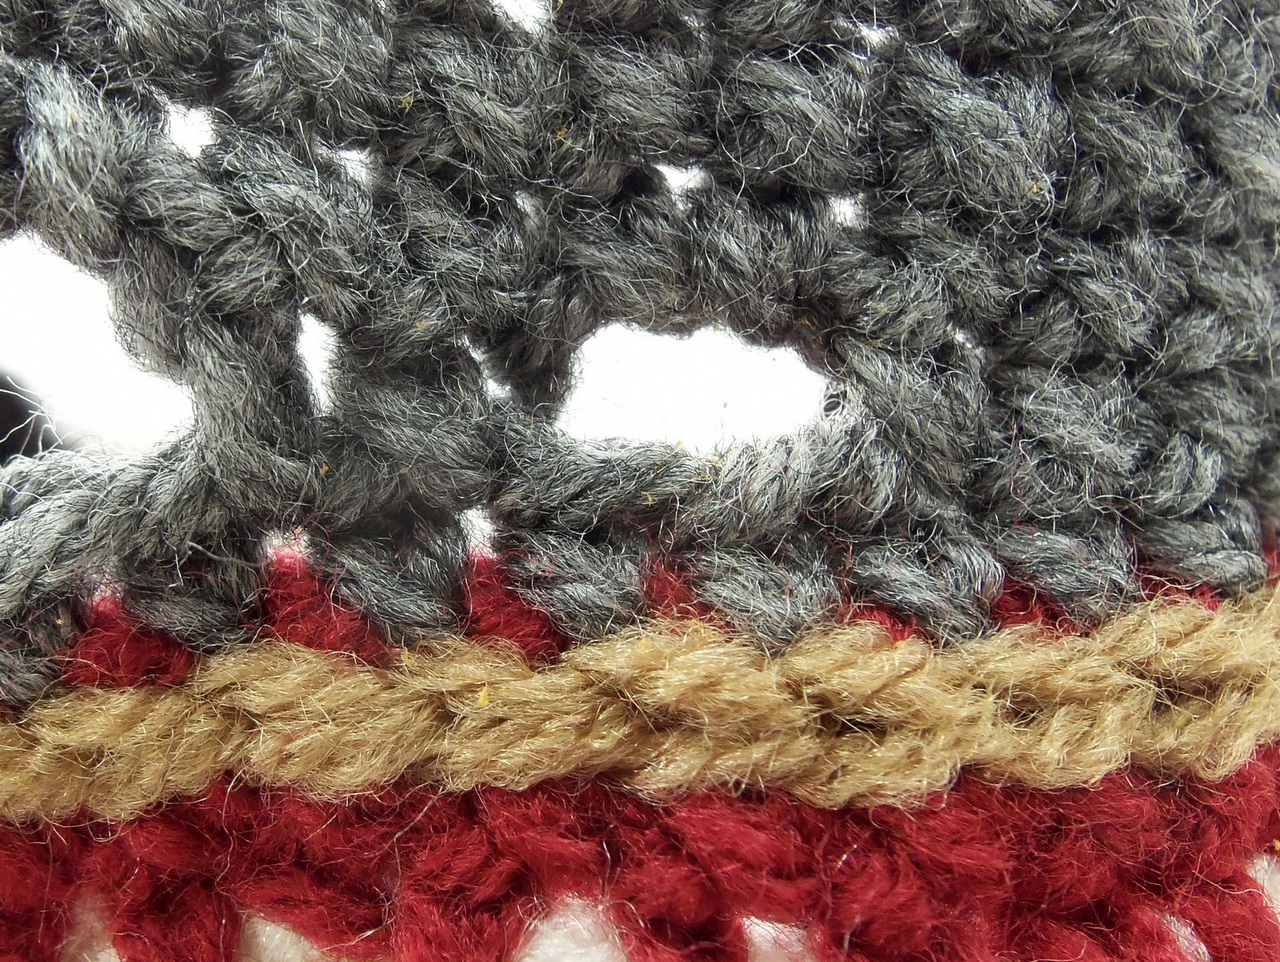
Finish the stitch. Chances are, your spike stitch row may still be somewhat loose. Make up for it by maintaining your normal tension during the subsequent single crochet rows above it, which will help tighten things up and help maintain the straight walls of the basket. In the long run, the spike stitches add thickness, helping make your basket walls sturdier. Later, you can take a tapestry needle and nudge any crossed spike stitches (like seen in the photo below) into place so they’re nice and pointy.
Rows 18 – 20
Do three more rows of single crochet, maintaining your normal tension to tighten things back up if your spike stitch row was a bit loose. Tie off color C (Warm Brown) and join in color D (Black) using your favorite method.
Row 21
Repeat the spike stitch triangle pattern, starting in the middle of the sequence with the spike stitch three rows down:
- Spike stitch through the third and fourth rows down (between the Warm Brown and Ranch Red).
- Spike stitch through the second and third rows down.
- Spike stitch through the last and second row down.
- Single crochet.
- Spike stitch through the last and second row down.
- Spike stitch through the second and third rows down.
- Repeat, for a total of twelve spike stitched triangles.
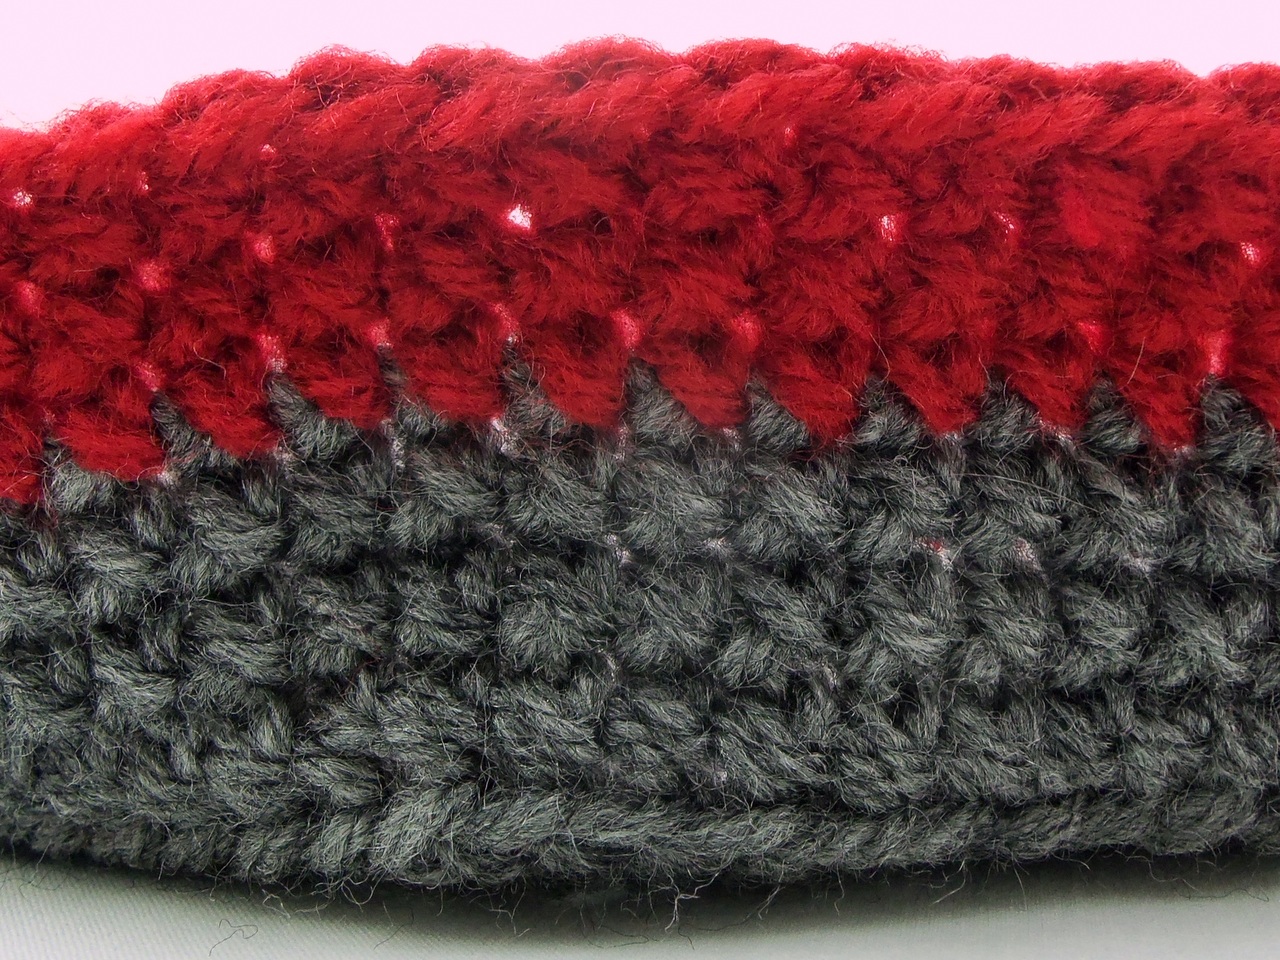
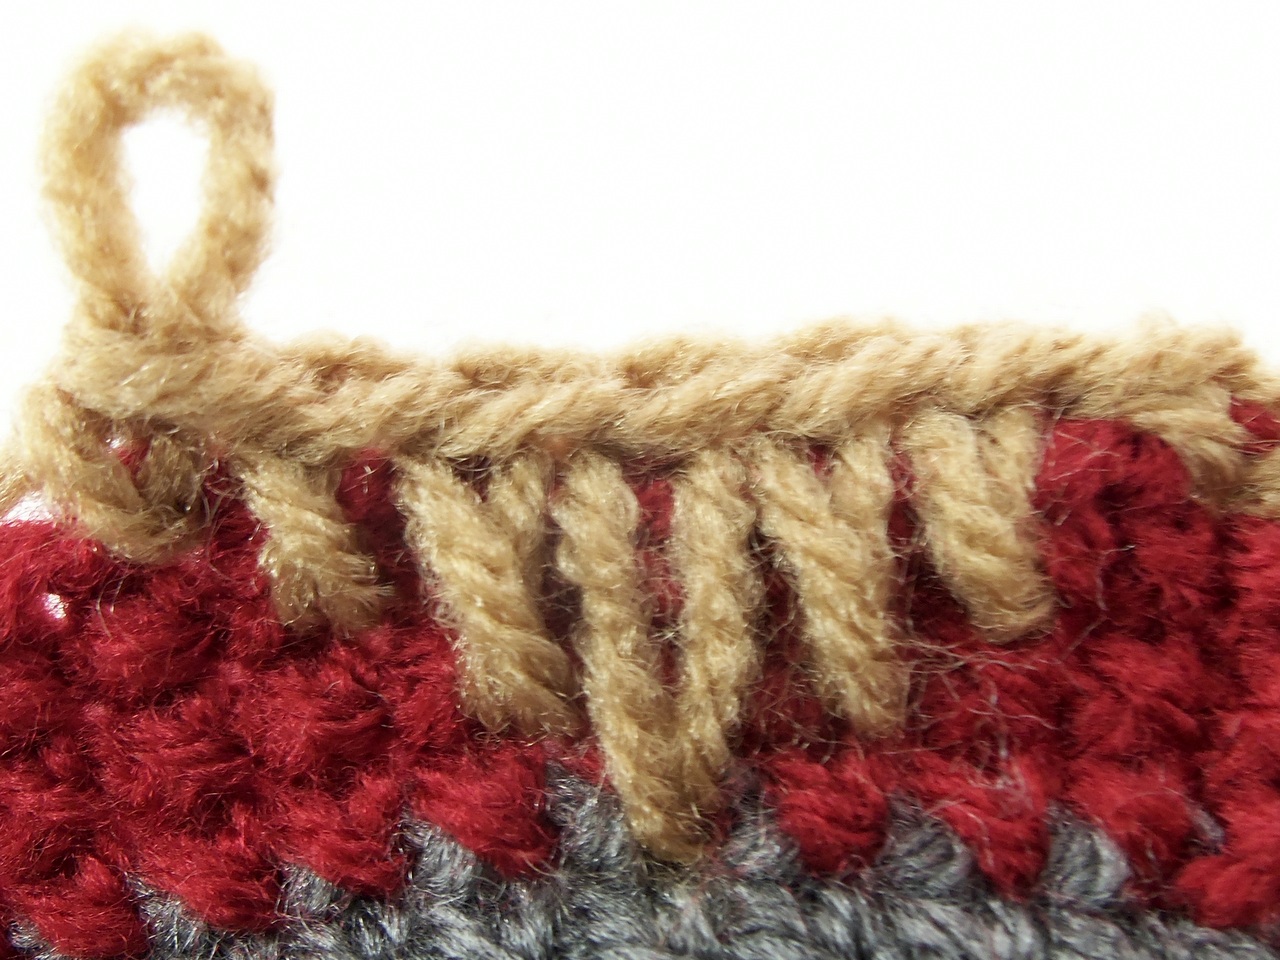
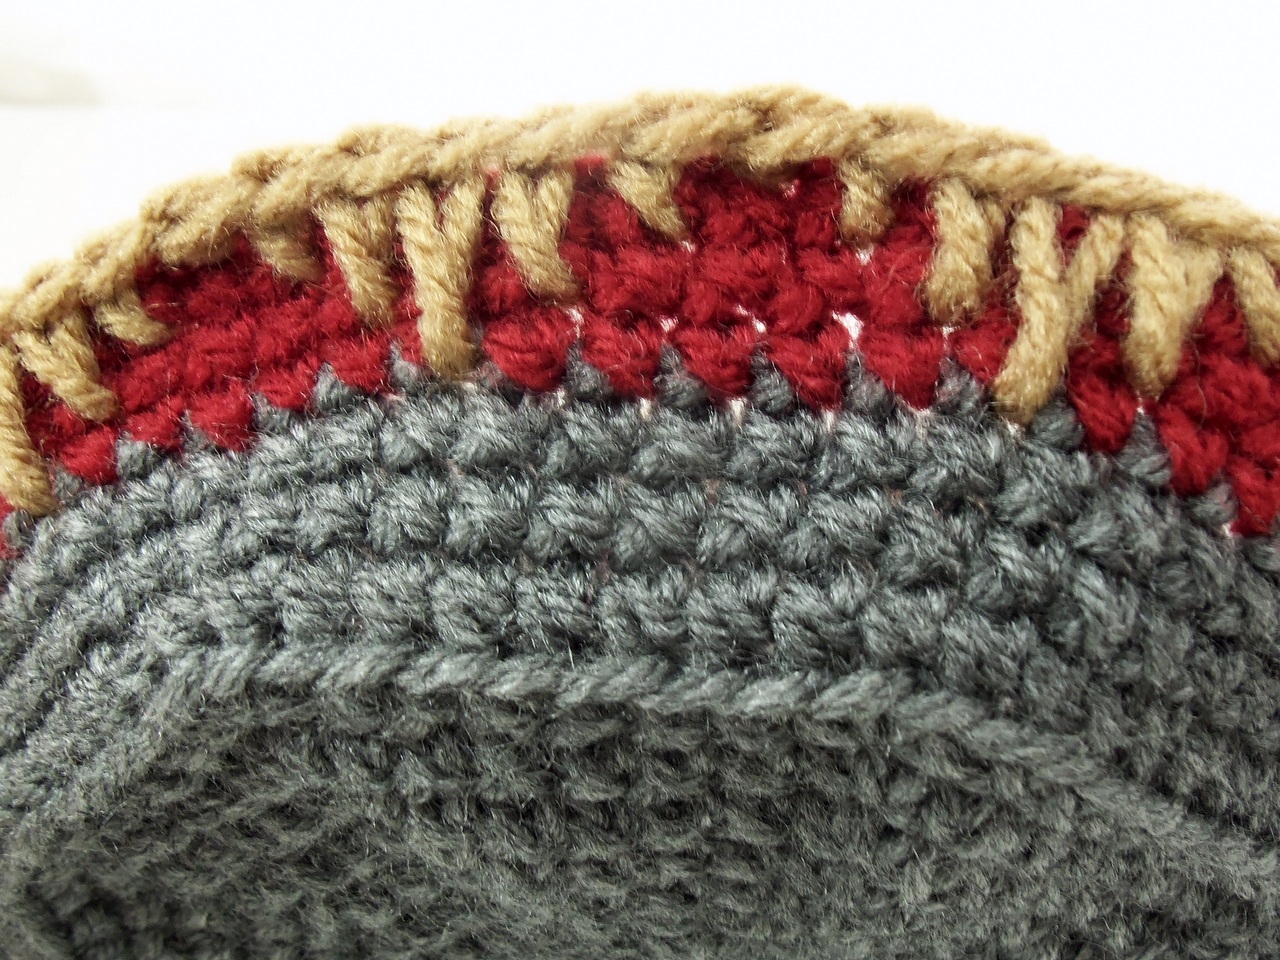
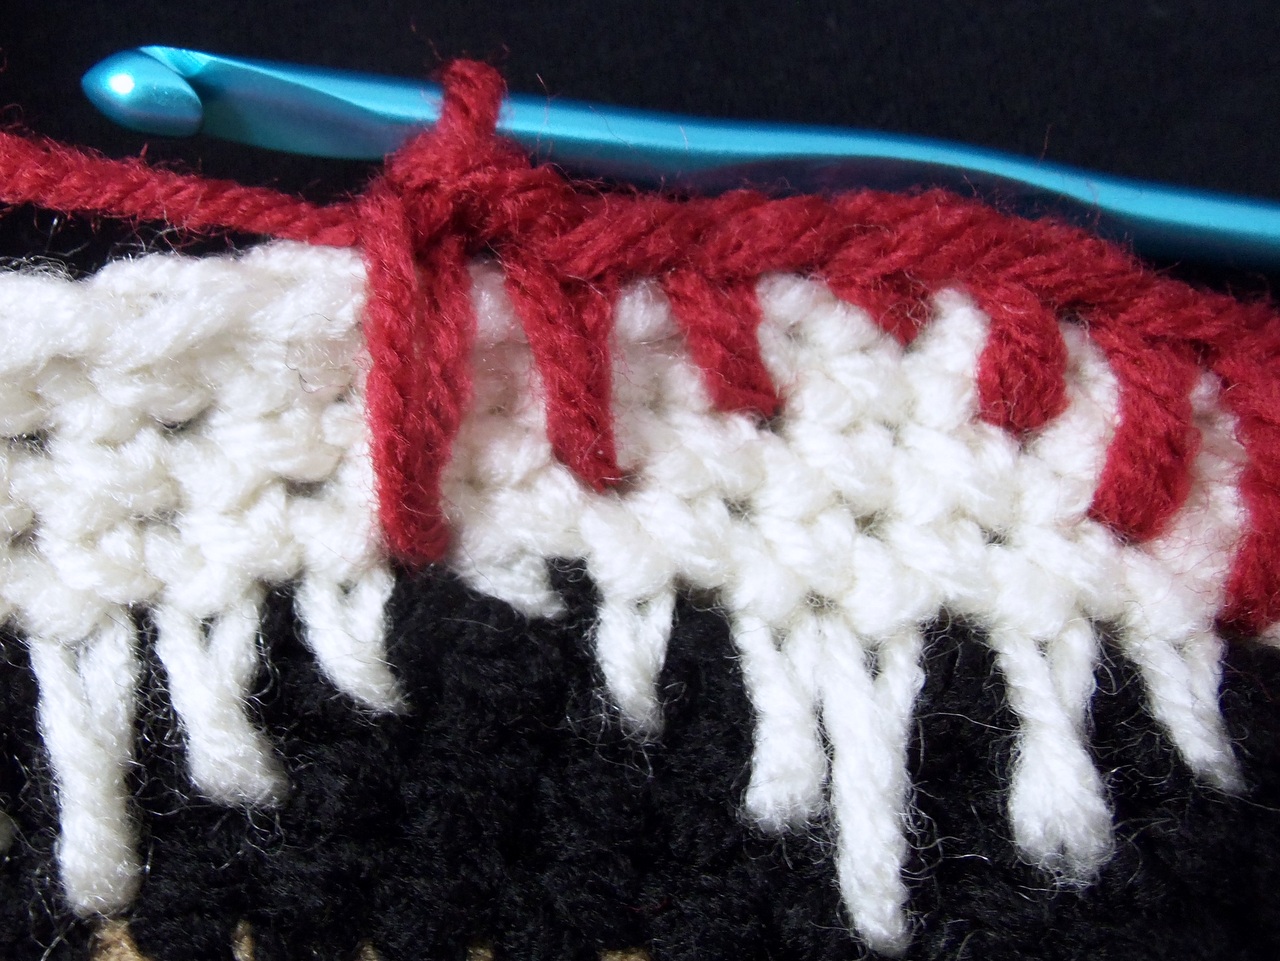
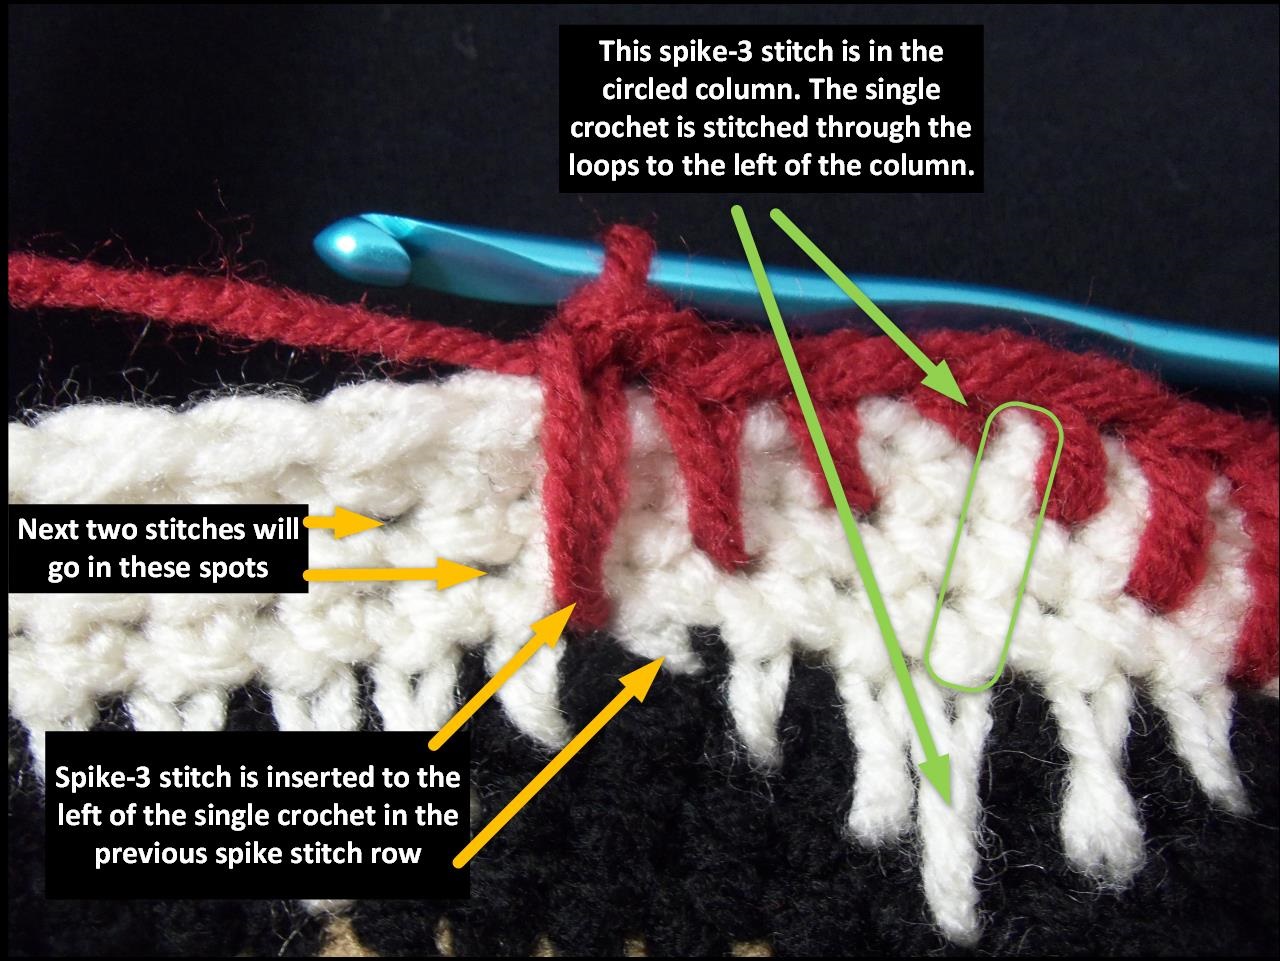
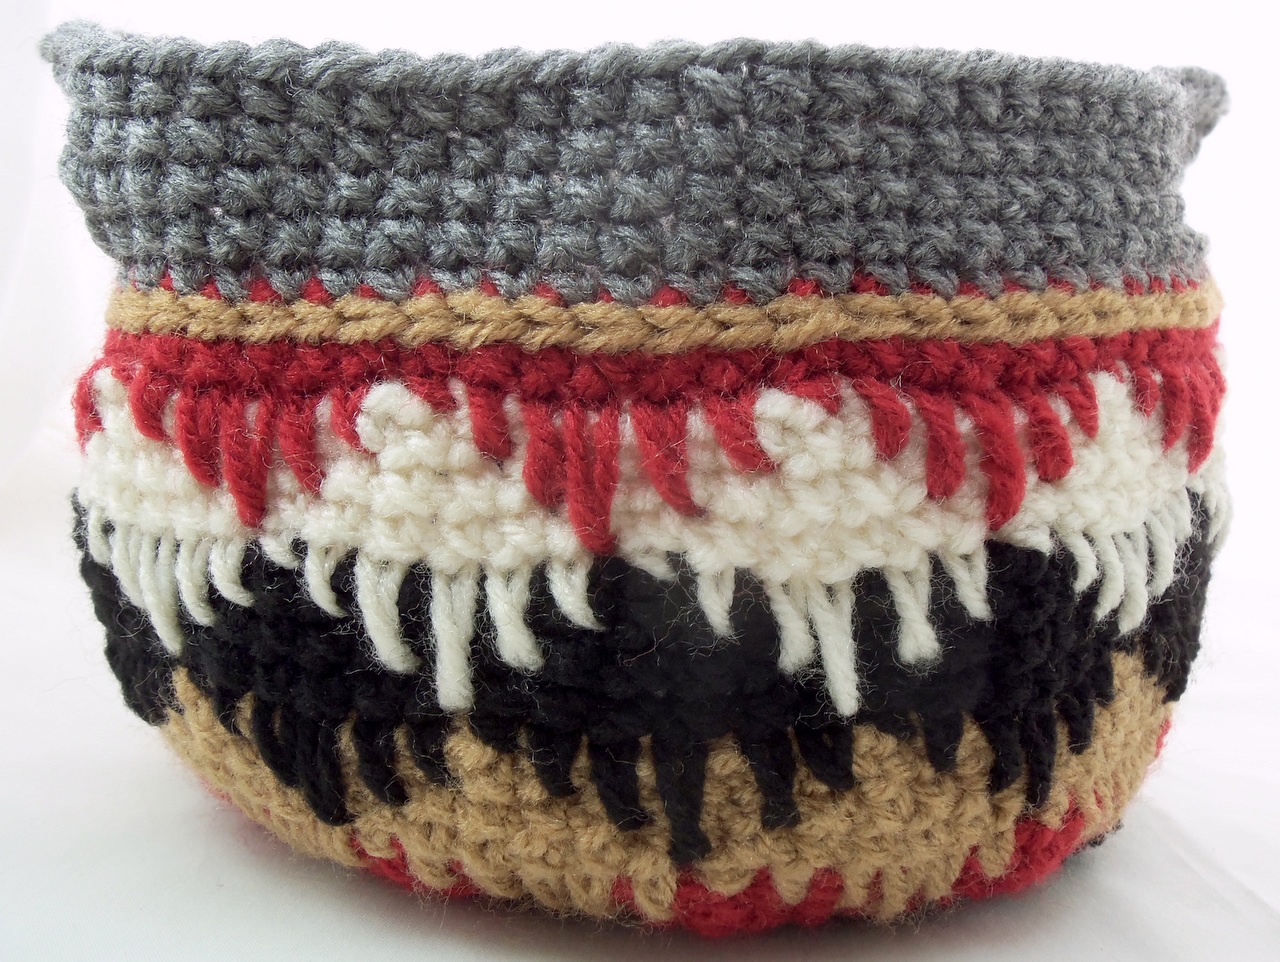
Because crochet in the round tends to lean to the right (if you’re right-handed), placement of these stitches relative to the previous spike stitch row is important to making the pattern look well centered and even. I’ll attempt to illustrate it here, using a different set of colors that show up more nicely in photos than the Black yarn we are currently using in the pattern.
Make sure the longest stitch is lined up to be put through the left side of the single crochet in the previous spike stitch row. When you get to the single crochet, it should line up with the left side of the longest spike stitch in the previous spike stitch row.
Rows 22 – 24
Do three rows of single crochet, making sure to maintain the 72 stitch count. Tie off color D (Black) and join in color E (Aran) using your favorite method.
Row 25
Repeat the spike stitch triangle sequence, starting with the single crochet.
- Single crochet into the joining stitch.
- Spike stitch through the last row and second row down.
- Spike stitch through the second and third rows down.
- Spike stitch through the third and fourth rows down (between the Warm Brown and Black).
- Spike stitch through the second and third rows down.
- Spike stitch through the last row and second row down.
- Repeat for a total of twelve triangles.
Rows 26 – 28
Do three rows of single crochet, making sure to maintain the 72 stitch count. Tie off color E (Aran) and join in color B (Ranch Red) using your favorite method.
Row 29
Repeat the spike stitch triangle sequence, starting with the longest stitch.
- Spike stitch through the third and fourth rows down (between the Warm Brown and Black).
- Spike stitch through the second and third rows down.
- Spike stitch through the last row and second row down.
- Single crochet.
- Spike stitch through the last row and second row down.
- Spike stitch through the second and third rows down.
- Repeat for a total of twelve triangles.
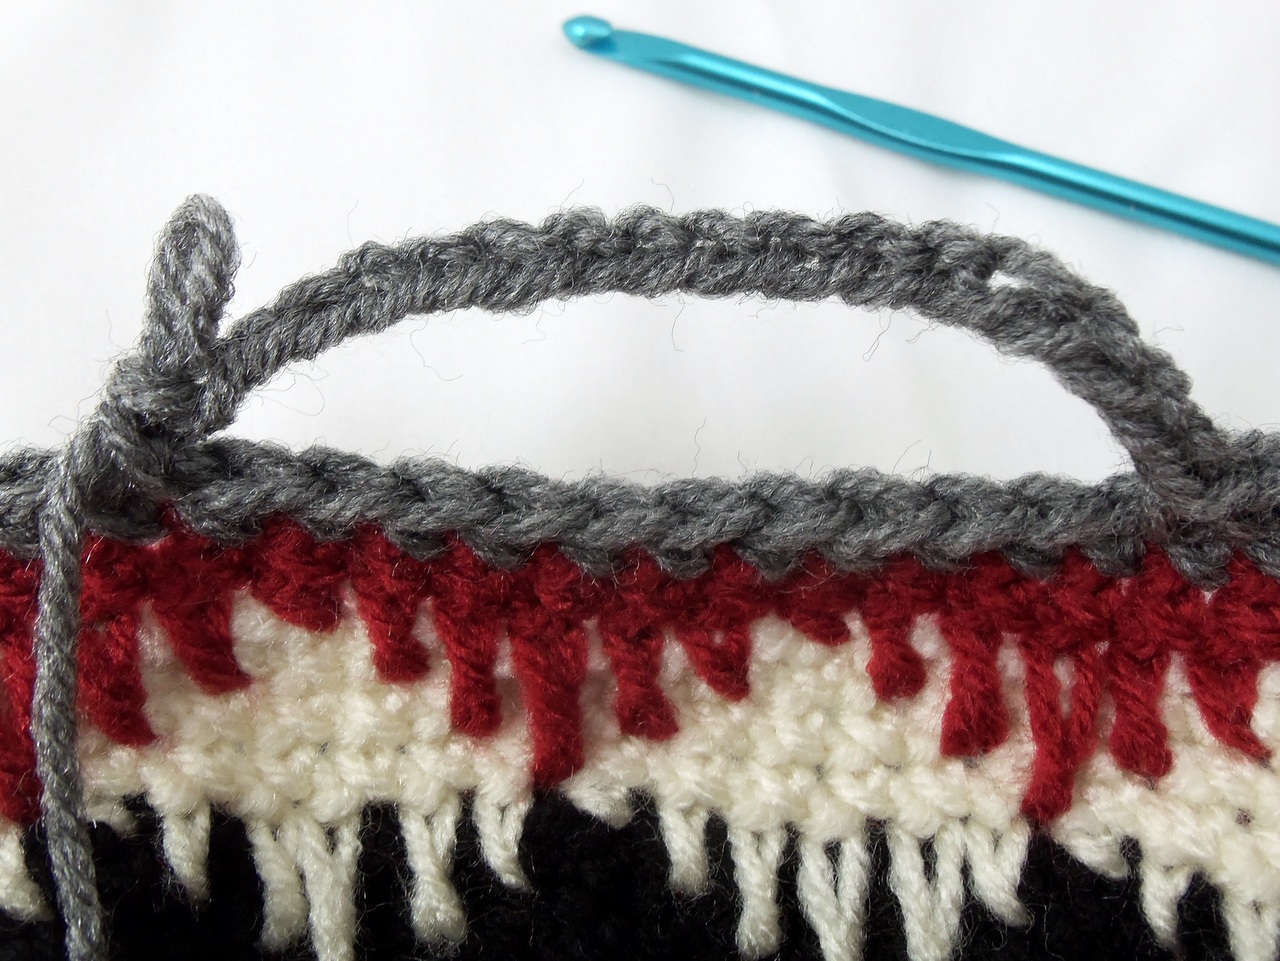
Rows 30
Do one rows of single crochet, making sure to maintain the 72 stitch count. Tie off color B (Ranch Red) and join in color A (Grey Heather) using your favorite method.
Rows 31 – 35: Option 1 – Straight Edged Basket (No Handles)
Do five rows of single crochet. Tie off. Weave in any loose ends.
Rows 31 – 35: Option 2 – Basket with Handles
Row 31: One row of single crochet.
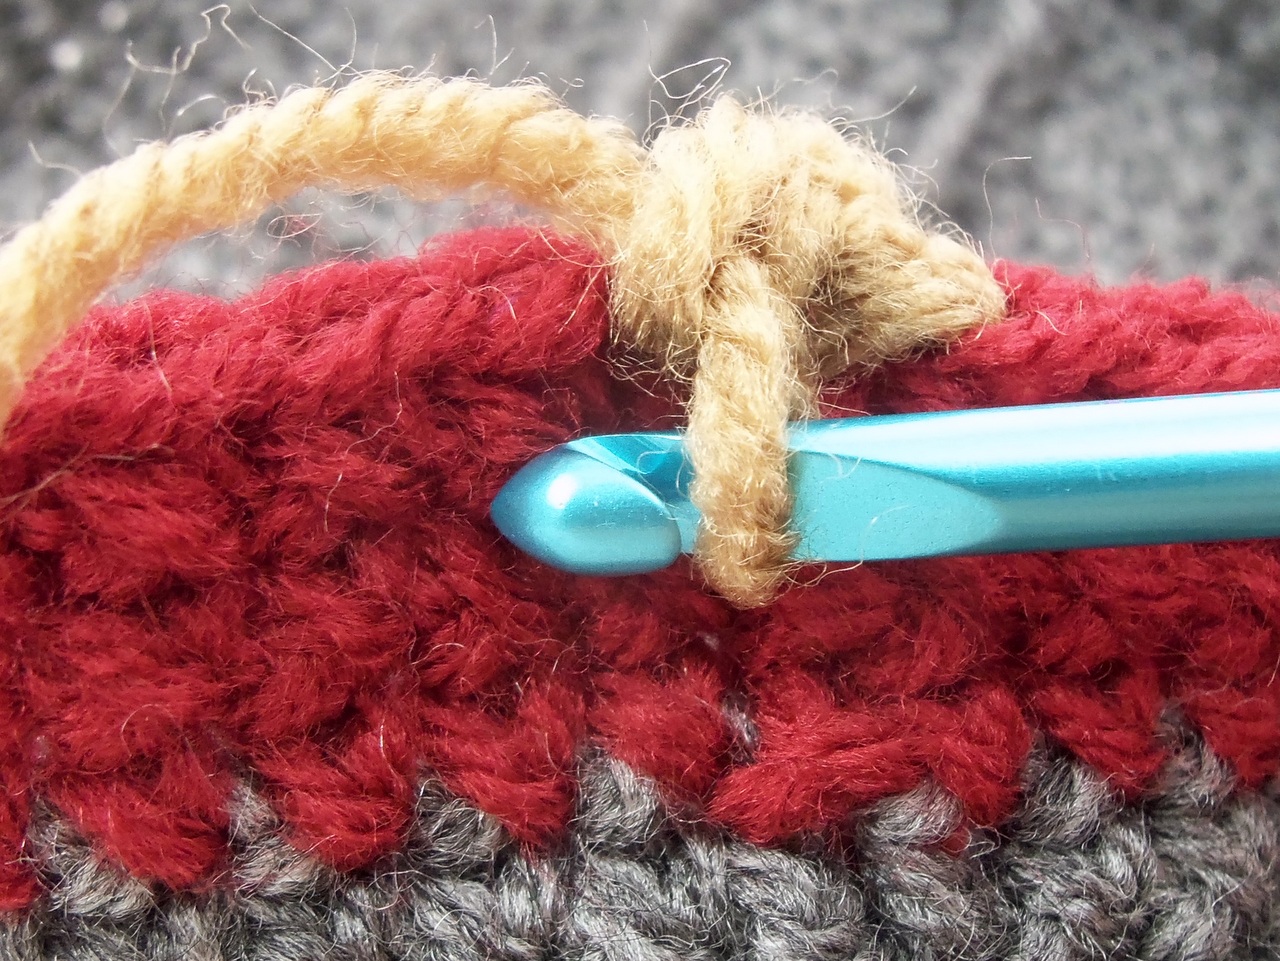
Row 32: Single crochet into the next 13 stitches. Chain 12. Skip 10 stitches. Single crochet into the next 26 stitches. Chain 12. Skip 10. Single crochet to the end.
Row 33: Single crochet into each single crochet stitch in the previous row. When you reach the chain, put 14 single crochet stitches into the chain space. Instead of stitching through the chain, put your hook through under the chain, pull the yarn through, and complete the stitch.
Rows 34 – 35: Do two rows of single crochet. Tie off. Weave in any loose ends.
Adding Detail with Surface Crochet
Using color D (Black), surface crochet between the rows of colors A and B near the bottom of the bowl (between rows 13 and 14). The following describes how to surface crochet.
Surface Crochet
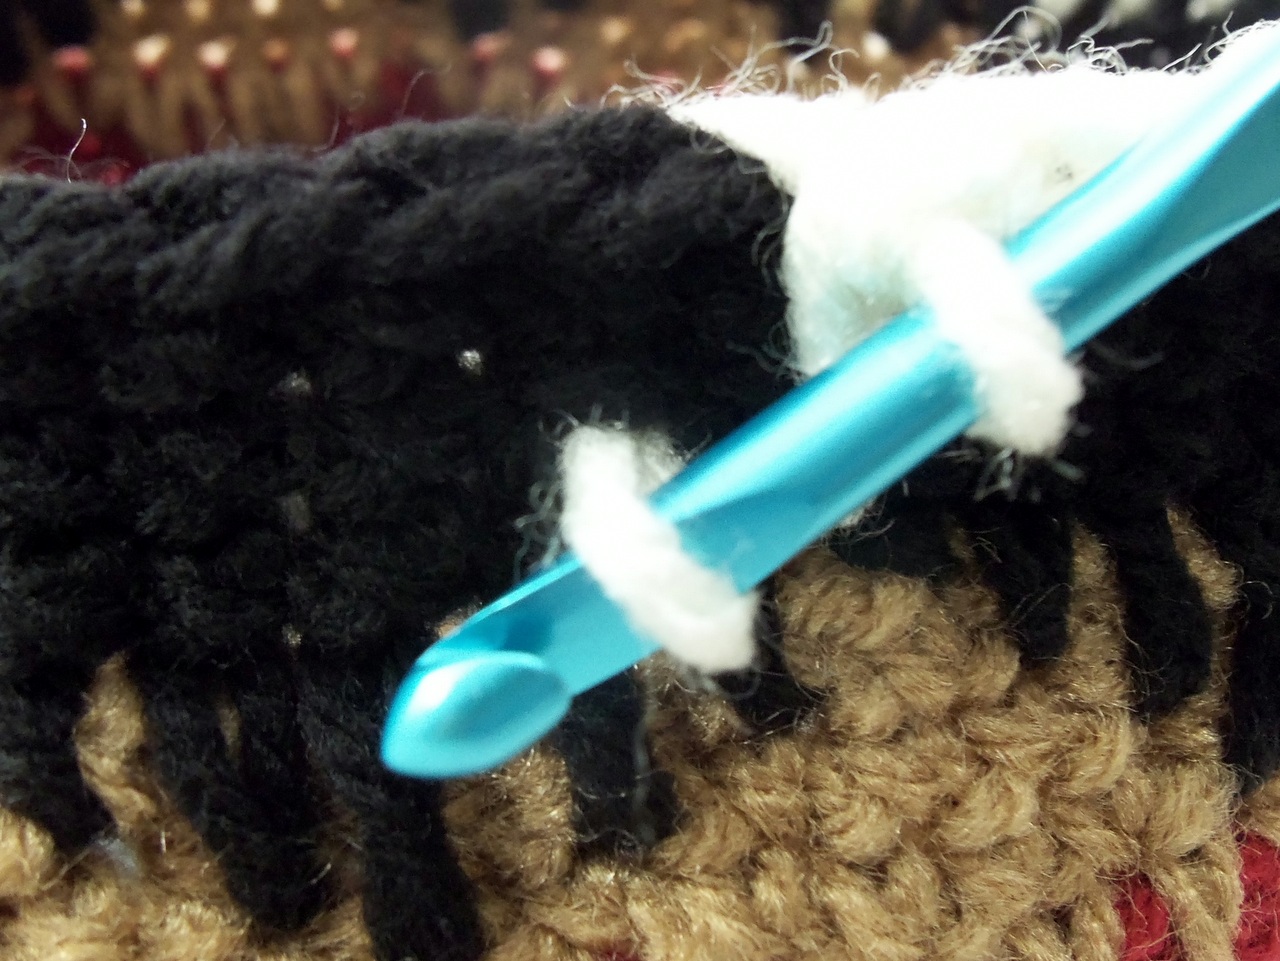
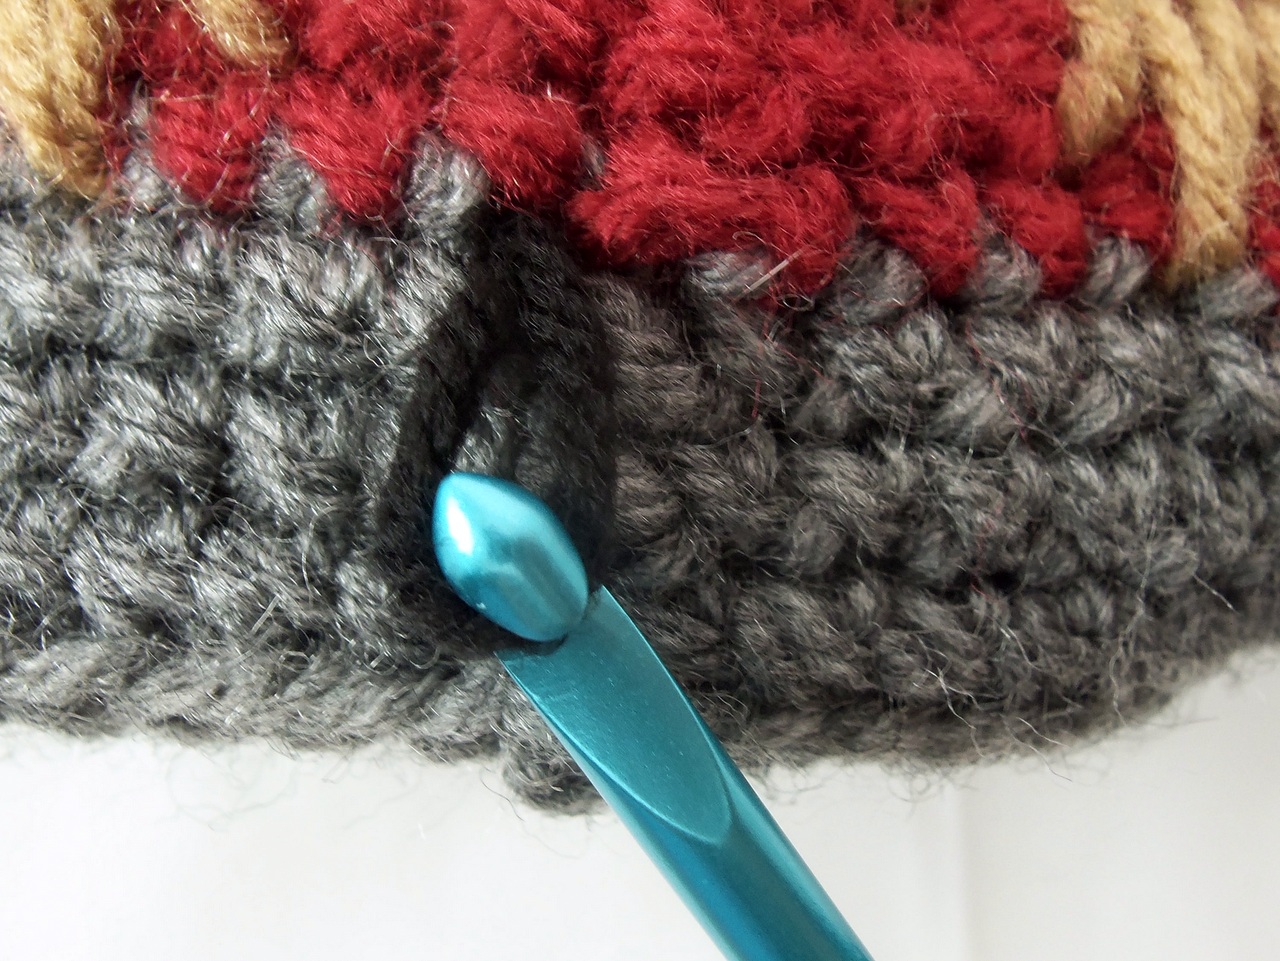
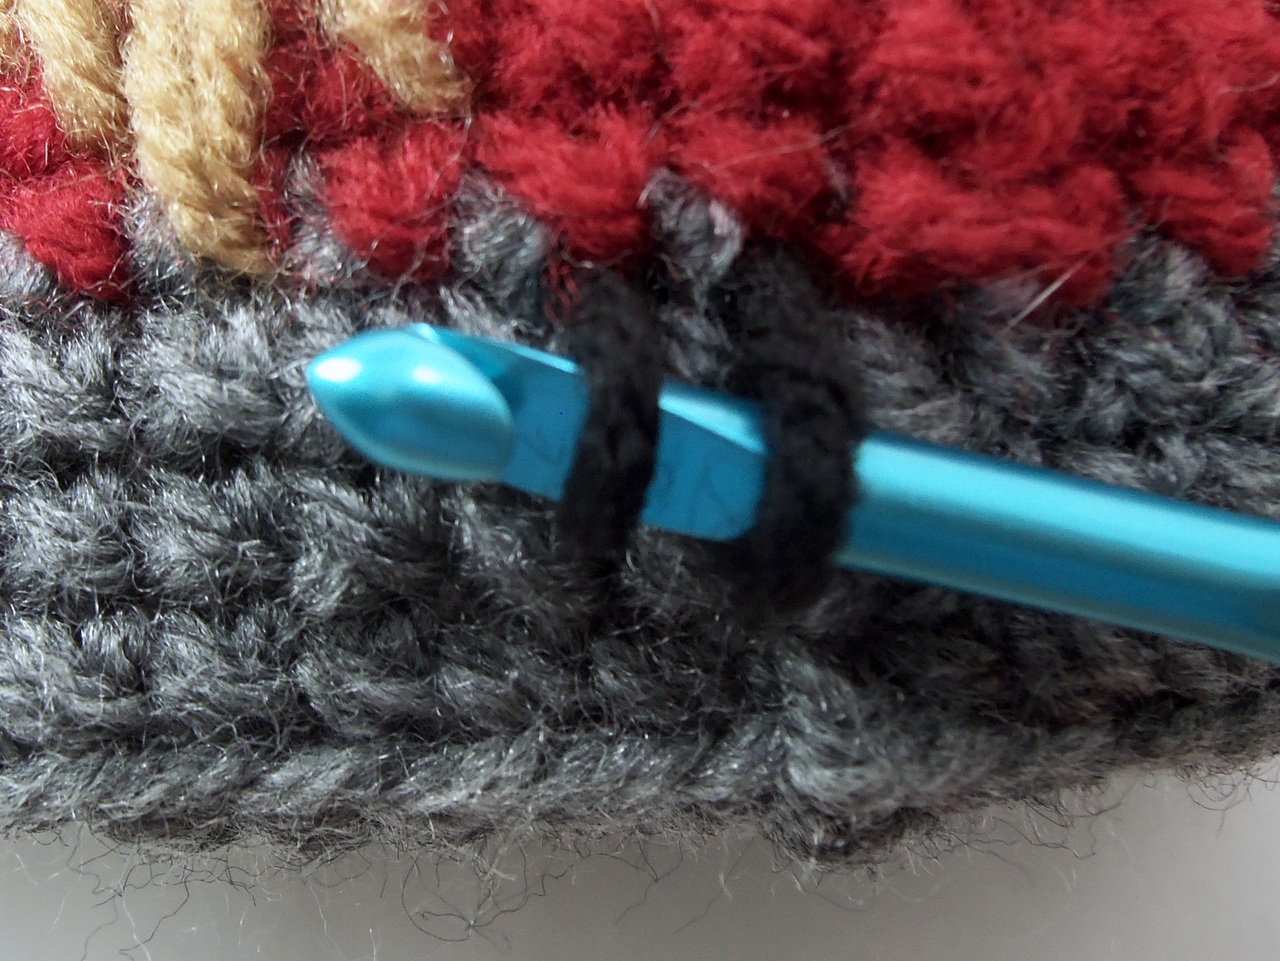
Insert your hook between the stitches of the rows where you are going to start your surface crochet. Pull the yarn through from back to front. Keep hold of the yarn and loose end on the back so you have a loop in the front.
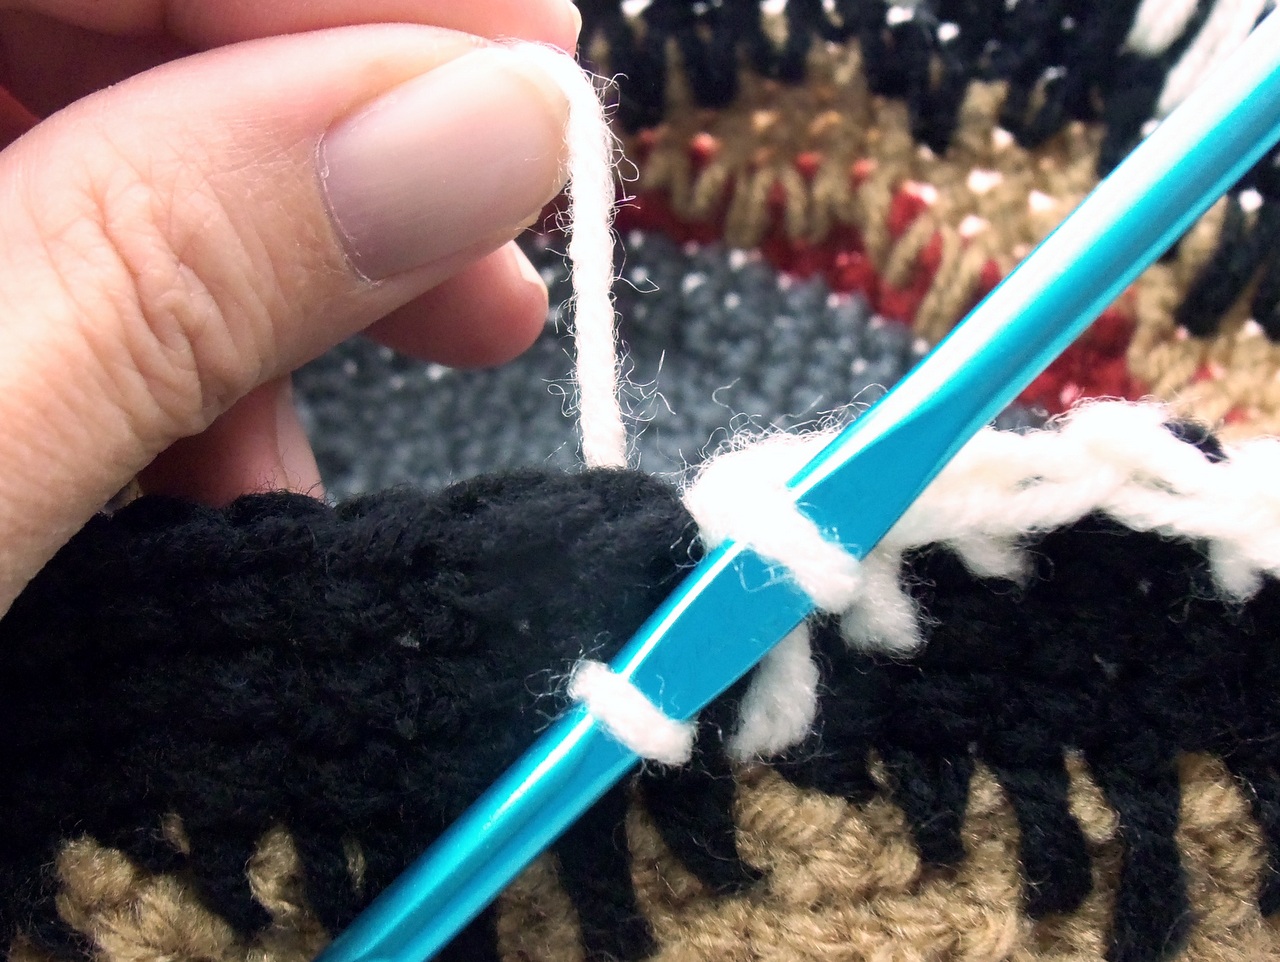
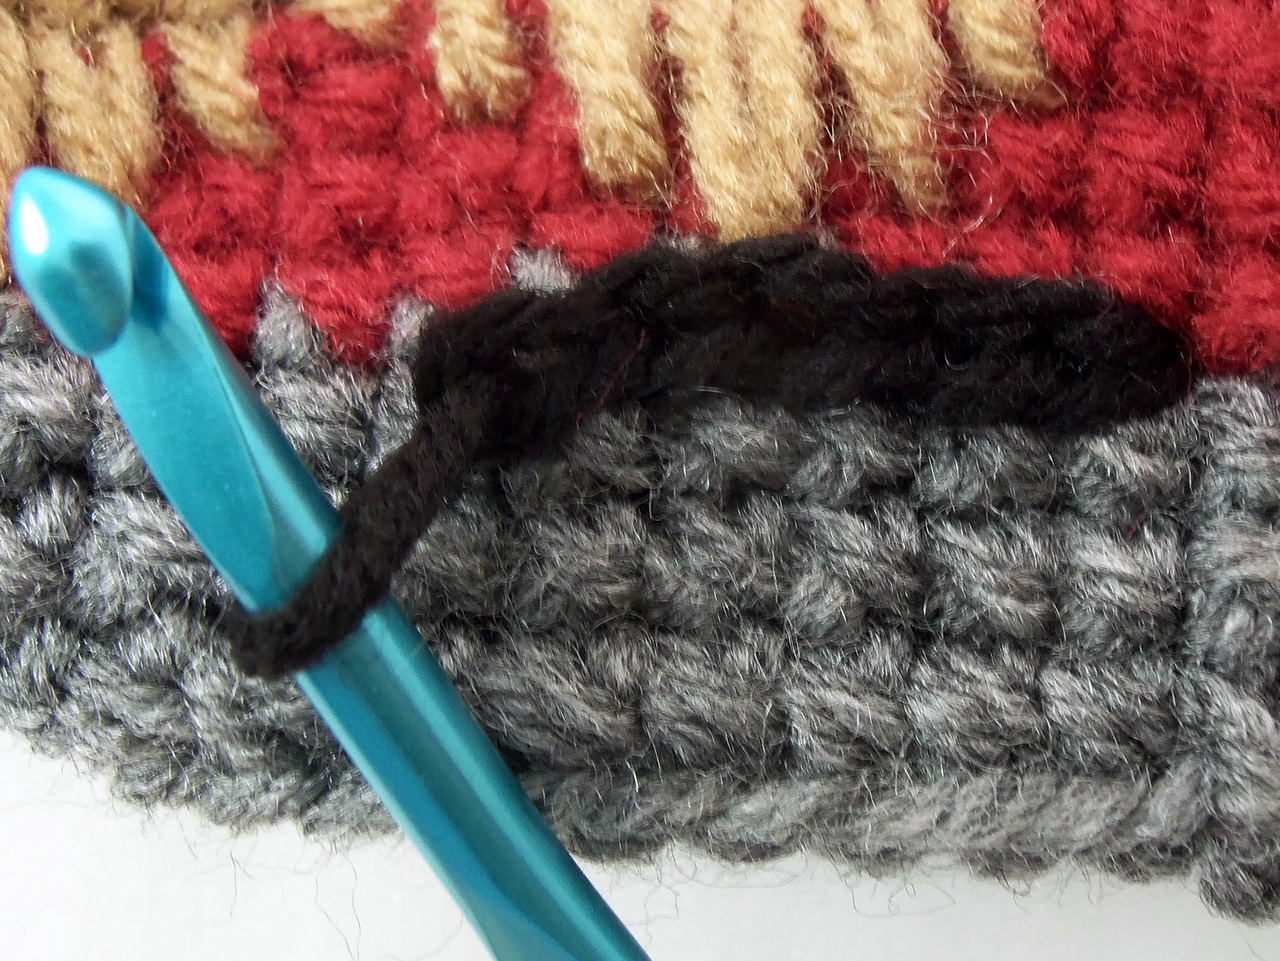
Insert your hook between the next stitches (one stitch to the left between the same rows).
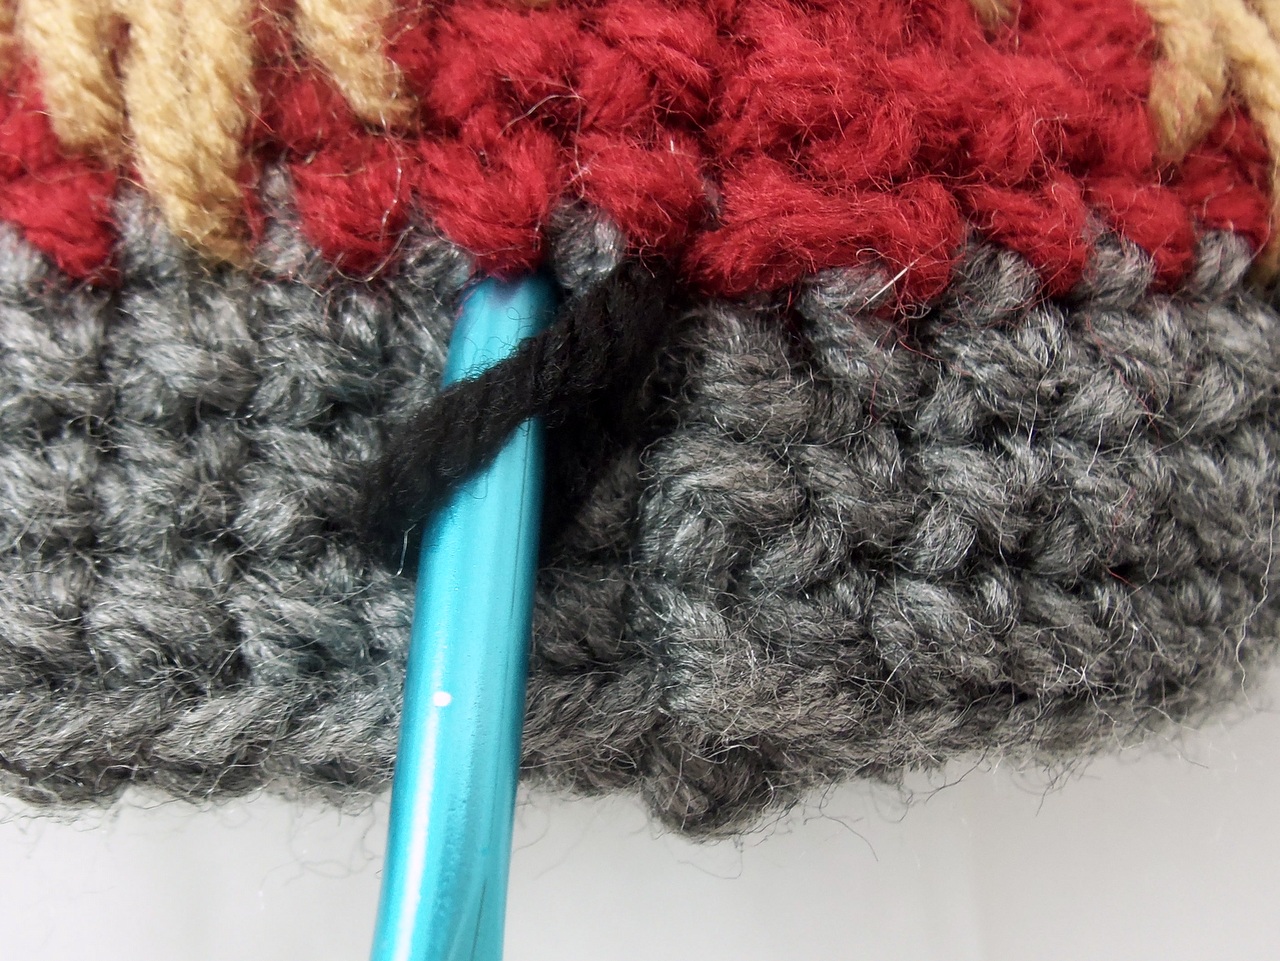
Pull the yarn through to the front.
Pull the new loop through the first loop.

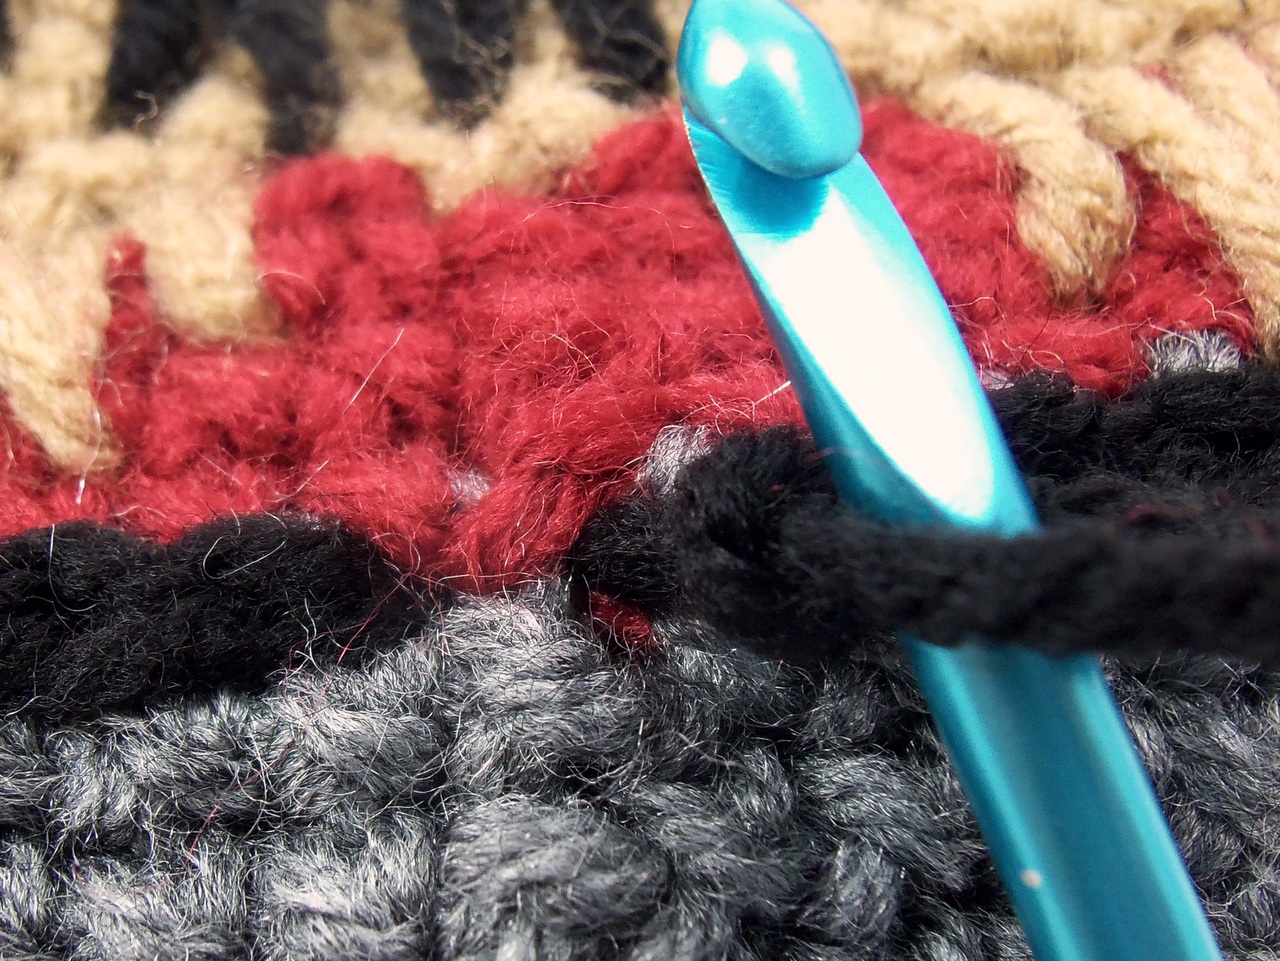
Continue, moving along one stitch to the left, pulling the yarn through the fabric and previous loop.
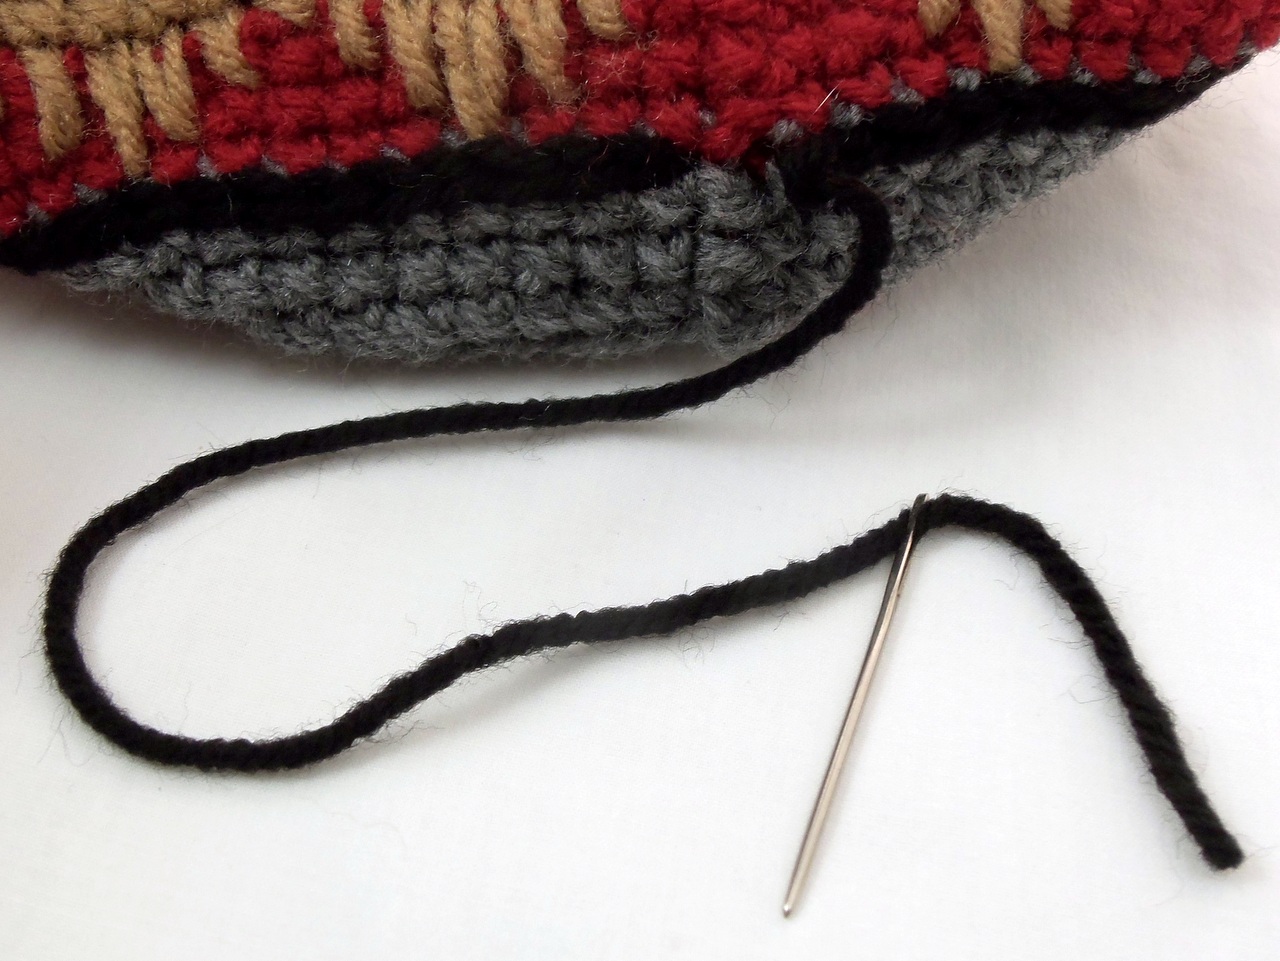
When you get to the very last surface crochet stitch, cut the yarn so you have a few inches to work with.
Pull the loop yarn through and thread your tapestry needle
Insert your needle behind the loops of the first stitch.
Pull the yarn through and insert the needle into the same spot where the last stitch came through the fabric.

Snug up the stitch to the desired tension. Tie the ends of the yarn together in the back using a secure knot (like a square knot) and weave in the ends.
Voila!
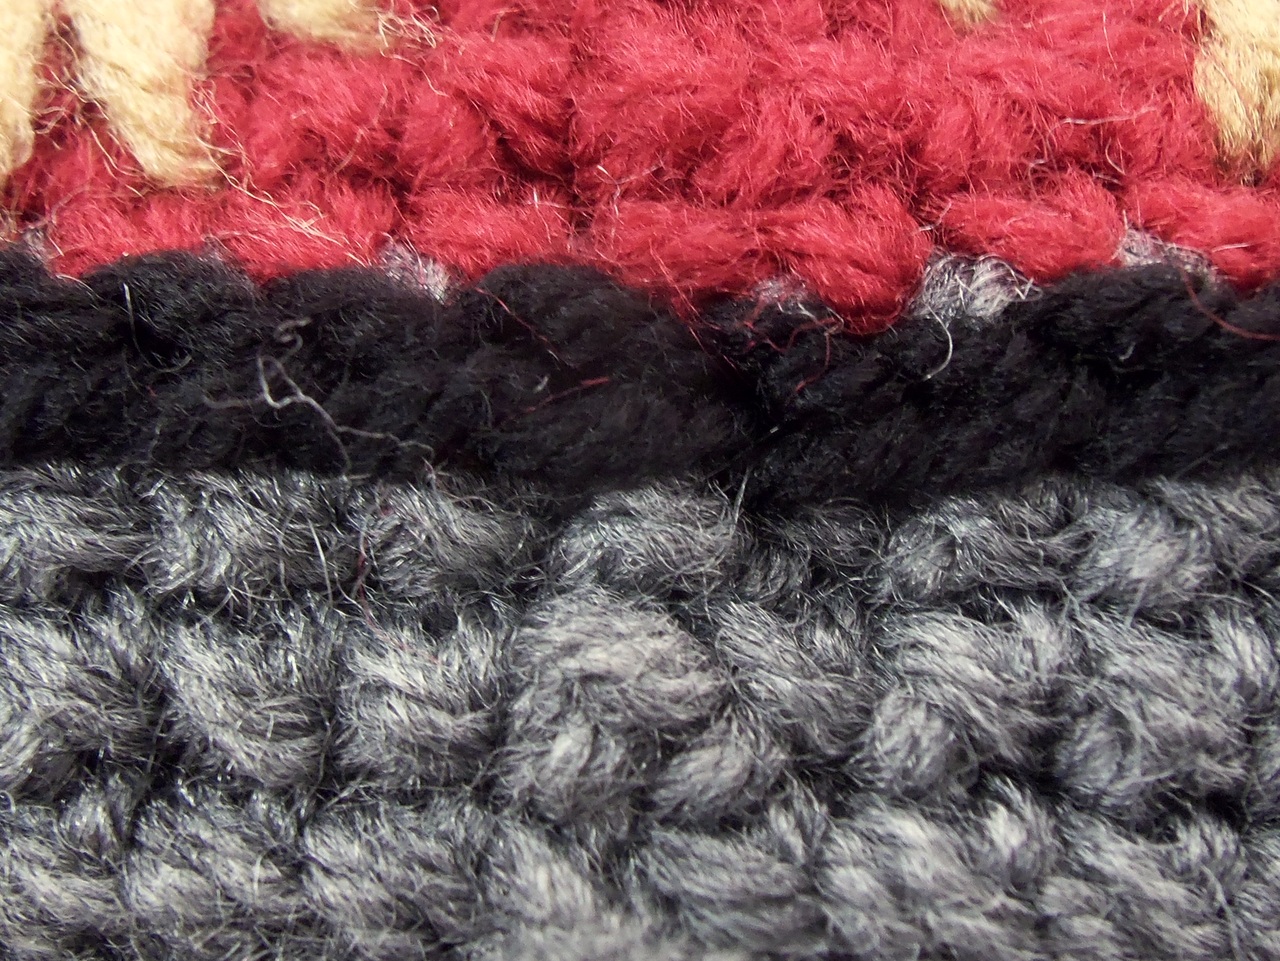
First line of finished surface crochet at the bottom of the diamond design band.
Next, using color C (Warm Brown), surface crochet between the last row of color B (Ranch Red) and the first row of color A (Grey Heather) near the top of the basket (between rows 30 and 31).
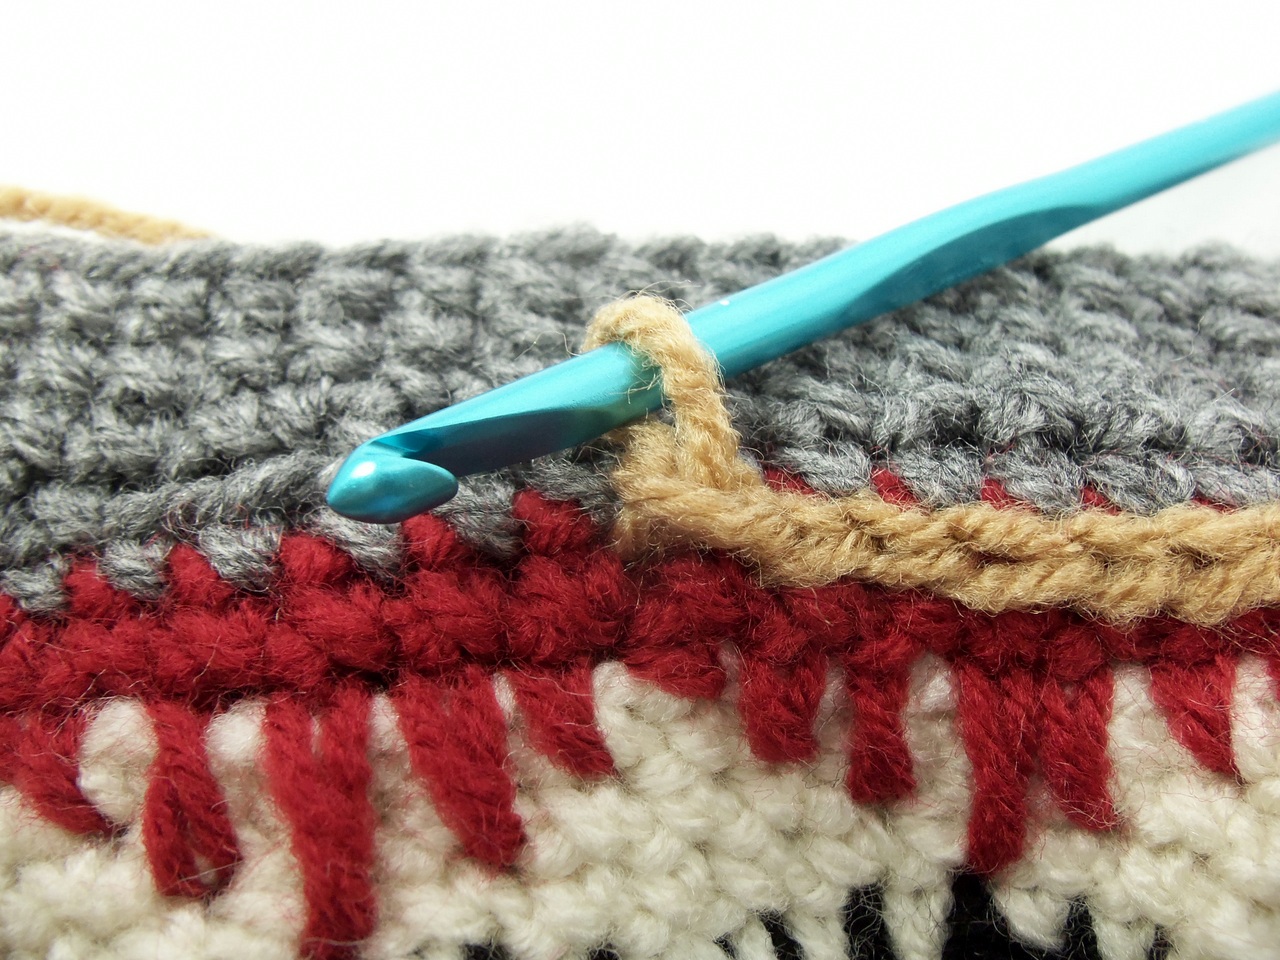
The second line of surface crochet at the top of the diamond design band is complete.
Finally, working in the back loop only, surface crochet along the top edge of the basket with color D (Black).
The result of working the back loop for this line of surface crochet is that it leaves a nice line of color A (Grey Heather) just below the surface crochet line of color D (Black).
Congratulations! All done!
Optional Embellishment
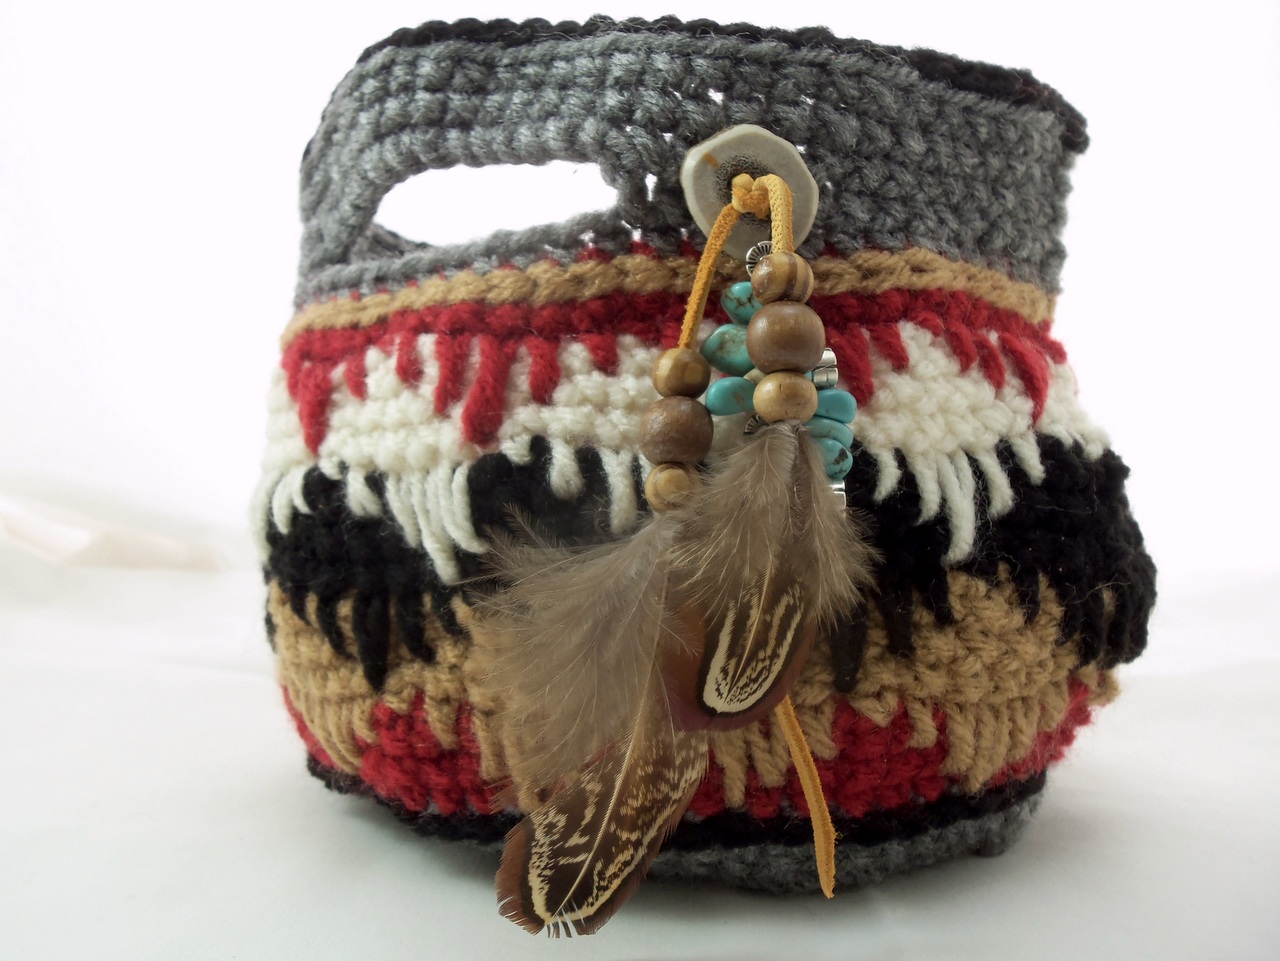
As I was working row 32 (the one with the two chain 12-skip 10 sections for the handle), I made a two-stitch buttonhole (chain 2, skip 2) a few stitches from the handle so I could attach a removable decoration. I made a tassel with a couple buttons, some buckskin lace, crochet thread, beads, and feathers.
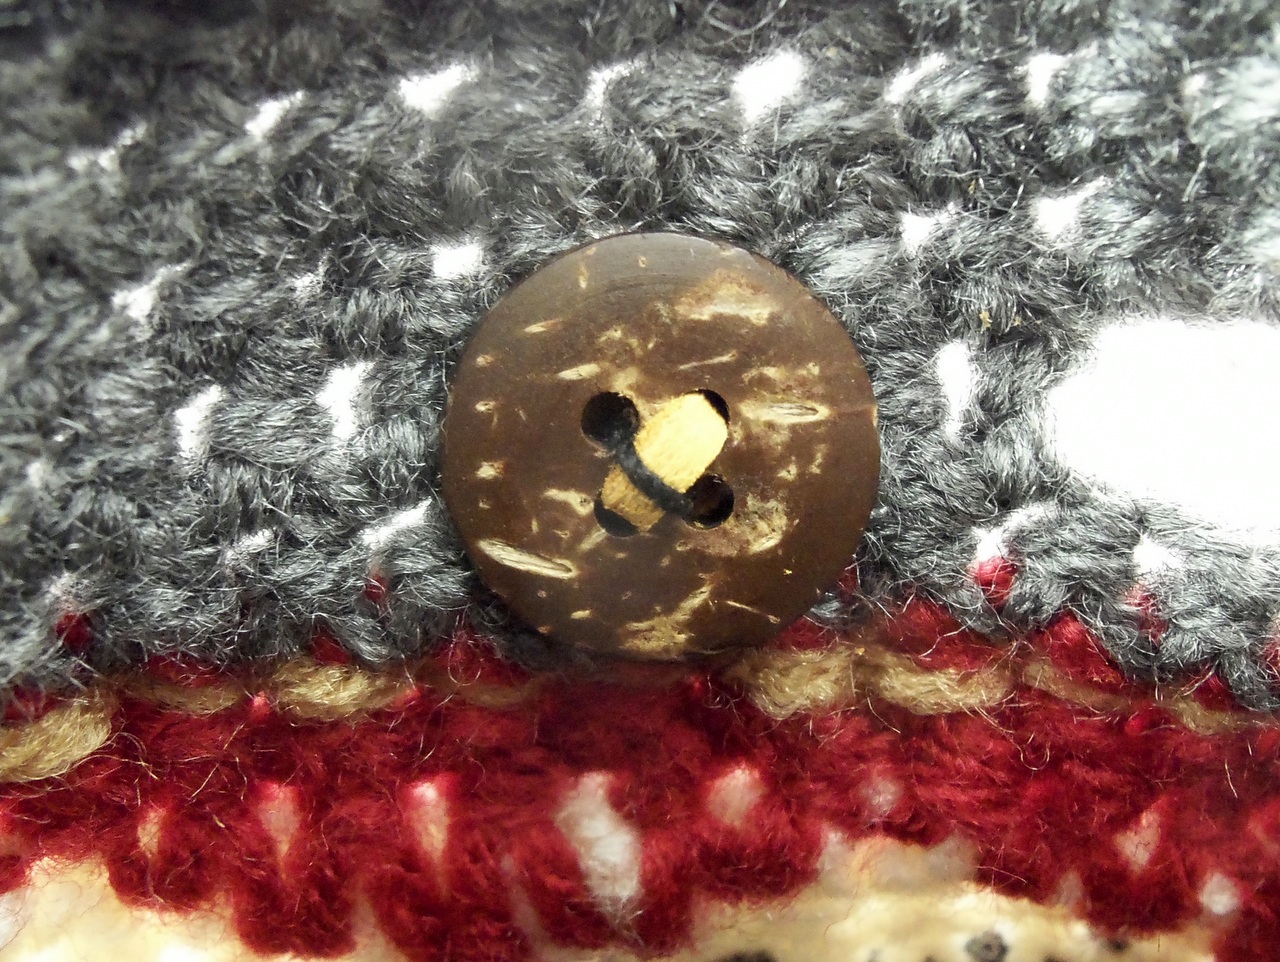
Here’s the interior button that holds the tassel to the basket.
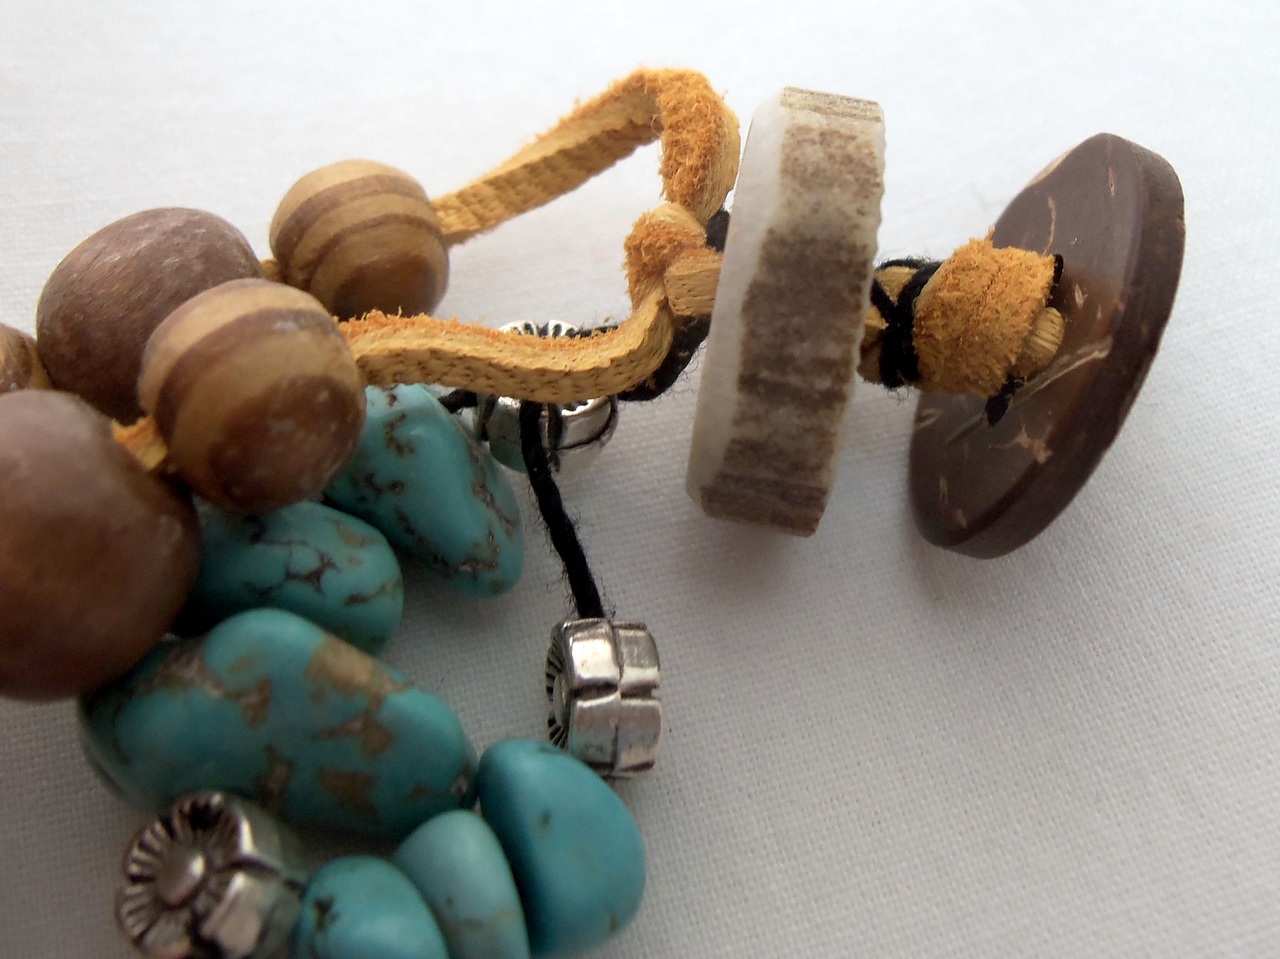
Here’s a close-up of the tassel. There’s a knot in the buckskin and crochet thread between the interior button (right) and the pretty antler exterior button (left).
Here’s the buttonhole.
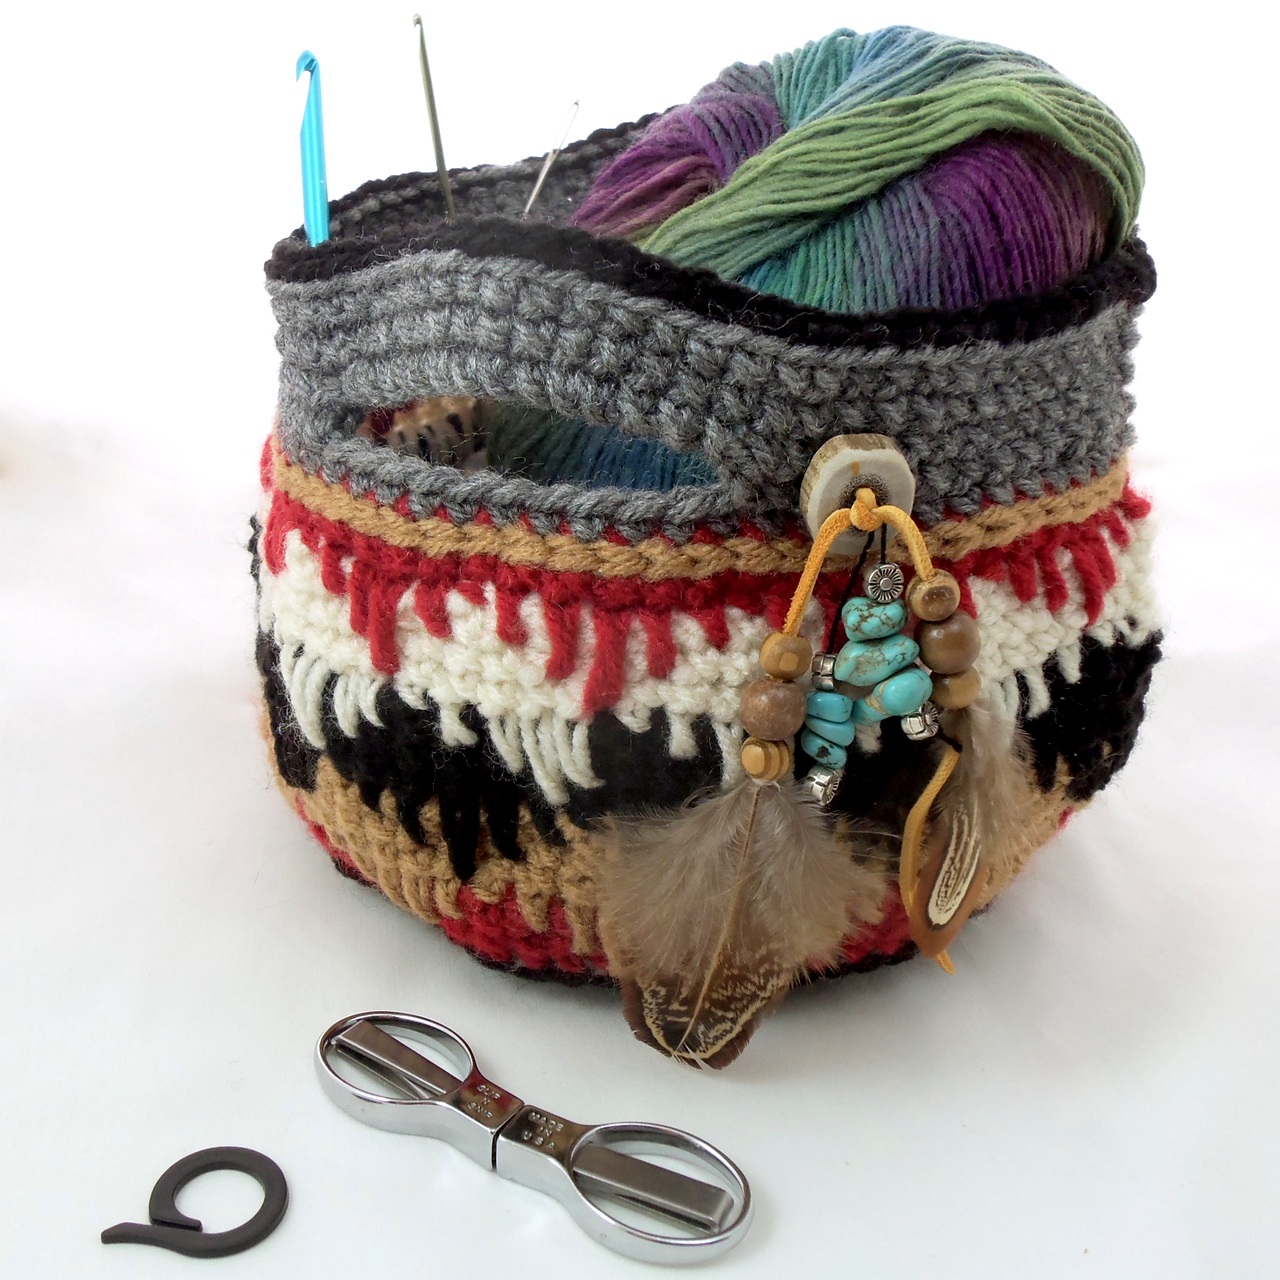
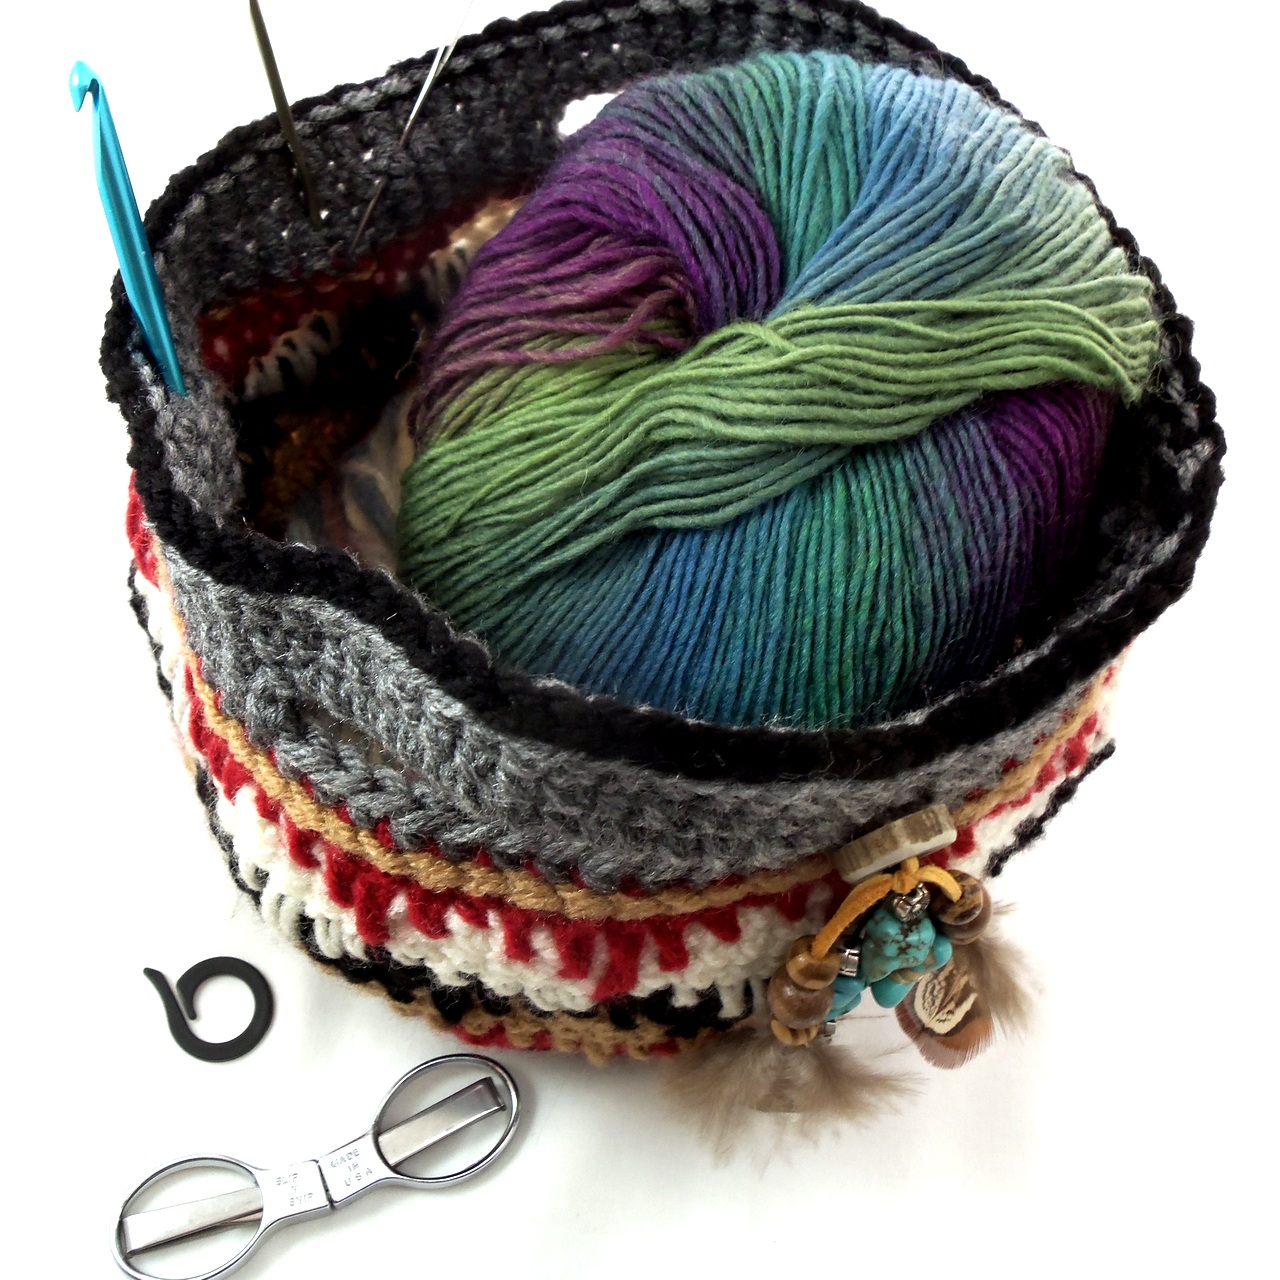
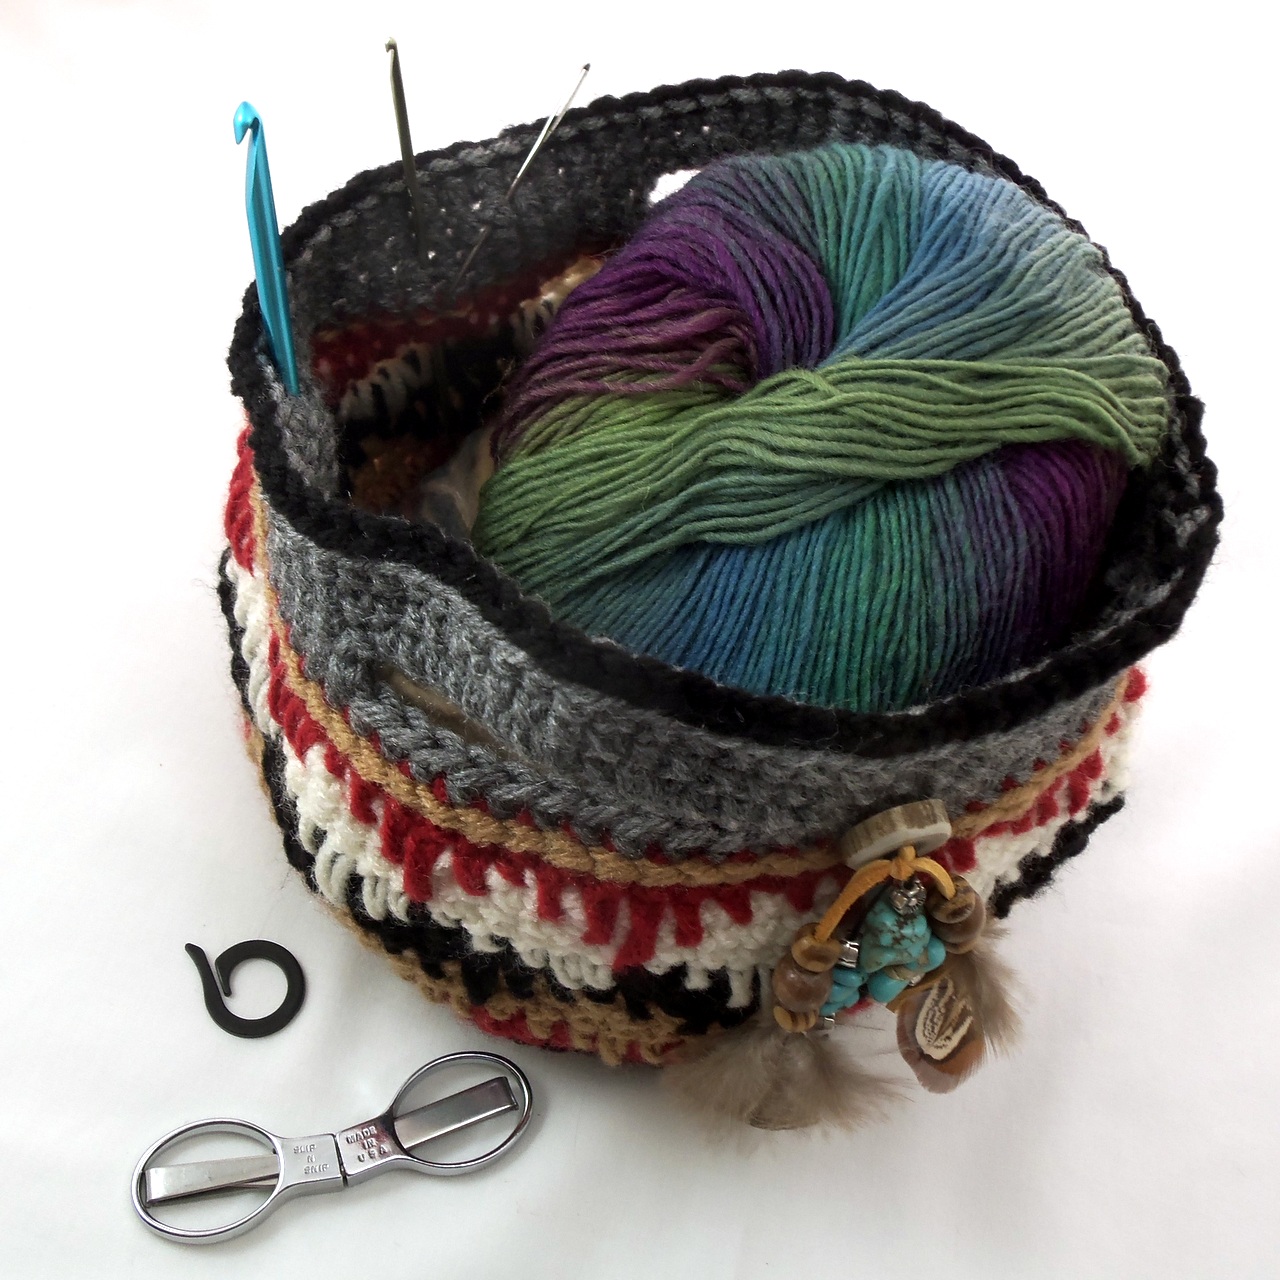
I wanted a basket going out on the porch with small crochet project and a few necessities. I toss my folding scissors, stitch markers, a couple small skeins of yarn, and a snack in the basket, stick whatever hooks and needles I need through the fabric, and I’m ready to go. The handles make it easy to grab it in one hand while juggling a cup of coffee, my tablet, and whatever else I’m taking out with me. If I have a bigger project bag, I just drop this on top and head out to the porch.
The tassel is made up of wood beads, dyed magnesite (fake turquoise), silver-toned beads, and pheasant feathers. I chose the silver and turquoise theme because the Navajo are as famous for their silverwork as they are for their rugs.
Yarn Colors
Here are a few of my recommendations for other nice Red Heart Super Saver Economy yarn colors for your basket palette. However, there are no rules! Navajo rugs can be quite colorful, and even in historic times, weavers used Anglo yarns in addition to their own wool yarns, which are either the natural color of the wool or dyed using local native plant dyes.
Making a Bigger (or Smaller) Basket
This pattern make a basket between 6″ and 7″ in diameter, and between 5″ and 6″ tall.
To make the basket taller, you can add rows of color A (Grey Heather) to the basket walls below and above the diamond pattern band. You can also add more rows to the diamond pattern band itself. Just add two more rows of color B (Ranch Red) before tying off, tie in a new color, and repeat the four row sequence (one row of alternating spike stitch triangles and three single crochet rows). The final repeat of this sequence should only have one row of single crochet above the spike stitch row.
To make the basket shorter, just leave out one or two of the four row triangle sequences
The triangle pattern repeats every six stitches. To make your basket wider or narrower, make sure the number of stitches in the last row of the bottom is evenly divisible by six. Thus, starting with eight single crochet in the first row, crochet in the round (increasing each row by eight stitches) to:
- row 3 (24 stitches)
- row 6 (48 stitches)
- row 9 (72 stitches)
- row 12 (96 stitches)
- row 15 (120 stitches)
- row 18 (144 stitches)
- row 21 (168 stitches)
- etc.
before going to one single crochet per stitch for the basket walls. I have a one foot wide, six inch tall basket that works nicely to contain several skeins of yarn on my coffee table.
Other Ideas
- For an even more “eye dazzling” basket, work the spike stitch rows in a different color than the two bands of single crochet it’s sandwiched between. This will make the upper and lower halves of the diamonds stand out as distinct.. See the photo of the Navajo rug – some of the diamonds are worked in two completely different colors, while others are worked in two shades of the same color.
- Crocheting two basket bottoms and stitching them together with batting or something stiff (like a whipped cream tub lid), then crocheting the basket walls to this reinforced bottom would make a pretty sturdy basket.
- A larger, taller basket might make a nice tote bag or purse, with or without the bottom reinforced like above. A row of DC 4 – chain 2 a few rows from the top could be added for pulling a drawstring through to tie the top.
- A wide, shallow basket (twice as wide, same height as this pattern) would make a nice fruit basket for the kitchen counter. The acrylic yarn is very washable.
- Add a batting padded bottom (as above) to a wide, shallow basket (twice as wide, same height as this pattern) would make a lovely bed for a cat or small dog. A plain crocheted interior wall could be stitched in a padded to make padded sides for your pet.
The Pattern in Compact Form
Notes
- Beginning/End Rows: Chain 1 and put first stitch in joining stitch, skip last stitch of row.
- ssc# (spike single crochet to row # below): ssc1 – spike stitch through first row below; ssc2 – spike stitch through second row below; etc. See photo tutorial for proper placement of spike stitches relative to the rows and columns of the pattern.
Pattern
- R1: With color A (Grey Heather), make a magic circle. 8 sc into circle. Join. (8 sc)
- R2: [sc 1, sc 2 into next stitch] around and join. (16 sc)
- R3: [sc 2, sc 2 into next stitch] around and join. (24 sc)
- R4: [sc 3, sc 2 into next stitch] around and join. (32 sc)
- R5: [sc 4, sc 2 into next stitch] around and join. (40 sc)
- R6: [sc 5, sc 2 into next stitch] around and join. (48 sc)
- R7: [sc 6, sc 2 into next stitch] around and join. (56 sc)
- R8: [sc 7, sc 2 into next stitch] around and join. (64 sc)
- R9: [sc 8, sc 2 into next stitch] around and join. (72 sc)
- R10: BLO sc 1 around and join (72 sc)
- R11: sc 1 around and join
- R12: sc 1 around and join
- R13: sc 1 around and join. Tie off and join color B (Ranch Red).
- R14: sc 1 around and join.
- R15: sc 1 around and join.
- R16: sc 1 around. Tie off color B and join color C (Warm Brown).
- R17: [sc, ssc1, ssc2, ssc3, ssc2, ssc1] twelve times and join.
- R18: sc 1 around and join.
- R19: sc 1 around and join.
- R20: sc 1 around. Tie off color C and join color D (Black).
- R21: [ssc3, ssc2, ssc1, sc, ssc1, ssc2] twelve times and join.
- R22: sc 1 around and join.
- R23: sc 1 around and join.
- R24: sc 1 around. Tie off color D and join color E (Aran).
- R25: [sc, ssc1, ssc2, ssc3, ssc2, ssc1] twelve times and join.
- R26: sc 1 around and join.
- R27: sc 1 around and join.
- R28: sc 1 around. Tie off color E and join color B (Ranch Red).
- R29: [ssc3, ssc2, ssc1, sc, ssc1, ssc2] twelve times and join.
- R30: sc 1 around. Tie off color B and join color A (Grey Heather).
- R31: sc 1 around and join. (72 sc)
- R32: sc 13, ch 12, skip 10, sc 26, ch 12, skip 10, sc 13 (to end), and join. (76 stitches: 52 sc, 24 ch)
- R33: sc 13, sc 14 into ch sp, sc 26, sc 14 into ch sp, sc 13 (to end), and join. (80 sc)
- R34: sc 1 around and join. (80 sc)
- R35: sc 1 around and tie off. (80 sc)
- R36: Color D (Black), ss around between R13 and R14 (i.e., surface crochet between these rows, the bottom of the diamond pattern band).
- R37: Color C (Warm Brown), ss around between R30 and R31 (i.e., surface crochet between these rows, the top of the diamond pattern band).
- R38: Color D (Black), BLO, ss around top of R35 (i.e., surface crochet in the back loops of the final row of sc, the top edge of basket).
More…

Eye Dazzler Basket Crochet Pattern by Deborah Lee Soltesz is licensed under a Creative Commons Attribution-NonCommercial-ShareAlike 4.0 International License.
Based on a work at http://www.deborah.ws/arts-crafts/how-to/free-pattern-eye-dazzler-basket/.