I love this rosebud pattern I came across. Unfortunately, the site is blocked by Pinterest and it’s in Russian (not a big problem because the photos are pretty good). So, here’s my version of the pattern. The compact form of the pattern is at the bottom of this post.
A Field of Rosebuds
Yarn Colors
- A: Background color. Something your rosebuds will show up nicely against, like white, black, cream, or even sky blue.
- B: Leaf color. A nice shade of green.
- C: Rosebud color. Red, pink, maroon, gold, or any color you’d like. I think this pattern would be really interesting with a slow striping yarn so the roses gradually change color as you work.
Yarn
Use your favorite. I used Lion Brand Bon Bons sport weight cotton for this tutorial. I show the results using a lace weight acrylic-wool blend at the end of this tutorial.
The Pattern
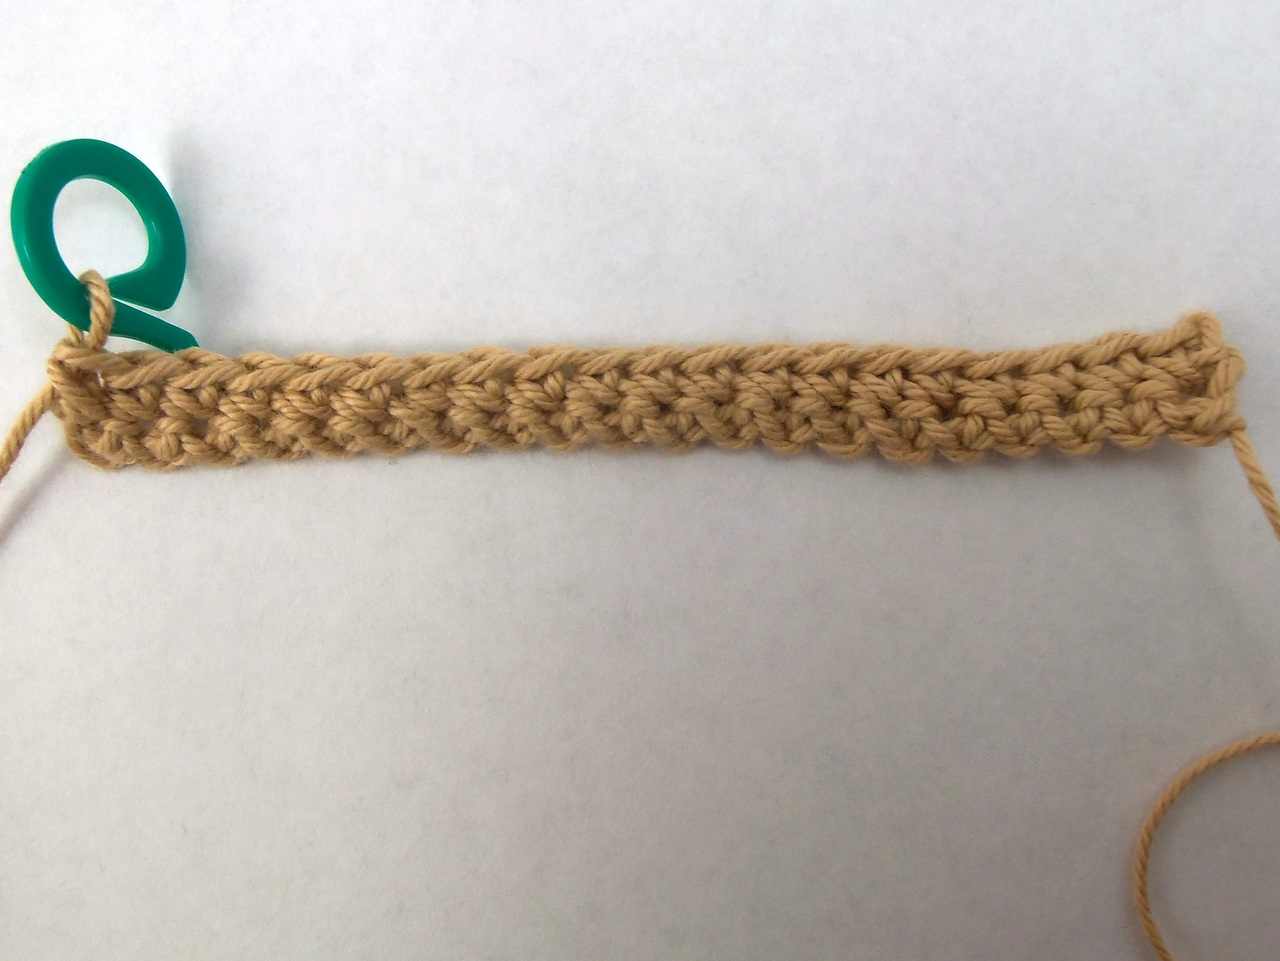
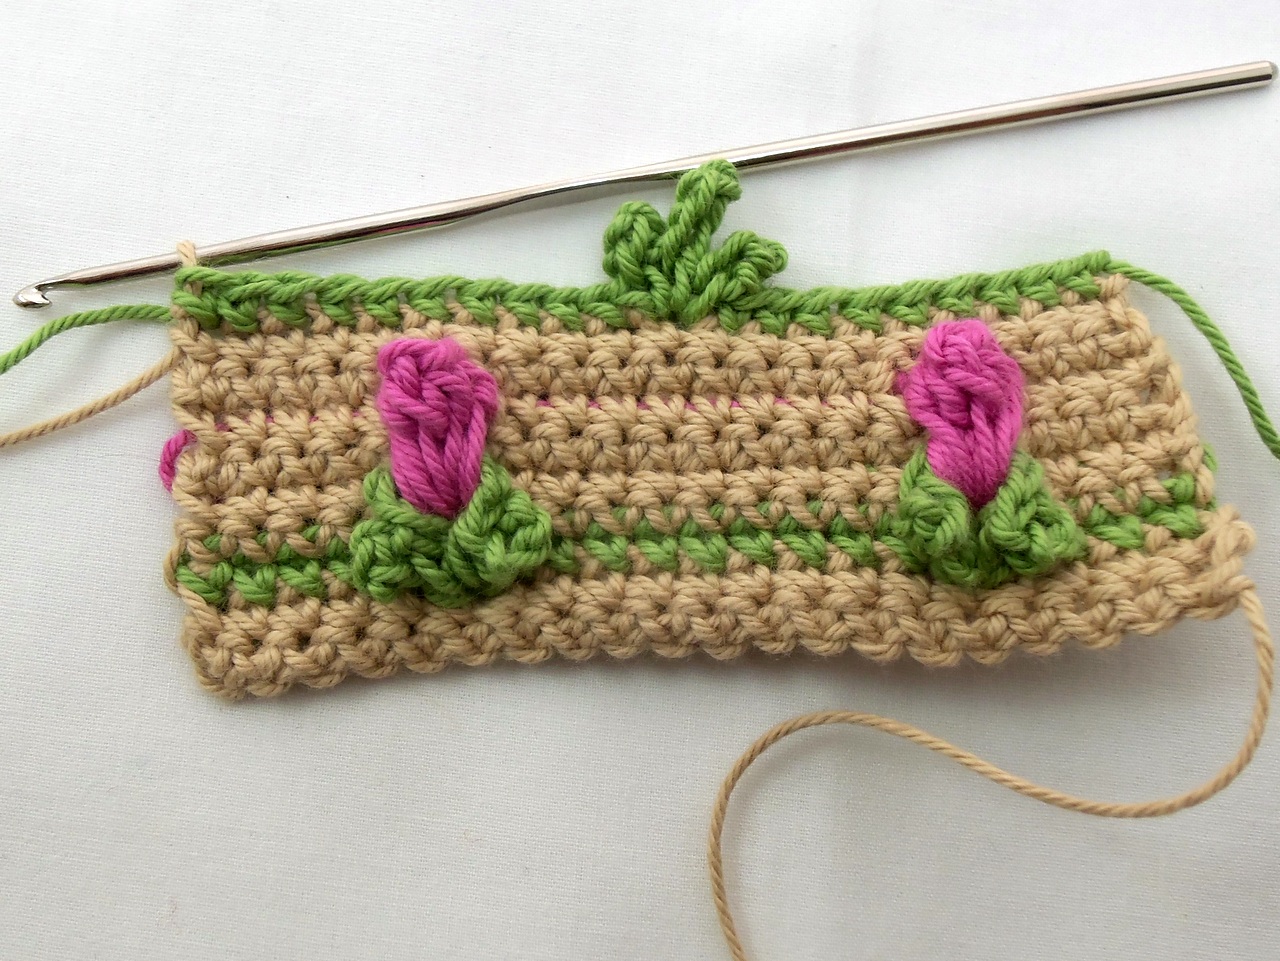
Start with a base row that has a multiple of ten stitches. Mine, shown here, is three rows of single crochet.
We’re going to start with one row of single crochet and the leaf stitches in color B. Hold the last stitch with a stitch marker so you can pick this color up again. Don’t turn your work. Start so the last stitch and yarn are off to the left (for righties) and the right side of the work is facing you.
Row 1: Leaves
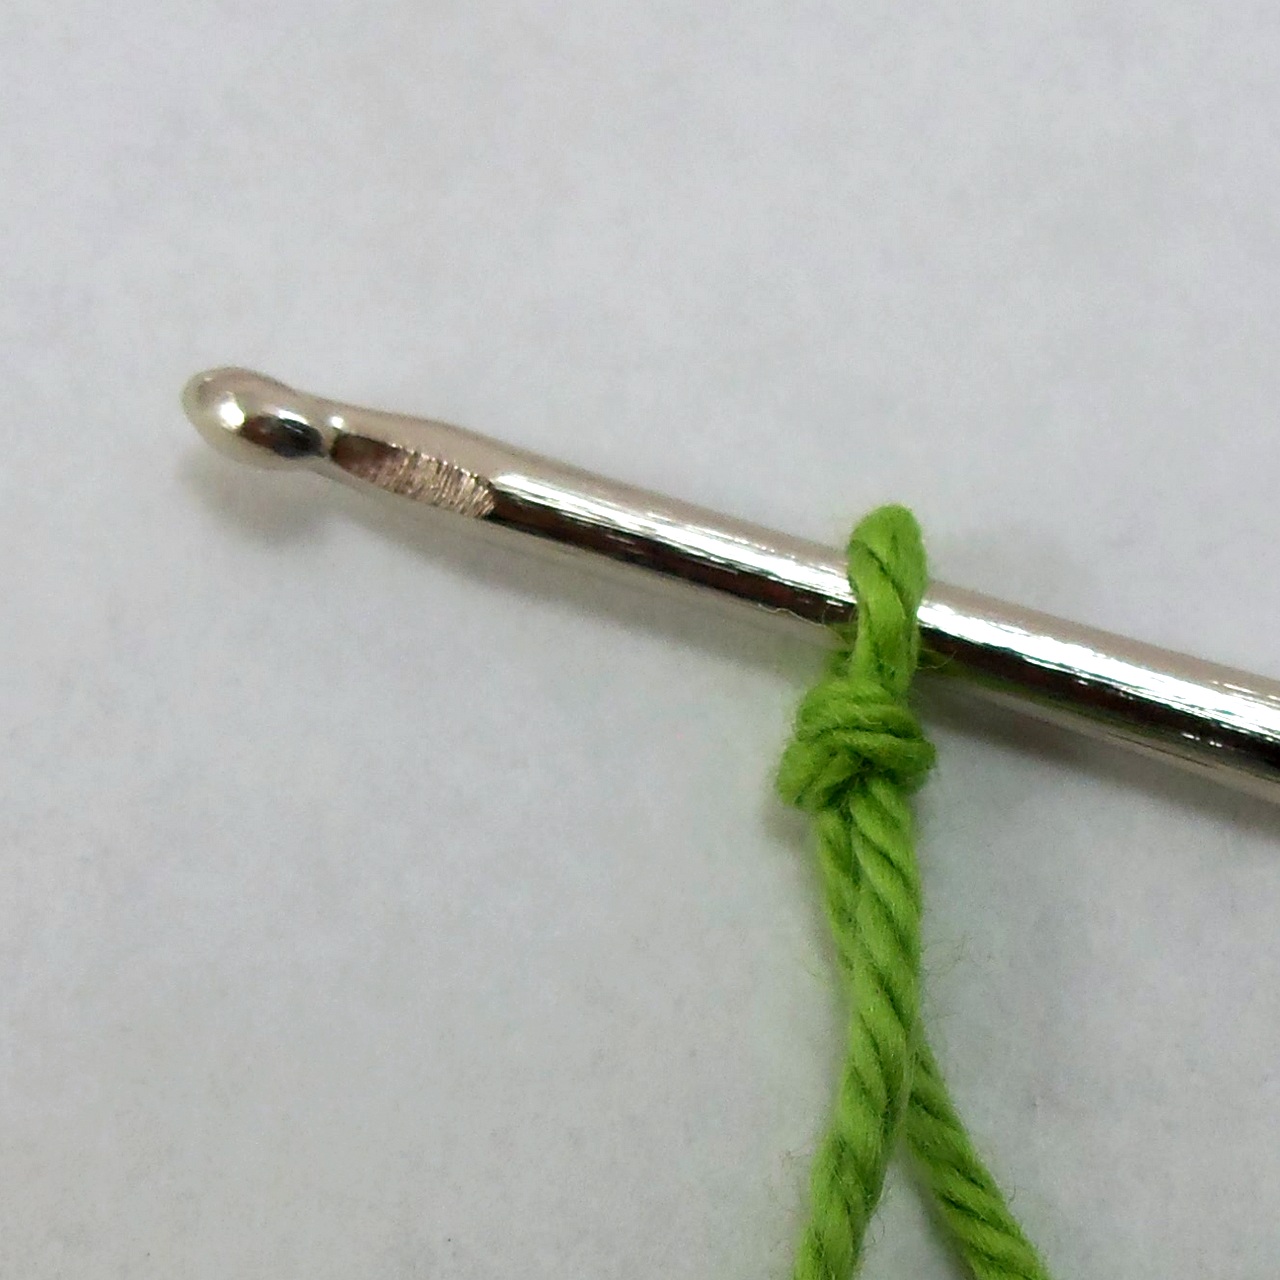
Start with a standing single crochet in the first stitch. Single crochet into the next three stitches.
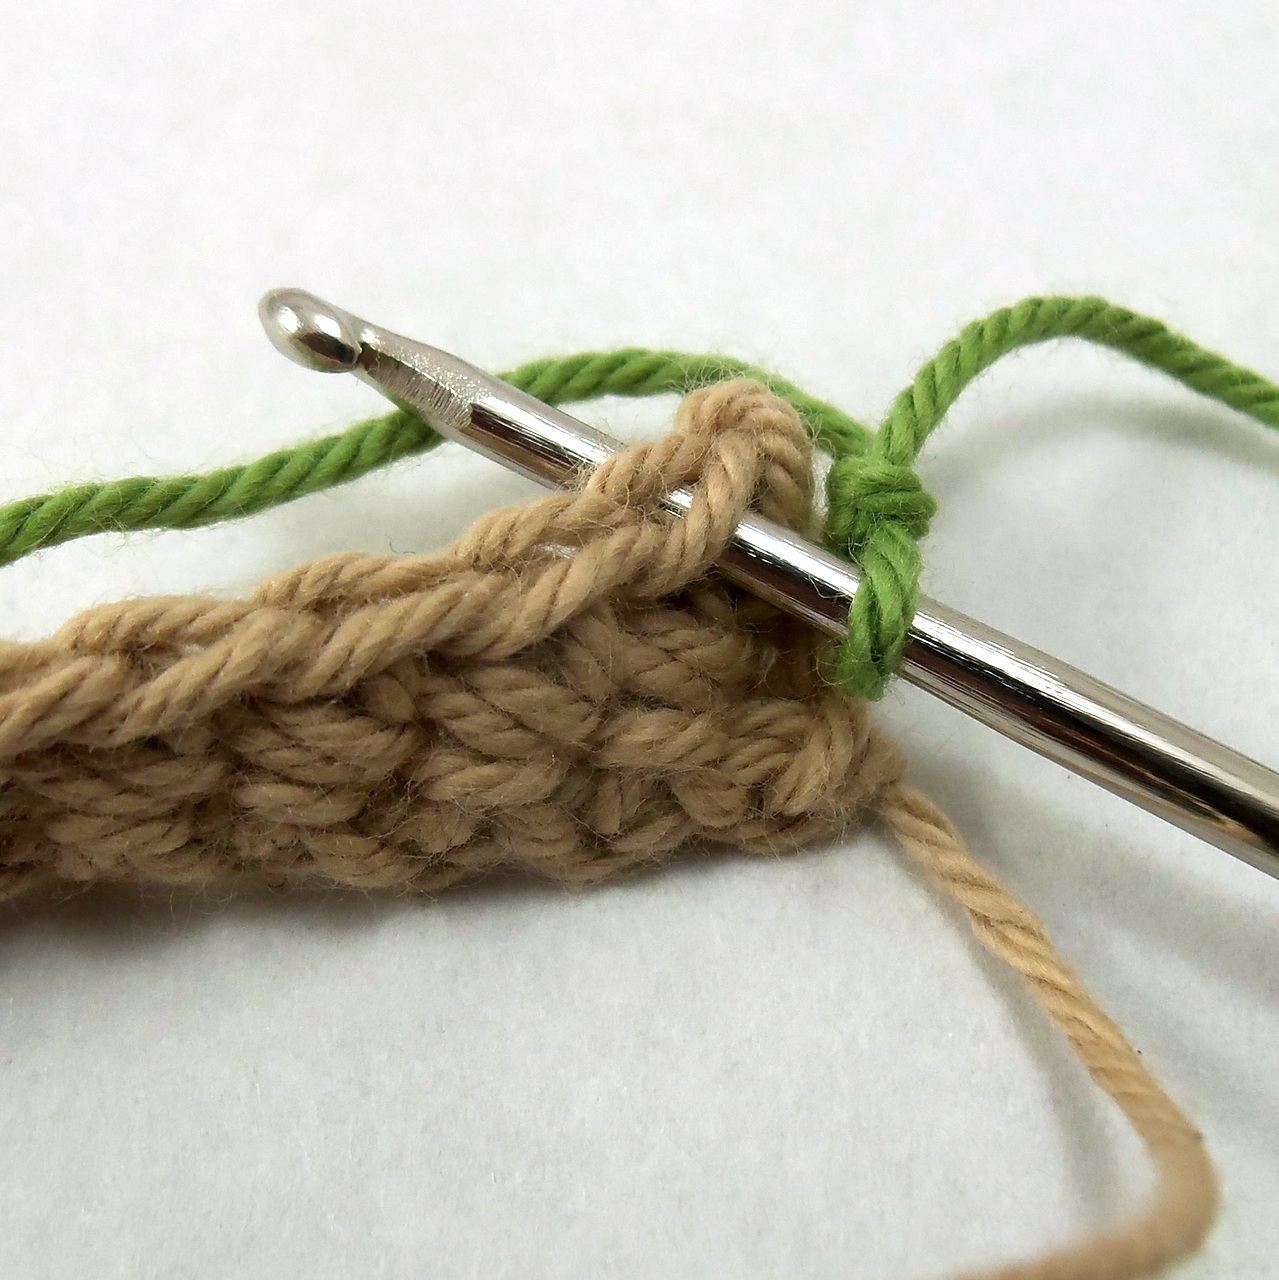
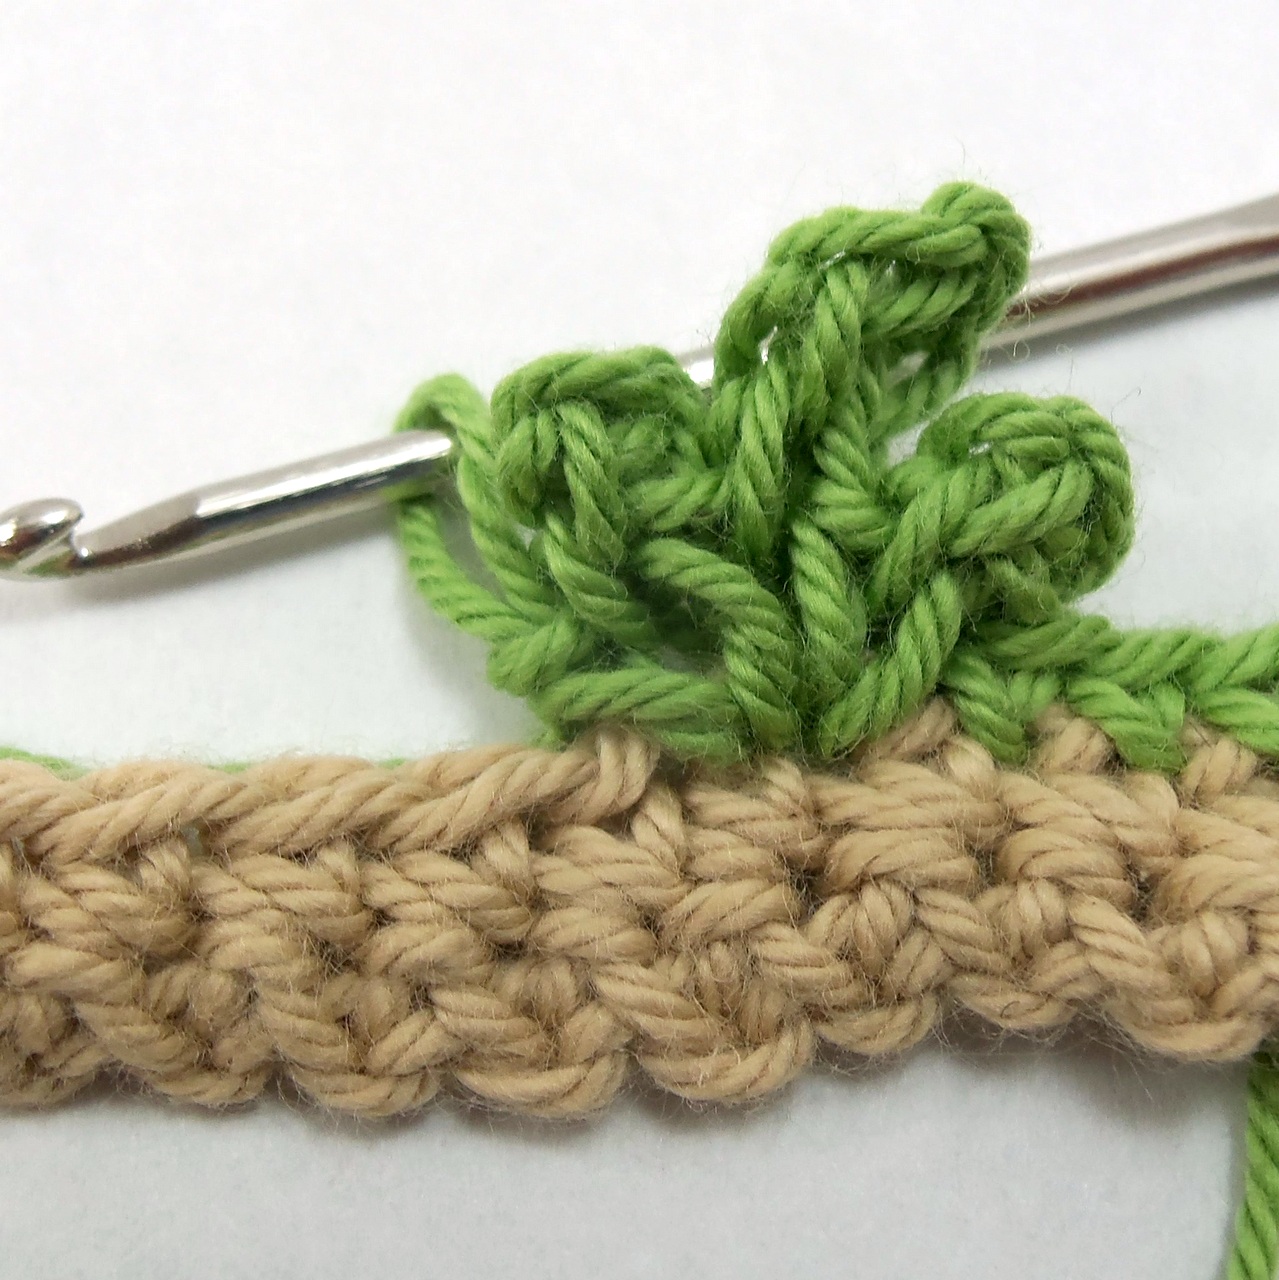
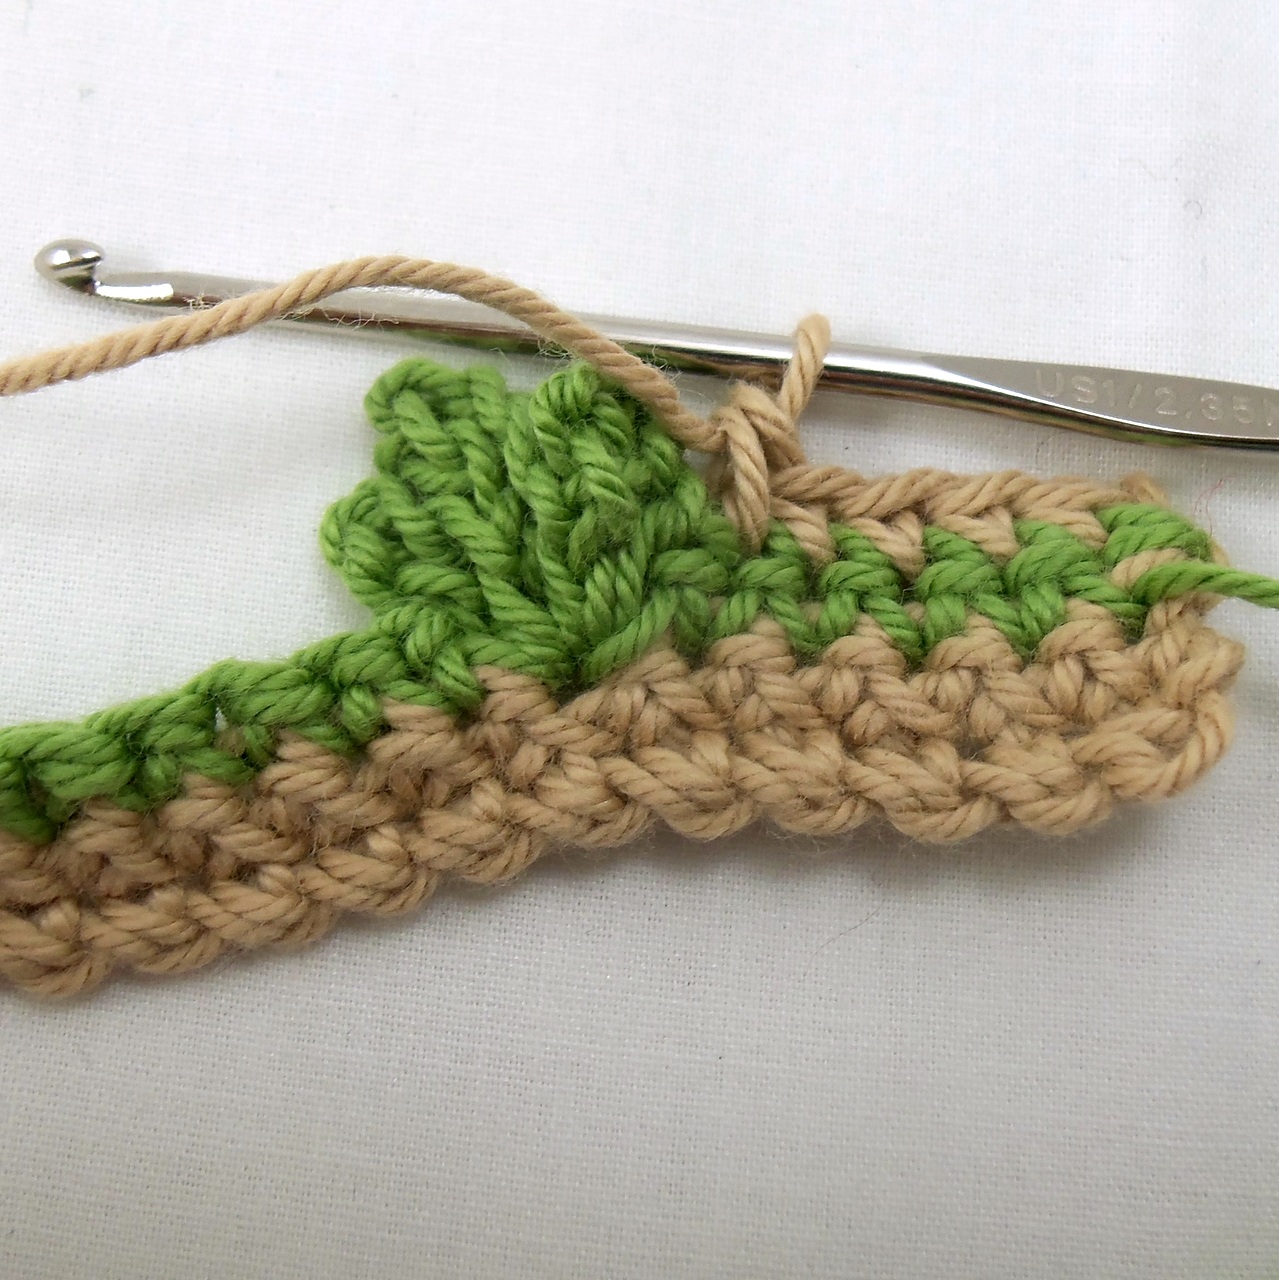
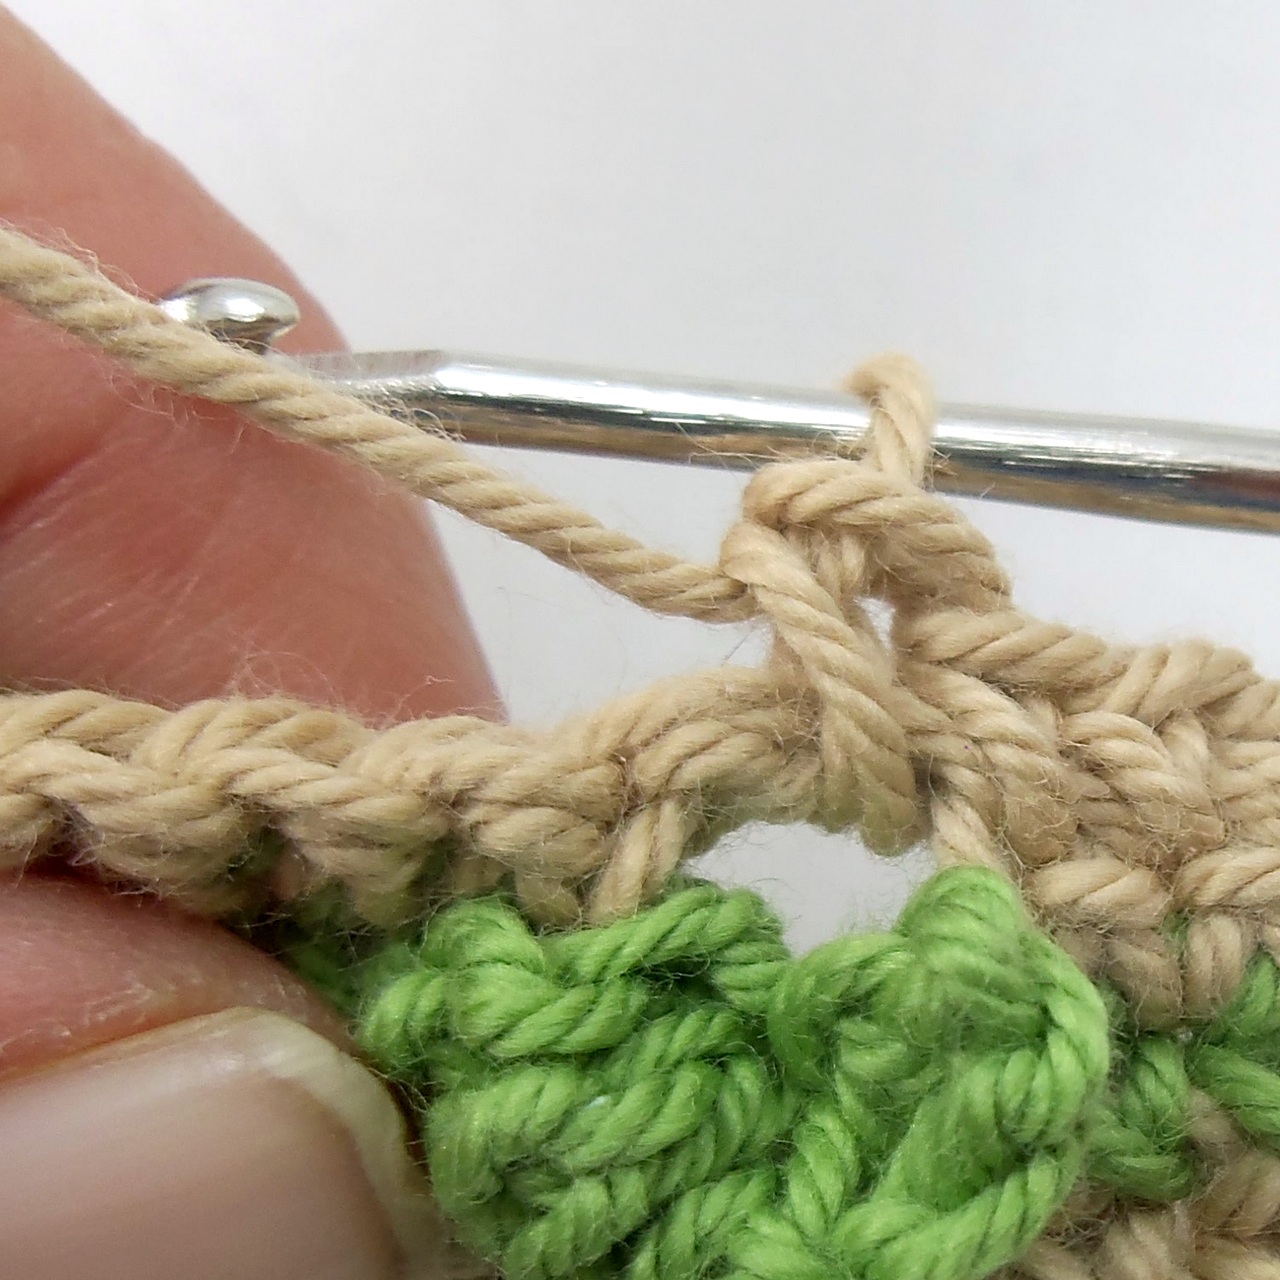
Leaf stitch: Now it’s time for the leaf stitch. Single crochet into the next (fifth) stitch and chain 4.
Single crochet into the same stitch. This will turn the CH 4 into a loop.
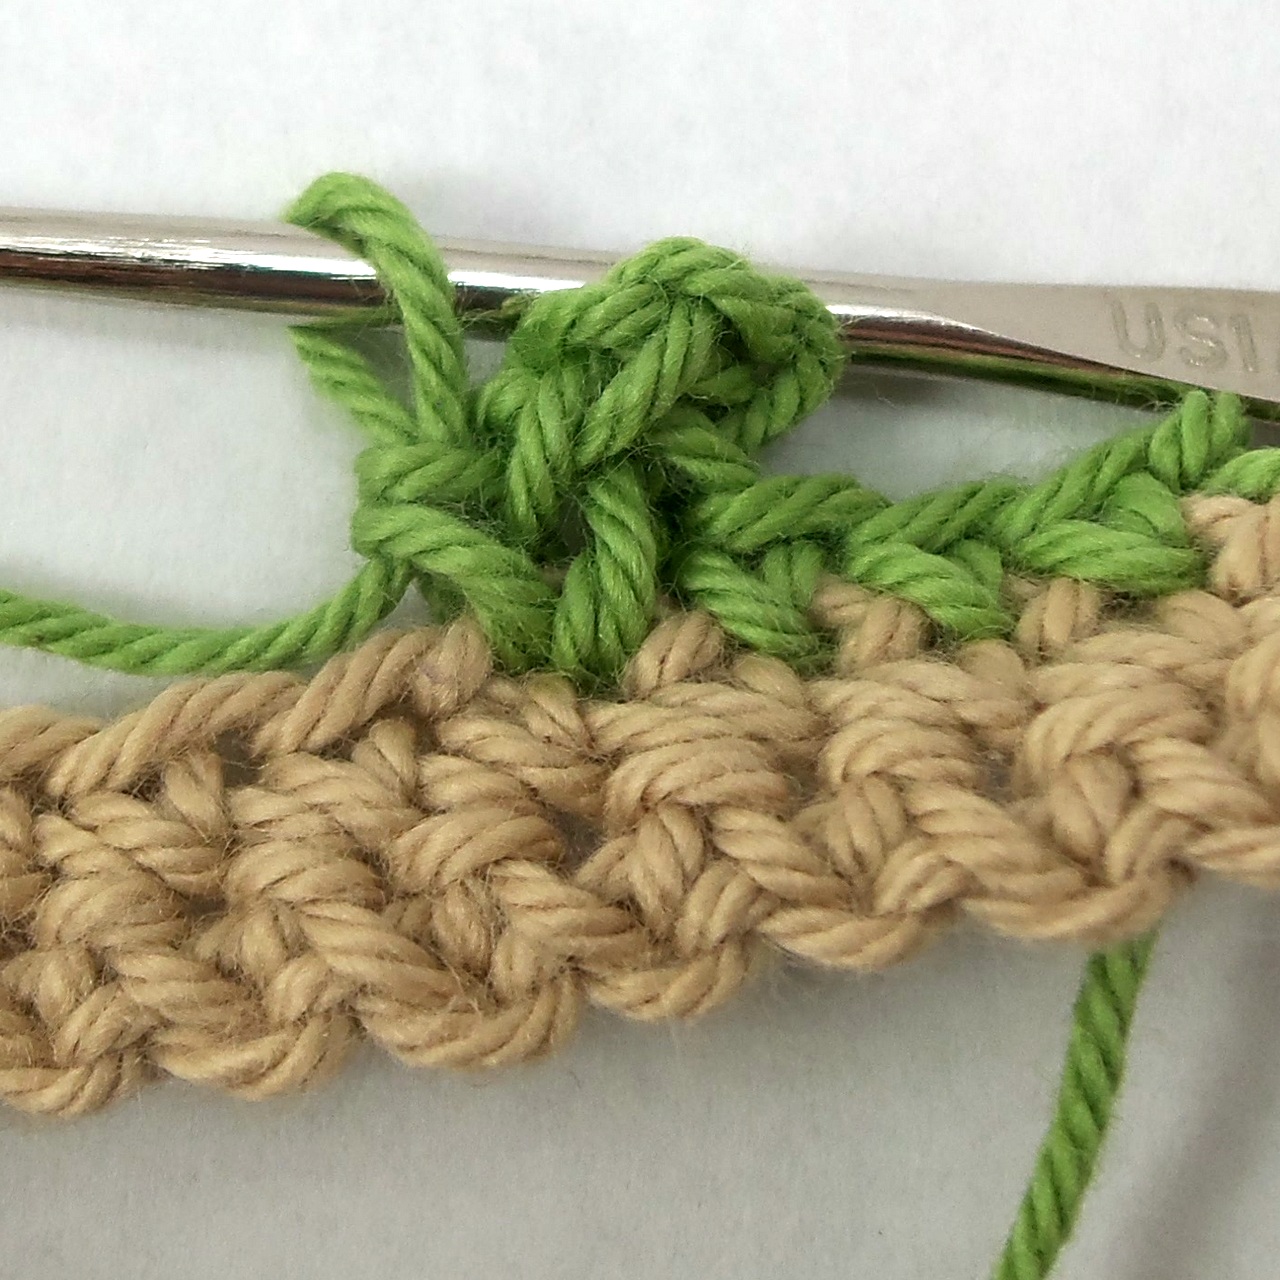
Chain 6 and single crochet into the same stitch.
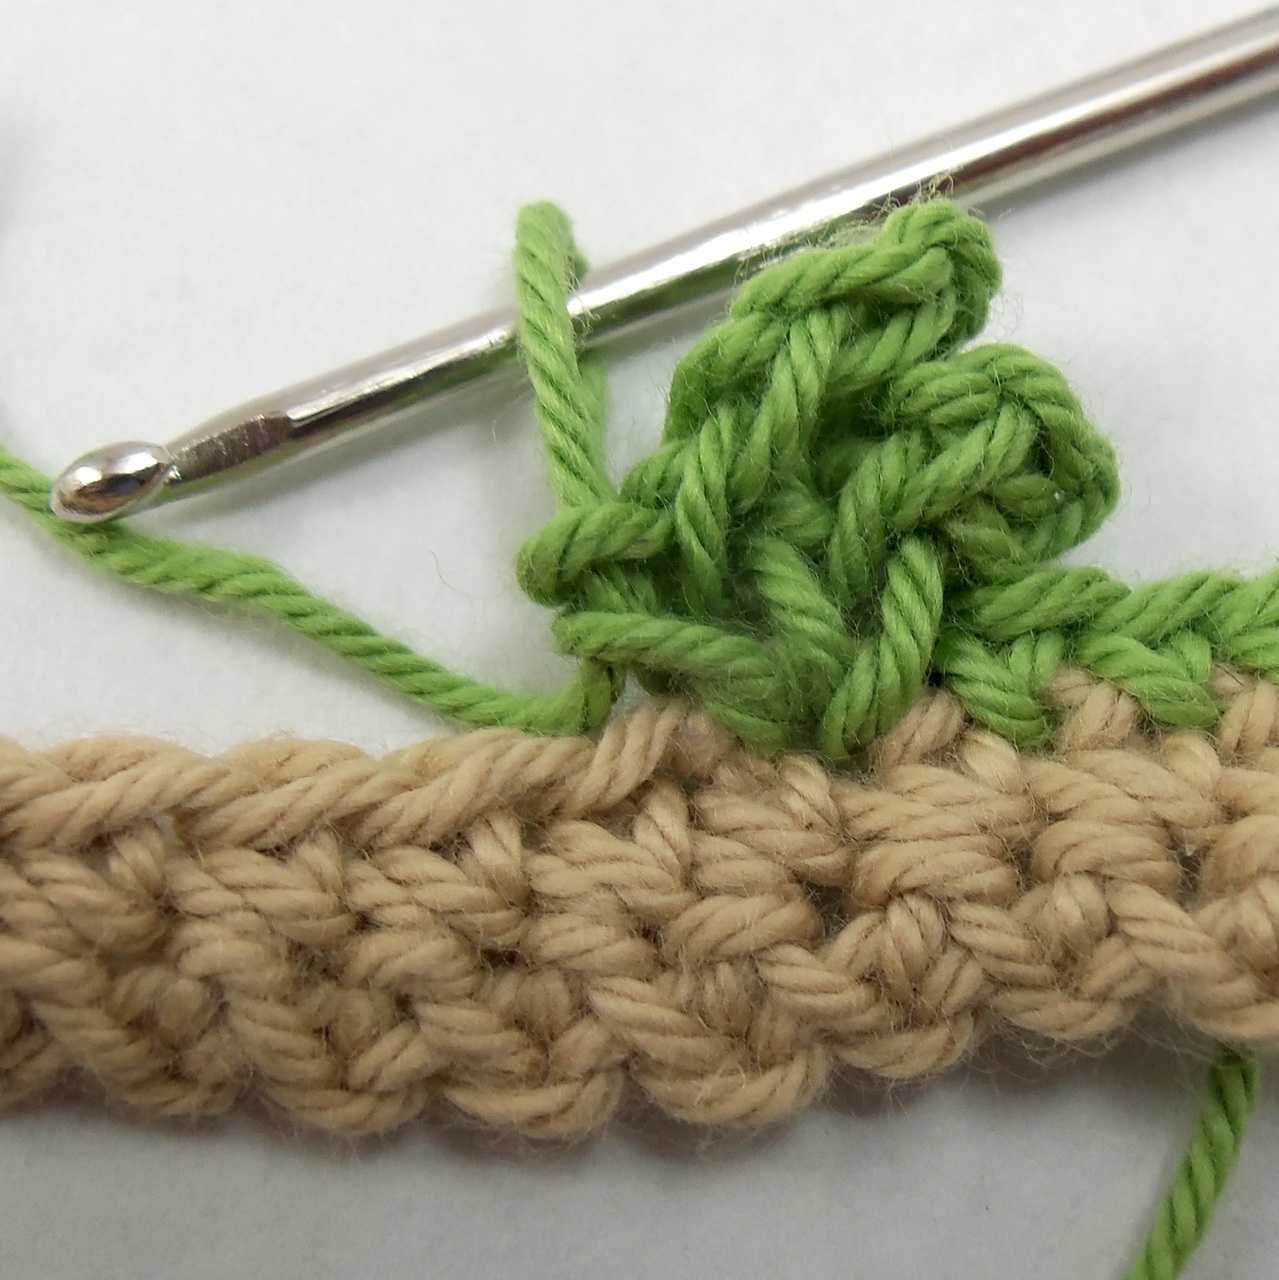
Chain 4 and single crochet into the same stitch. The leaf stitch is completed.
Single crochet into the next 9 stitches. Put a leaf stitch into the 10th stitch. Repeat [8 SC, 1 leaf stitch] until you are five stitches from the end of the row.
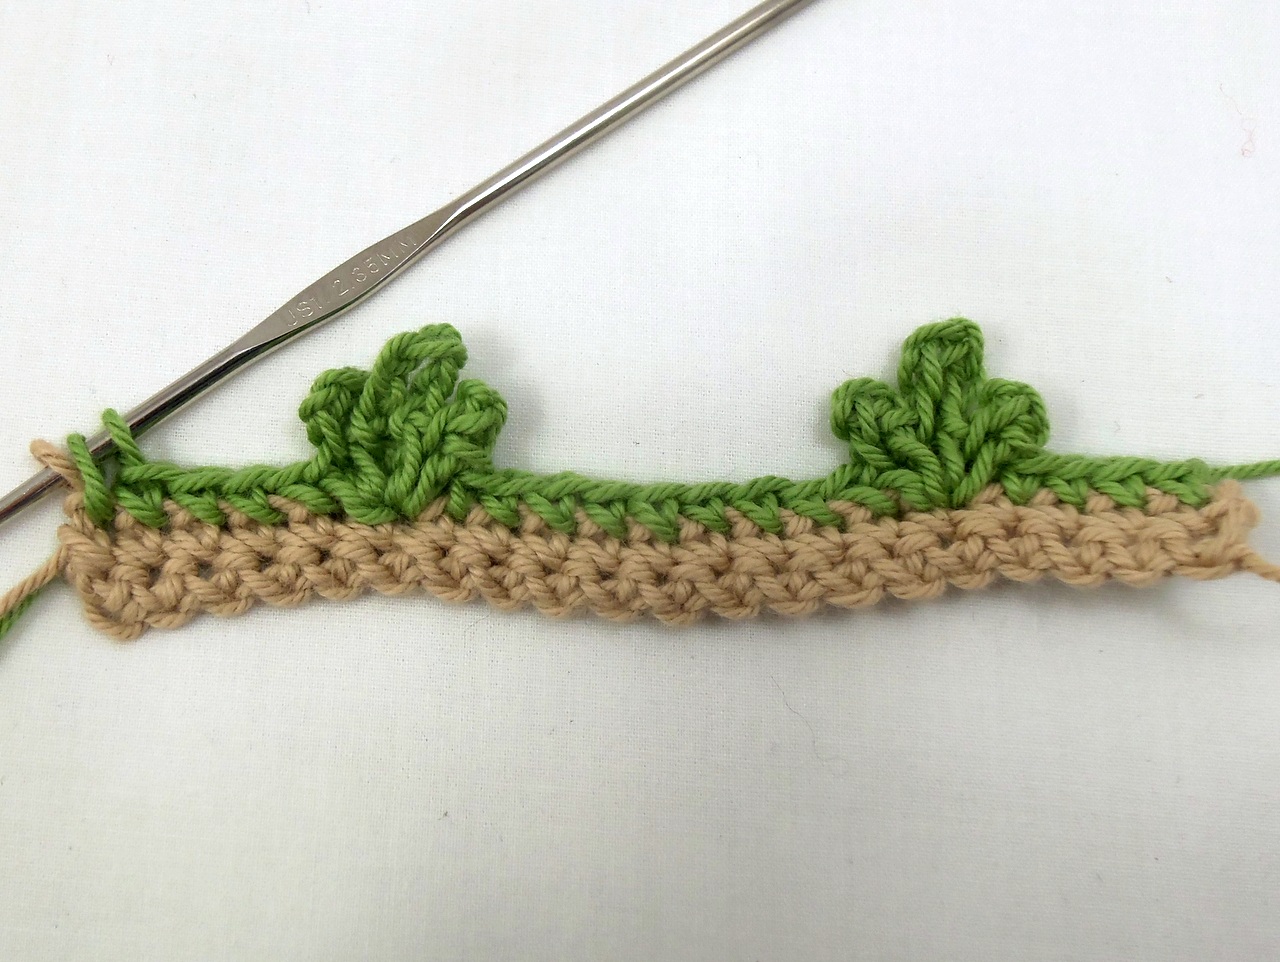
Single crochet into the next five stitches. On the last stitch, finish the stitch with color A (your background color). Cut off yarn color B and weave in the tail.

Row 2: Background
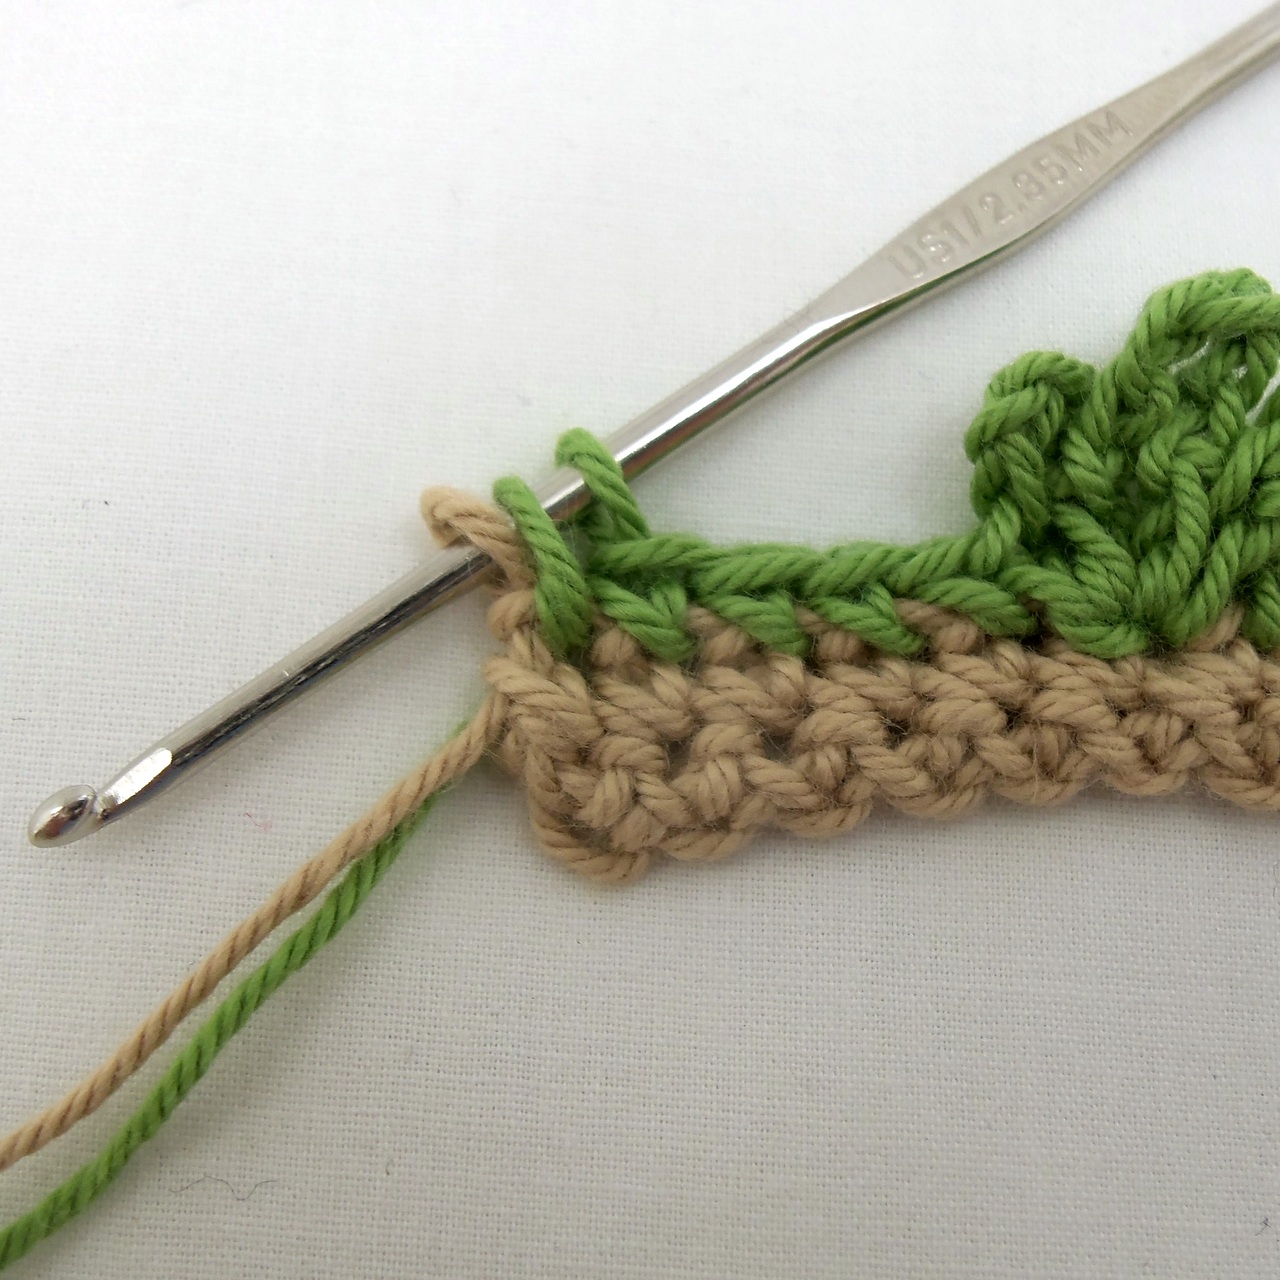
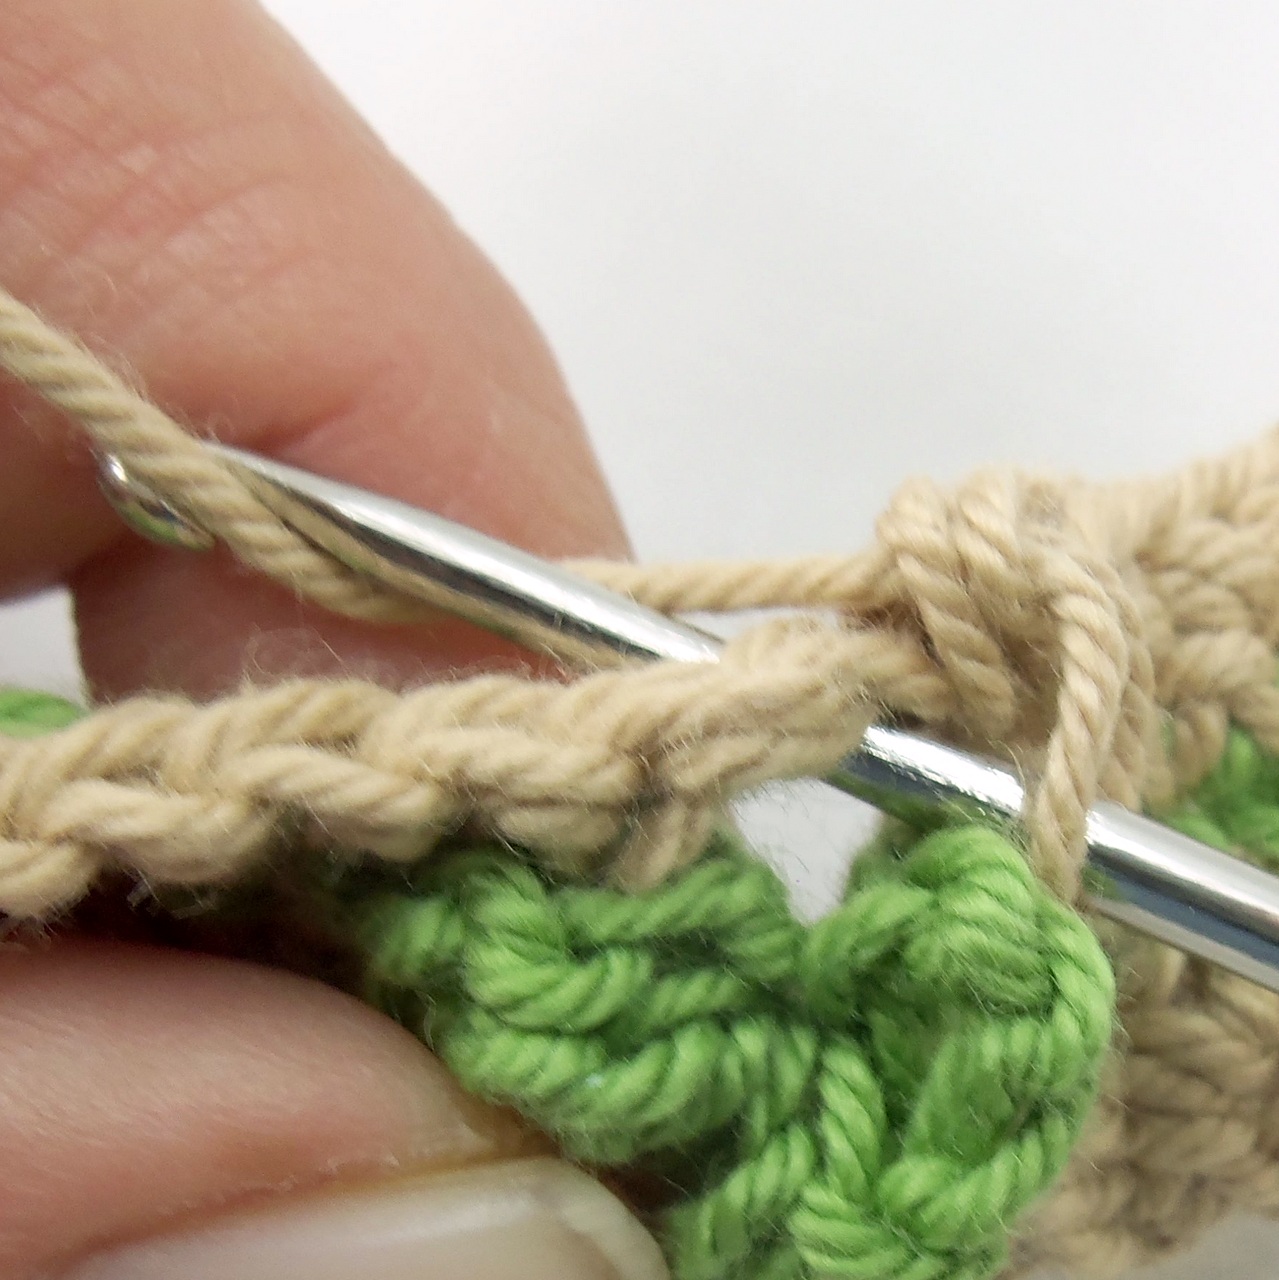
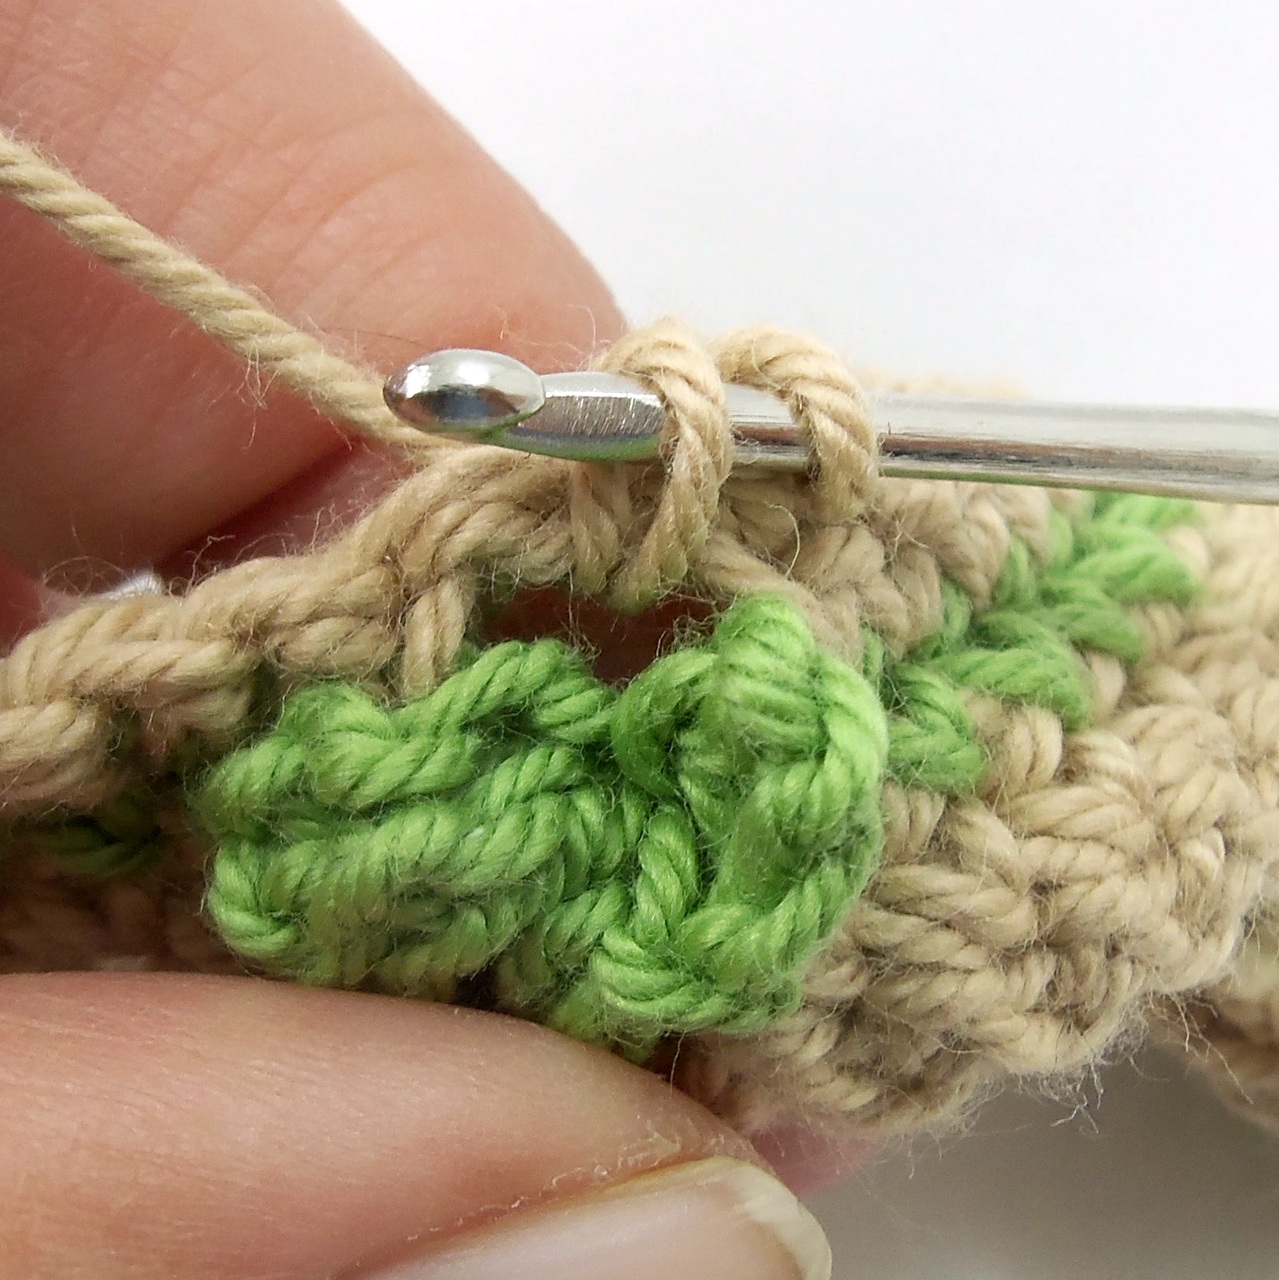
Chain 1 and turn (the wrong side of the work is now facing you). Single crochet into the next five stitches. The last stitch will be in the last SC before the leaf stitch.
Chain 1, skip over the leaf stitch and single crochet into the first stitch after the leaf, working in front of the leaf and pushing it towards the front of the work. [Single crochet into the next 8 stitches, chain one, skip the leaf stitch, single crochet into next stitch] until you reach the end of your leaves. Single crochet to the end (which should be five more stitches) and turn.

Single crochet across, putting one single crochet stitch into the CH1 spaces above the leaves.
Rows 3 & 4: Background
Add two more rows of single crochet.
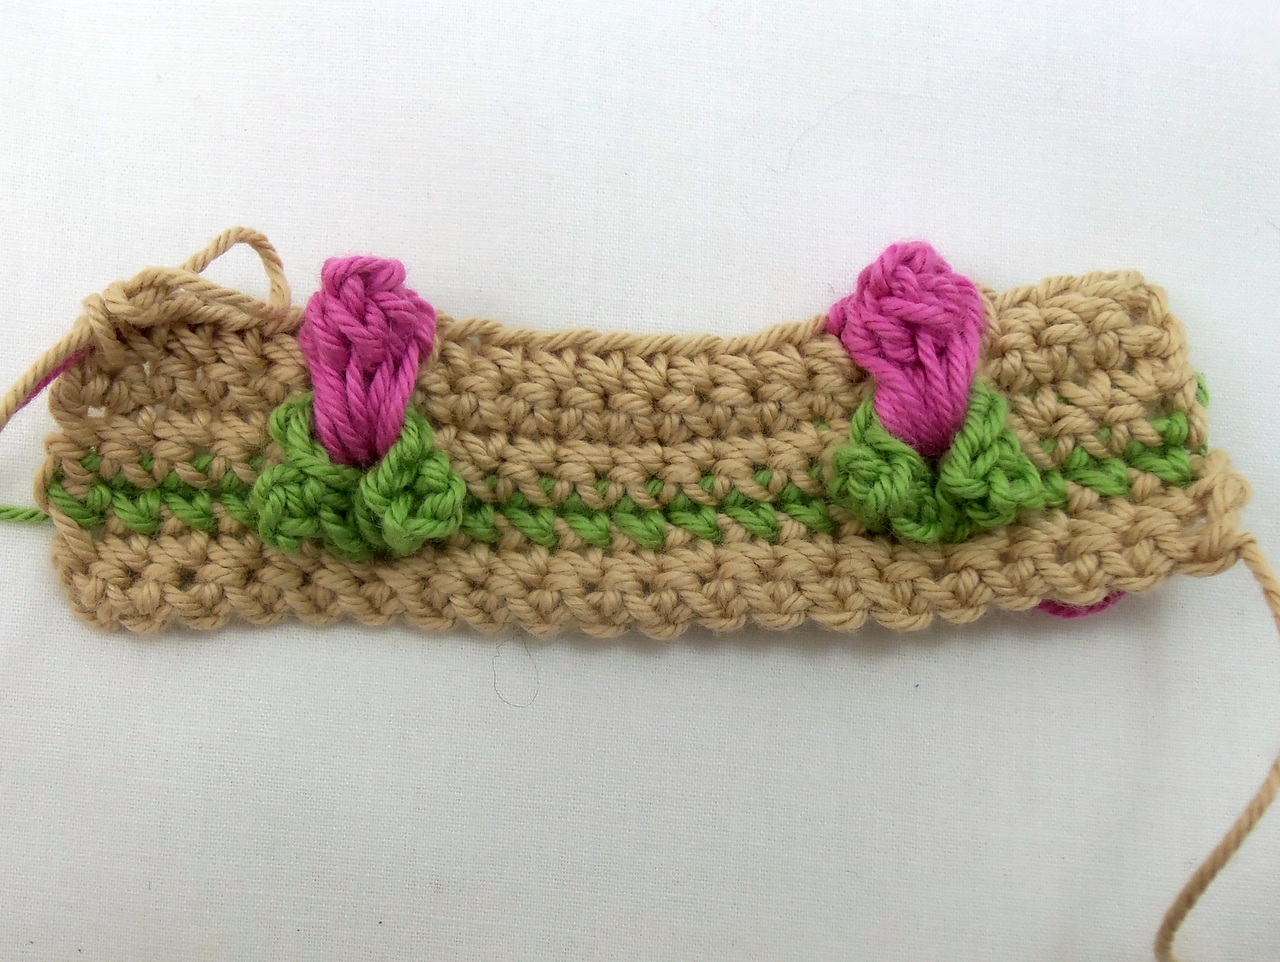
Row 5: Rosebuds
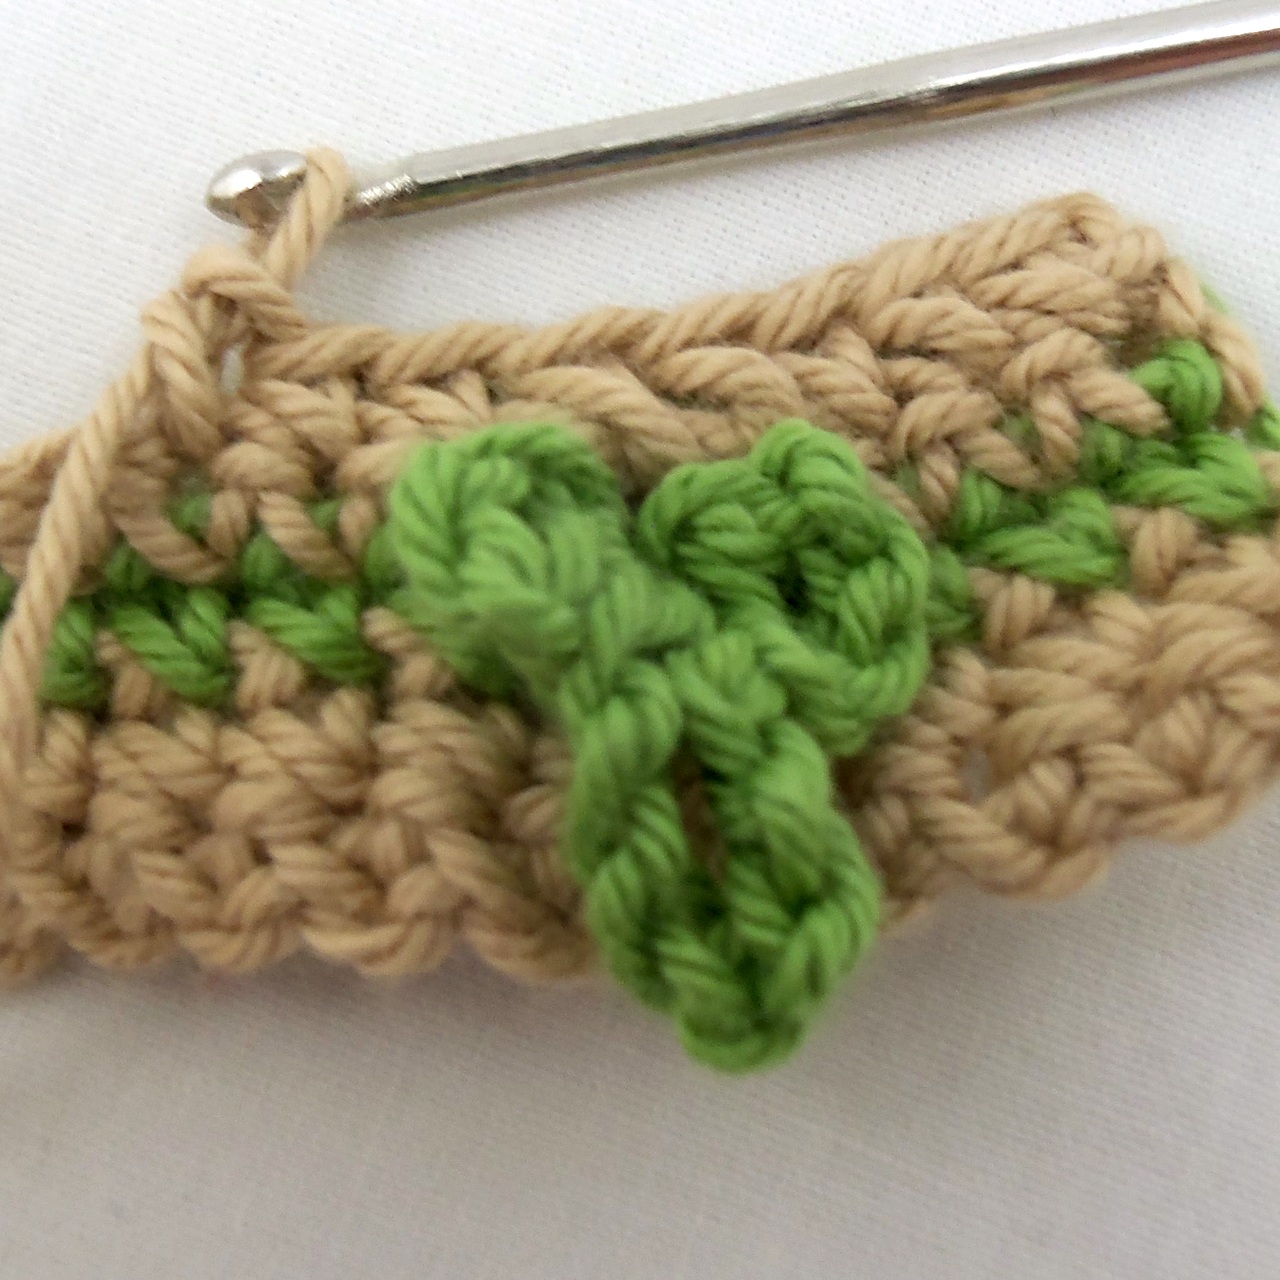
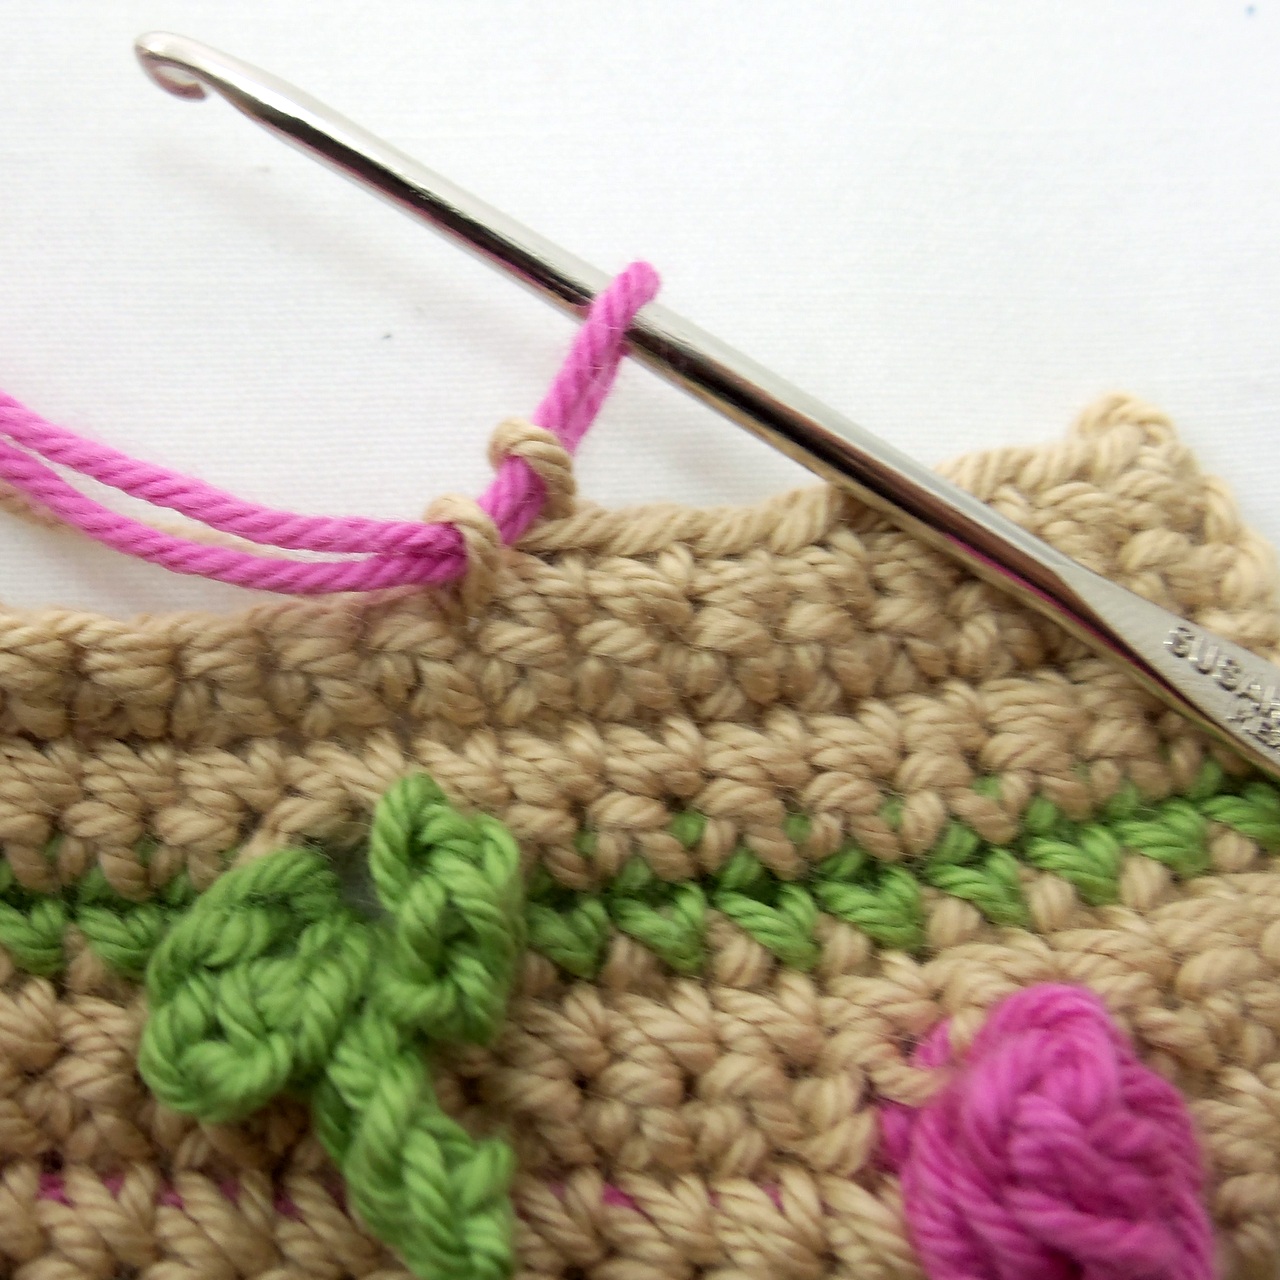
Chain 1 and turn. Single crochet into the first four stitches. Finish the fourth stitch with color C (the rosebud color).
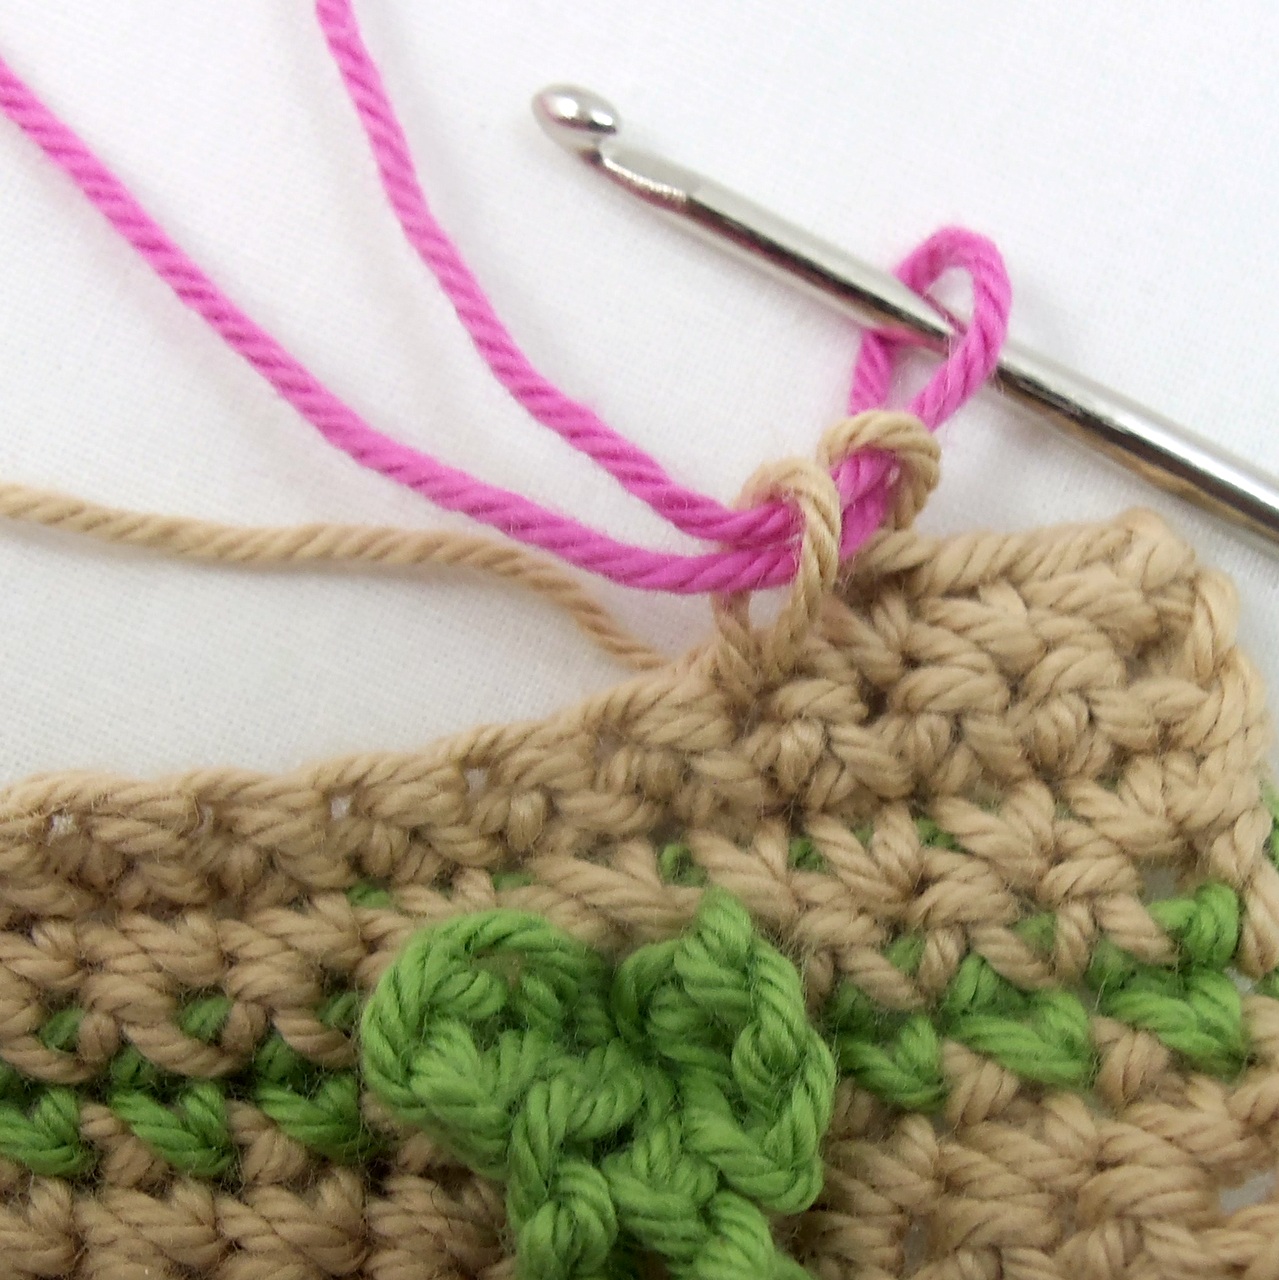
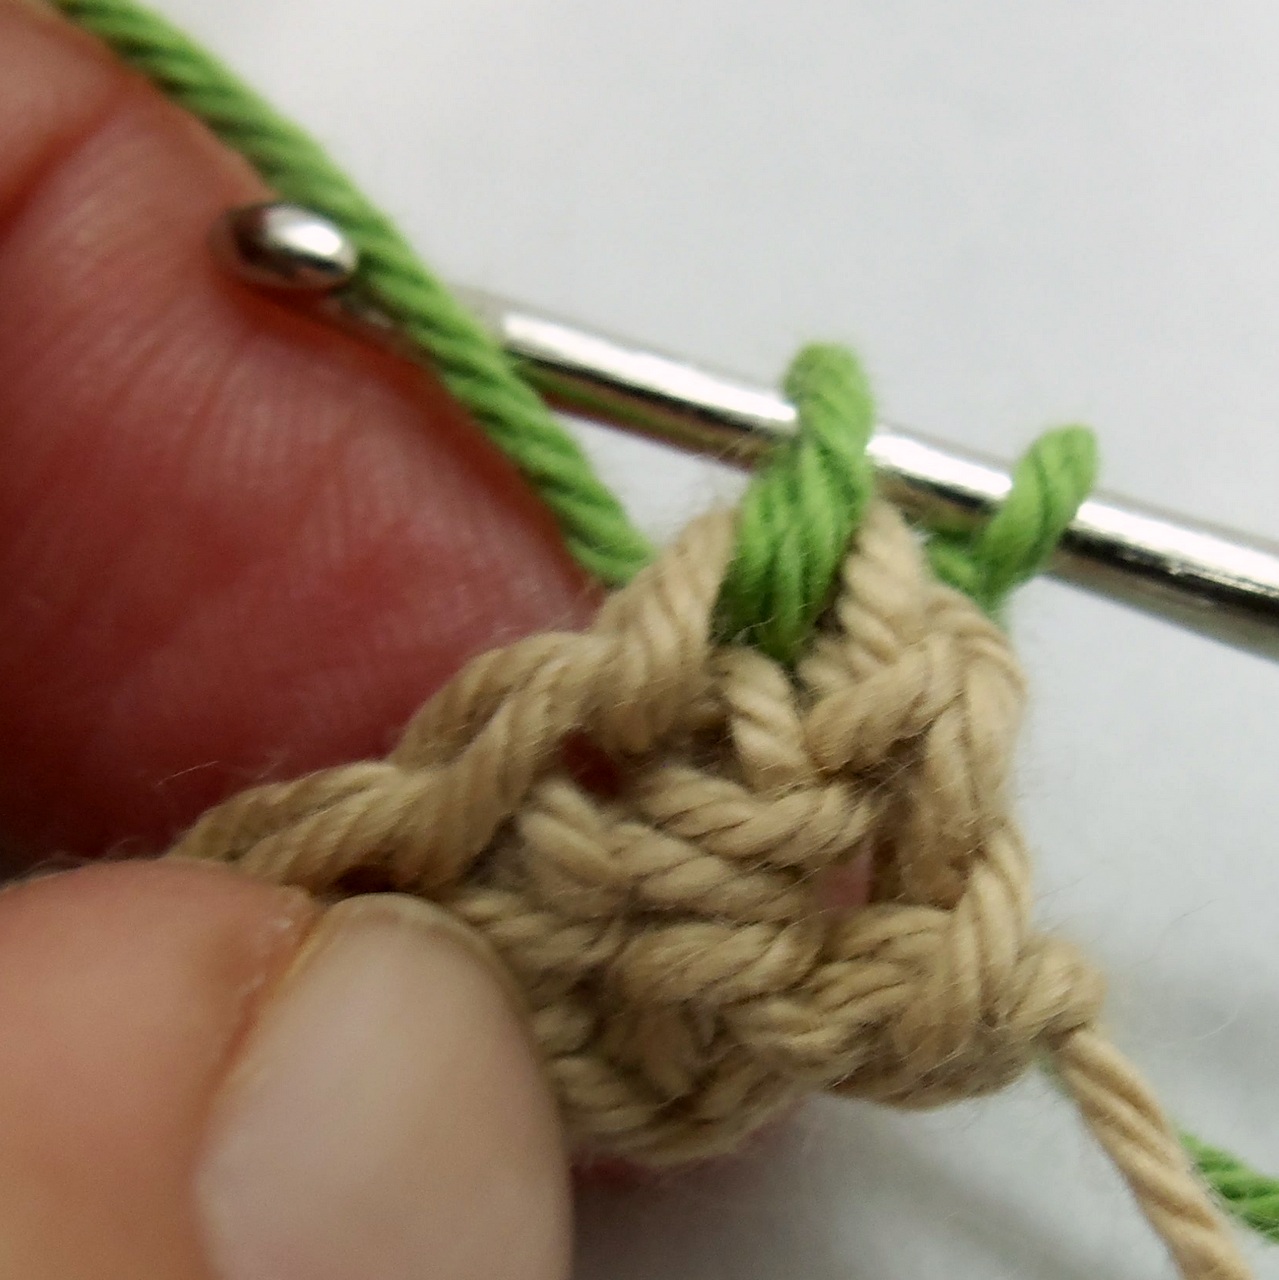
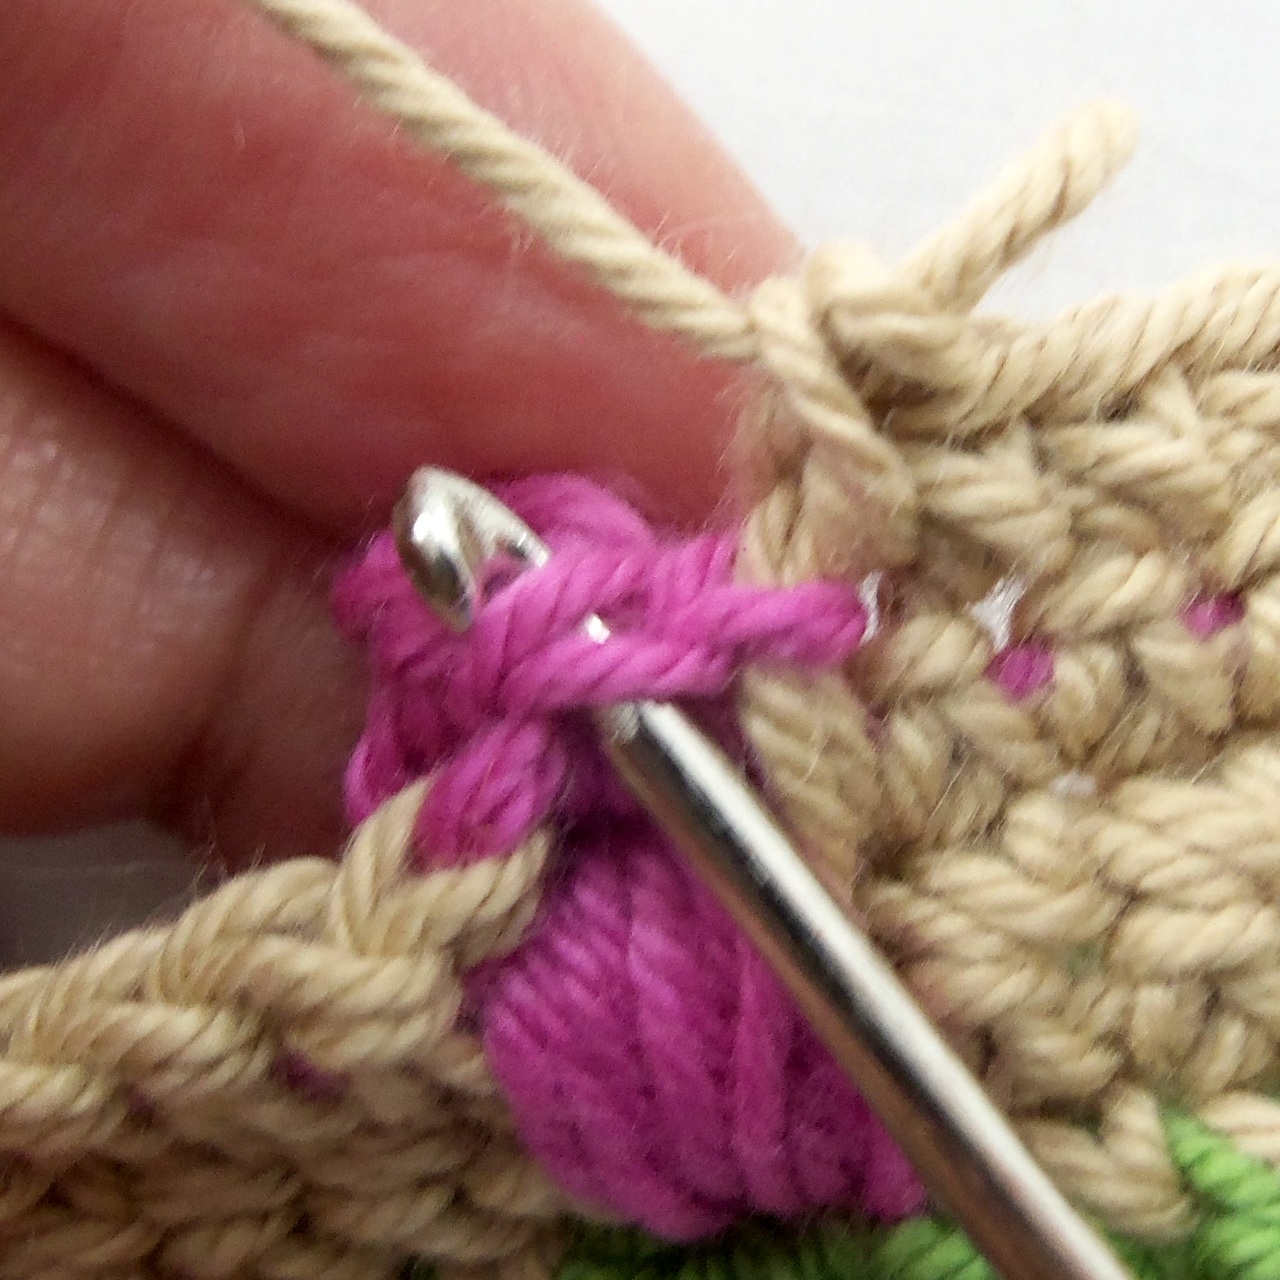
Rosebud Stitch: Double crochet spike stitch through the center CH 6 leaf and the CH 1 space above the leaf. The photos show where to insert the hook through the leaf and CH 1 space. Make sure to catch the loose color A yarn inside the stitch to hide it.
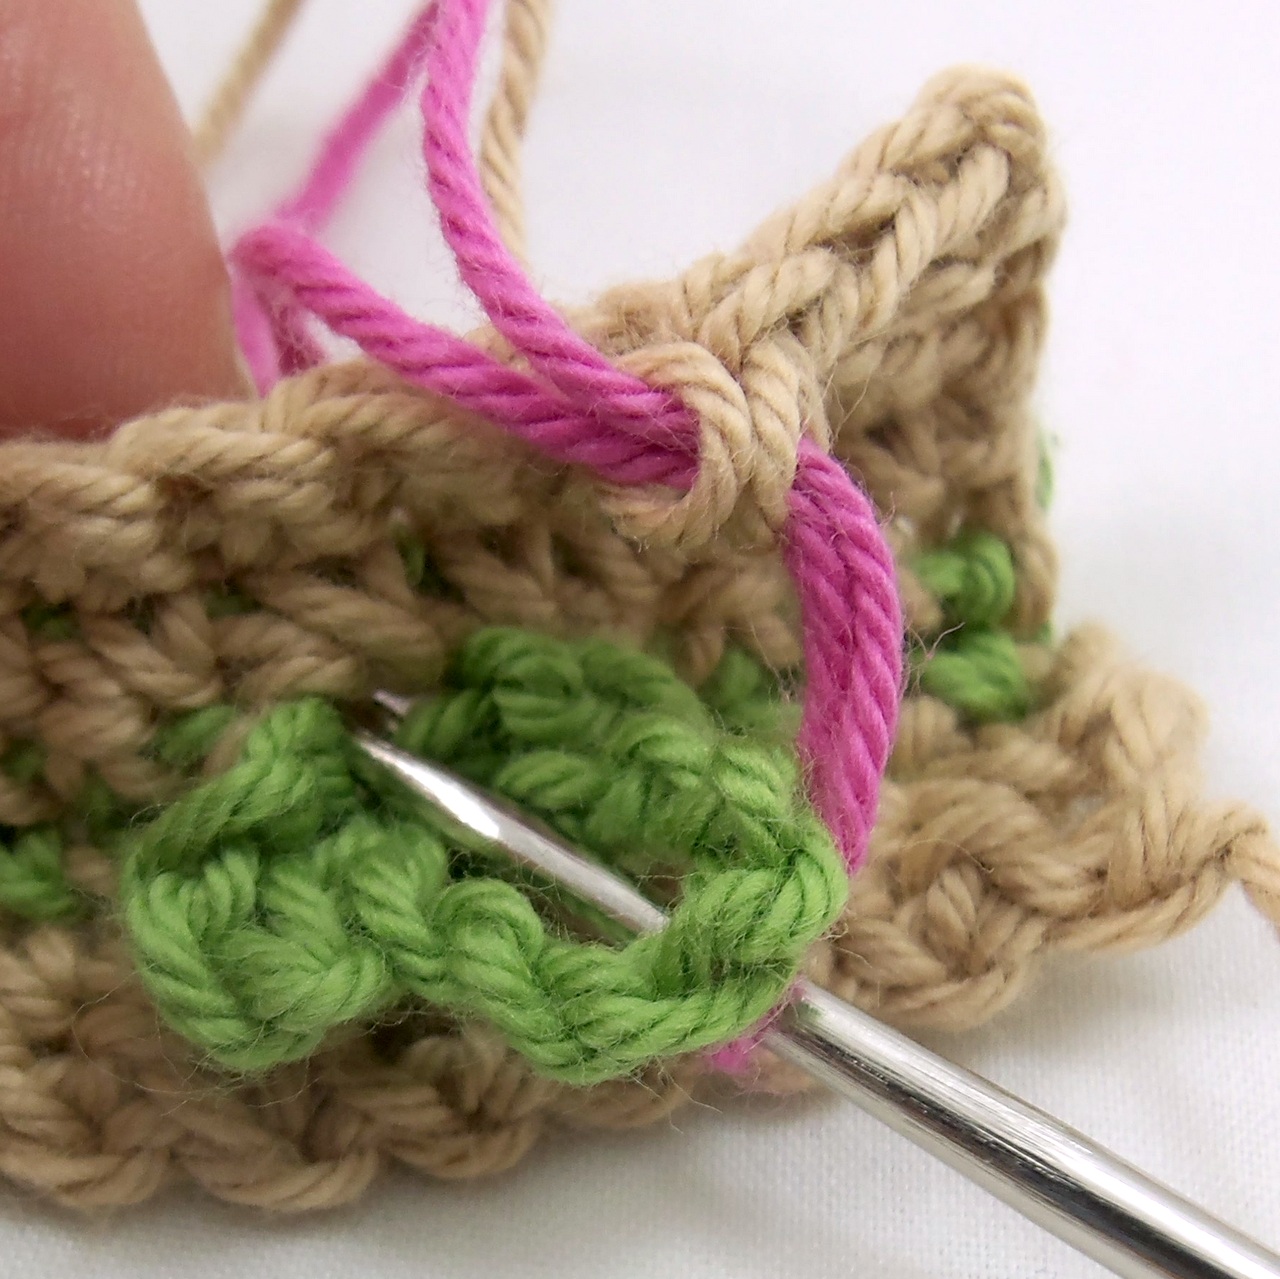

Double crochet spike stitch five more times into the same place (through the leaf and CH 1 space above the leaf) for a total of five stitches..
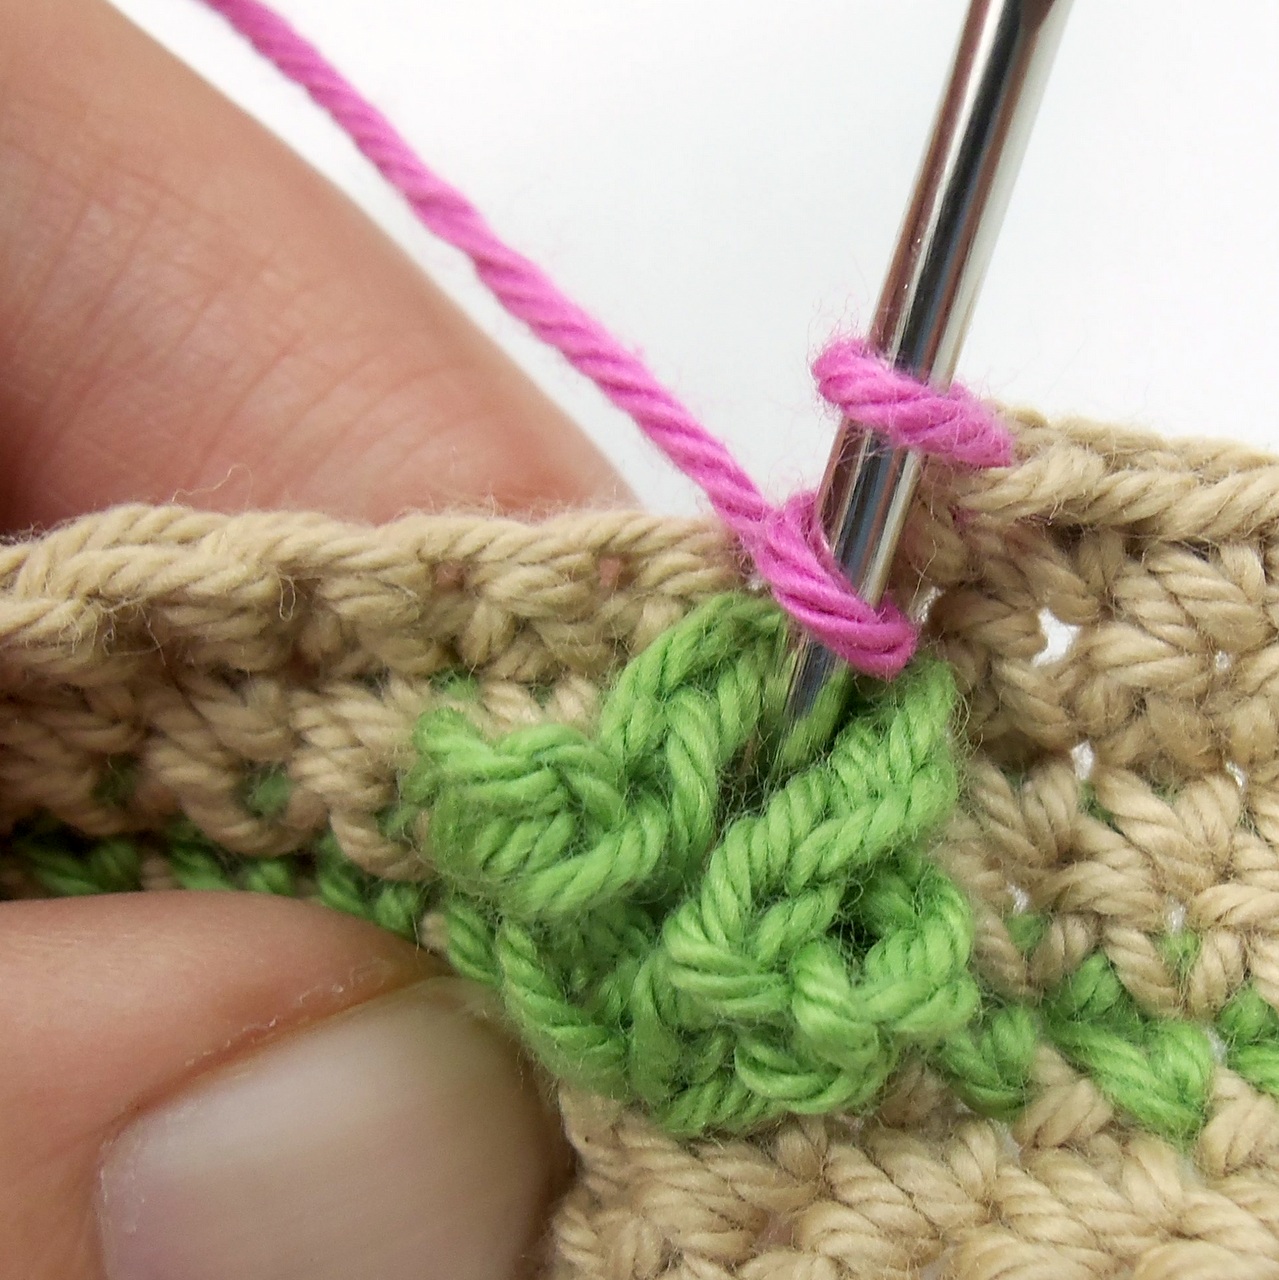
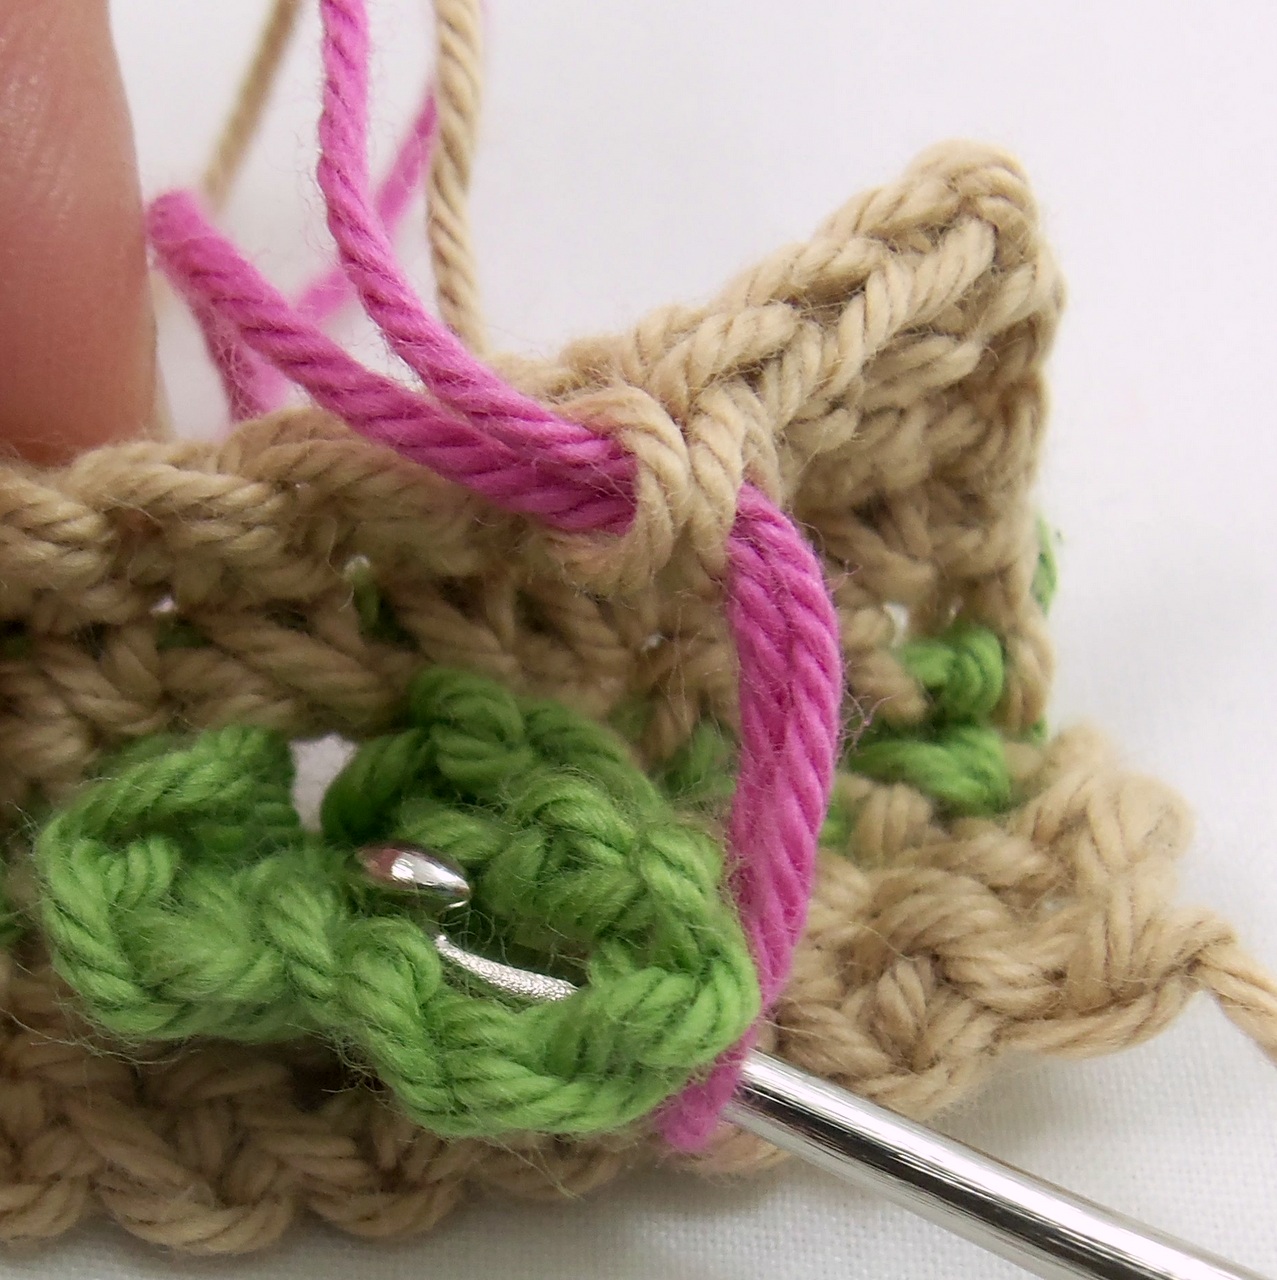
Pull your hook out. Insert it through the loops of the first stitch and through the loop of yarn from the last stitch.
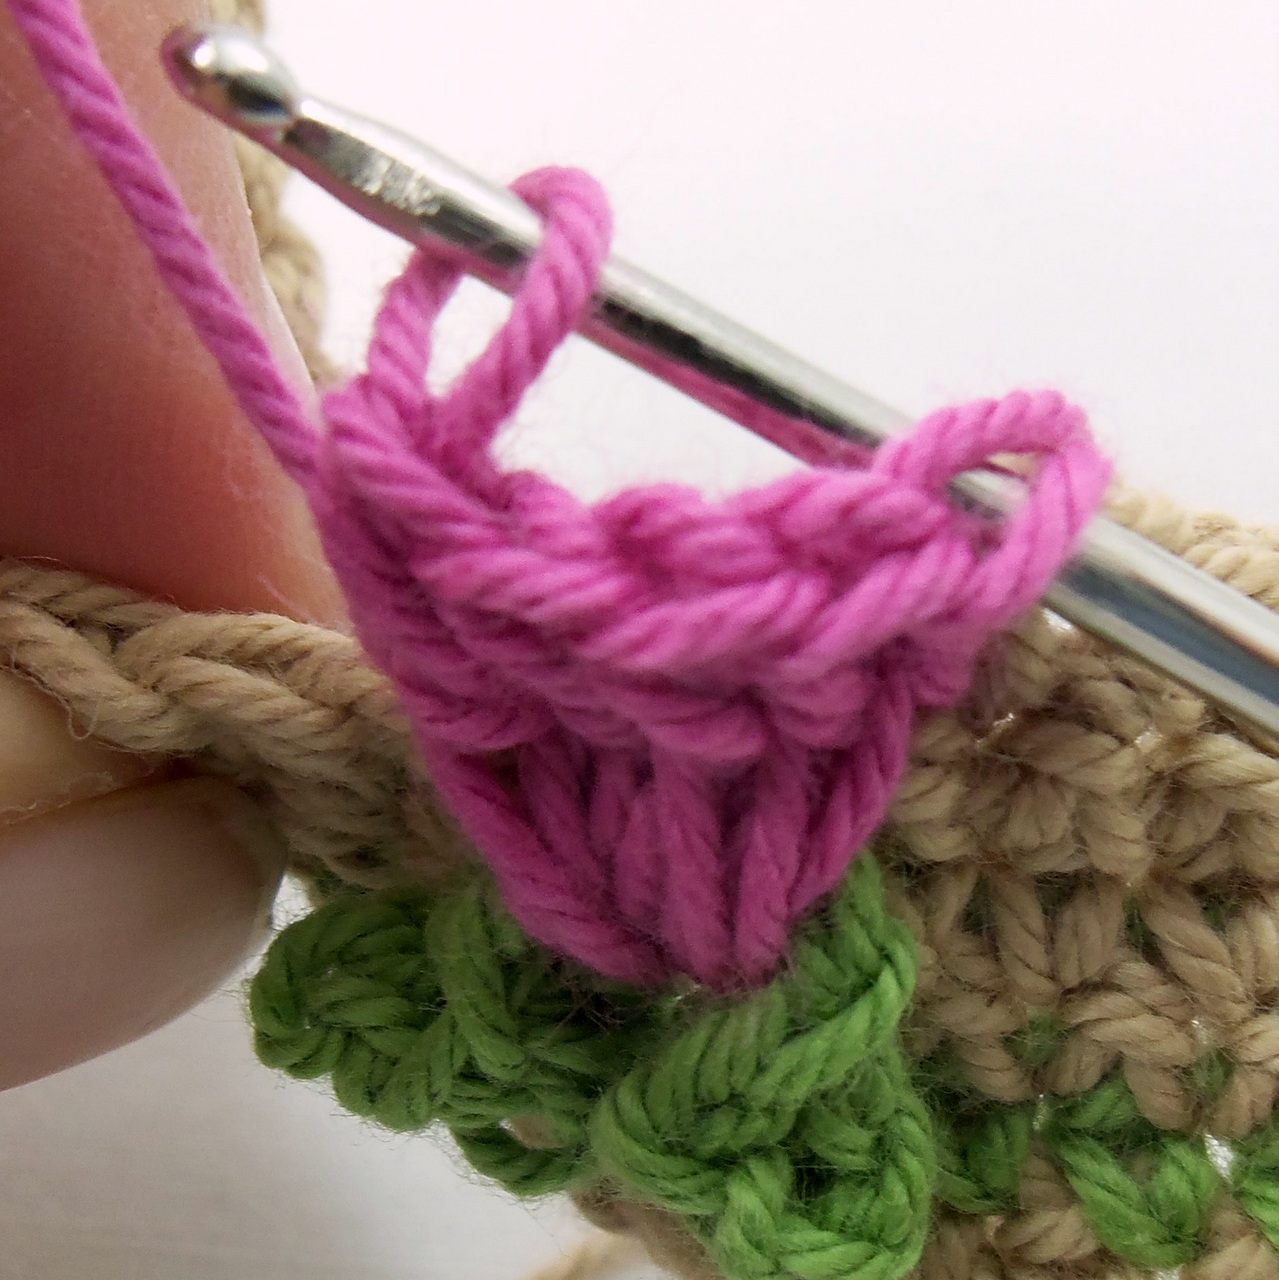
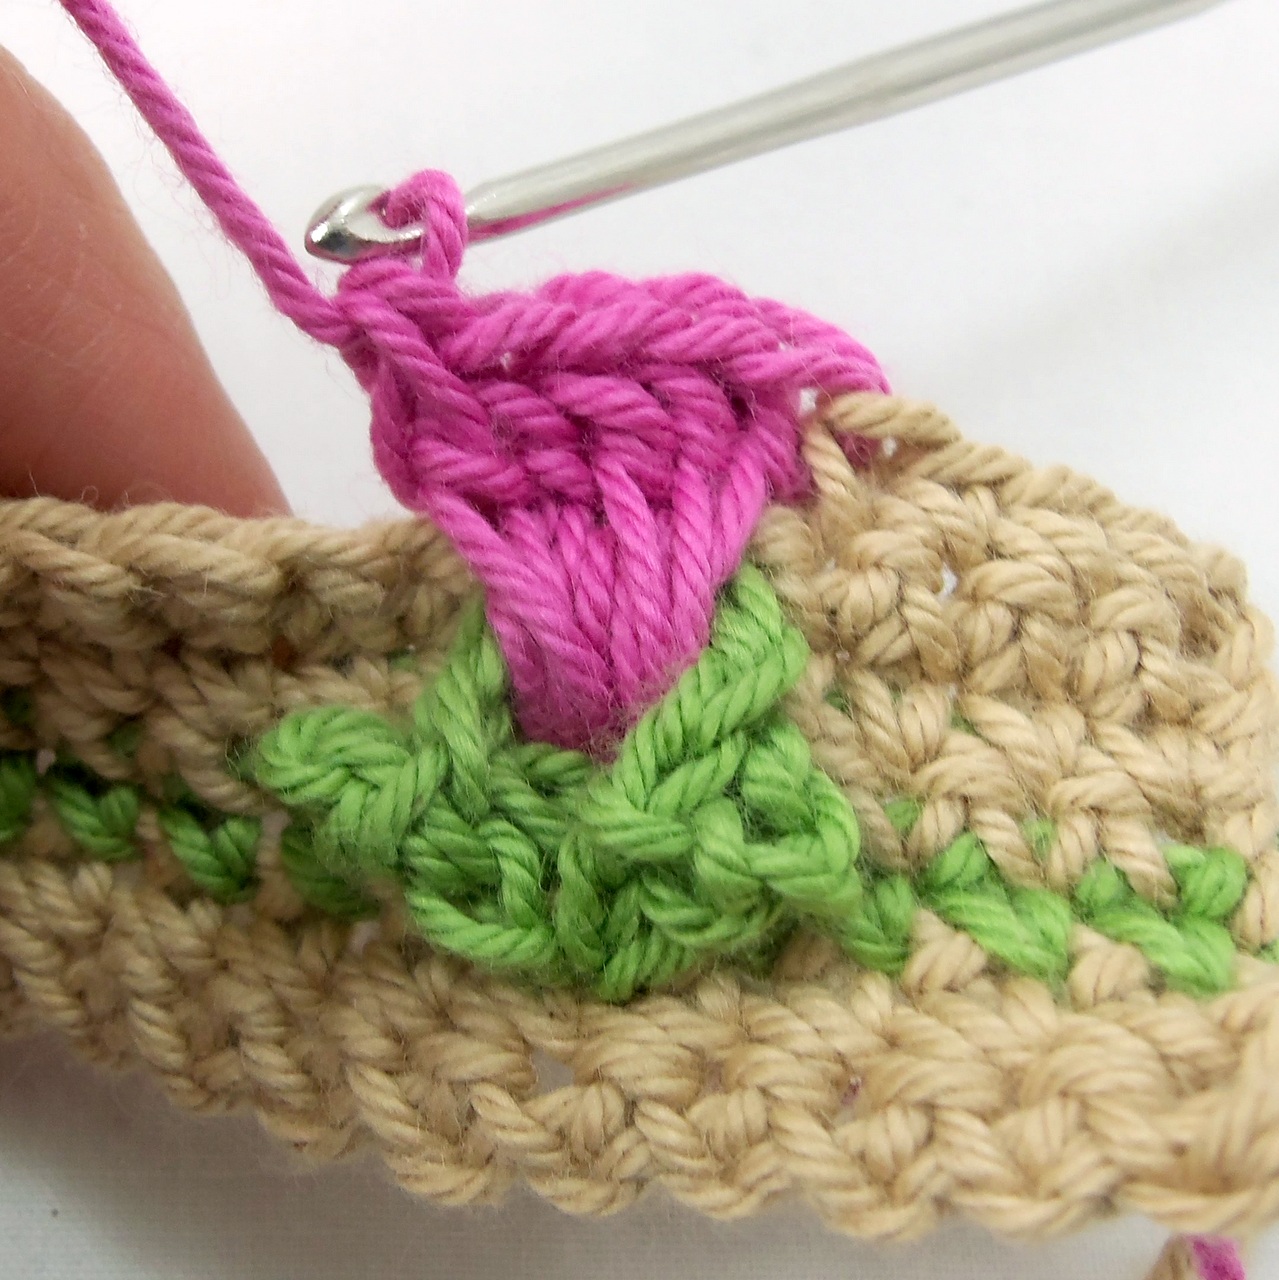
Pull the loop through the first stitch loops to close the rosebud. Make sure the rosebud bulges out away from the fabric.
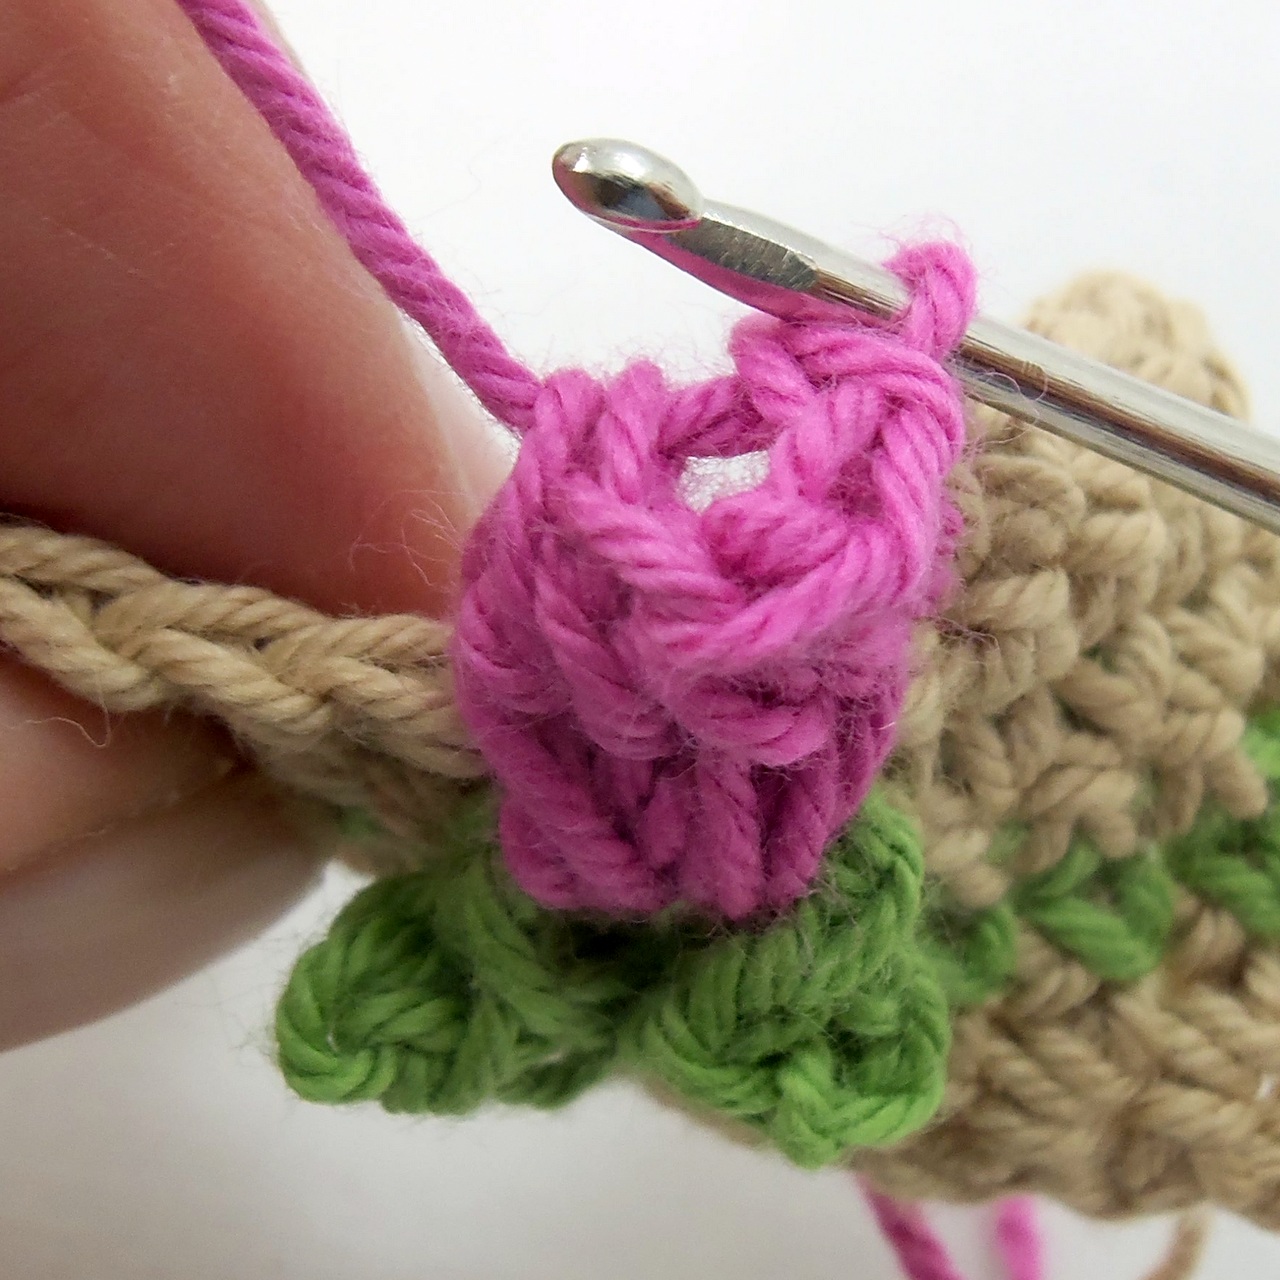
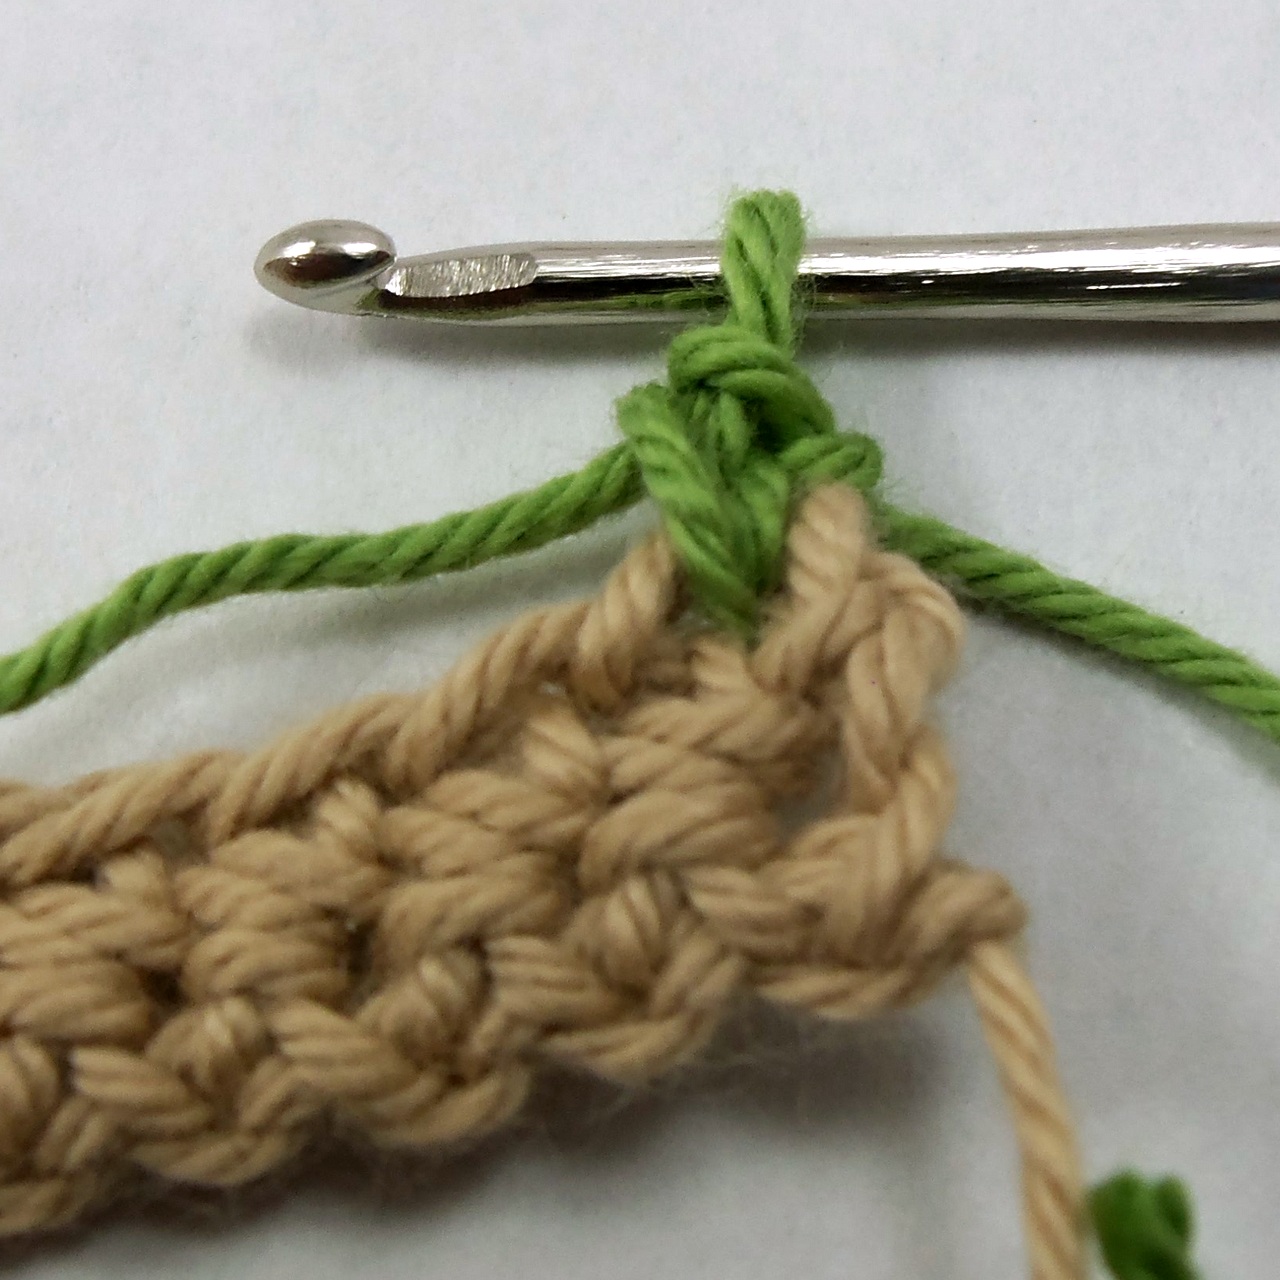
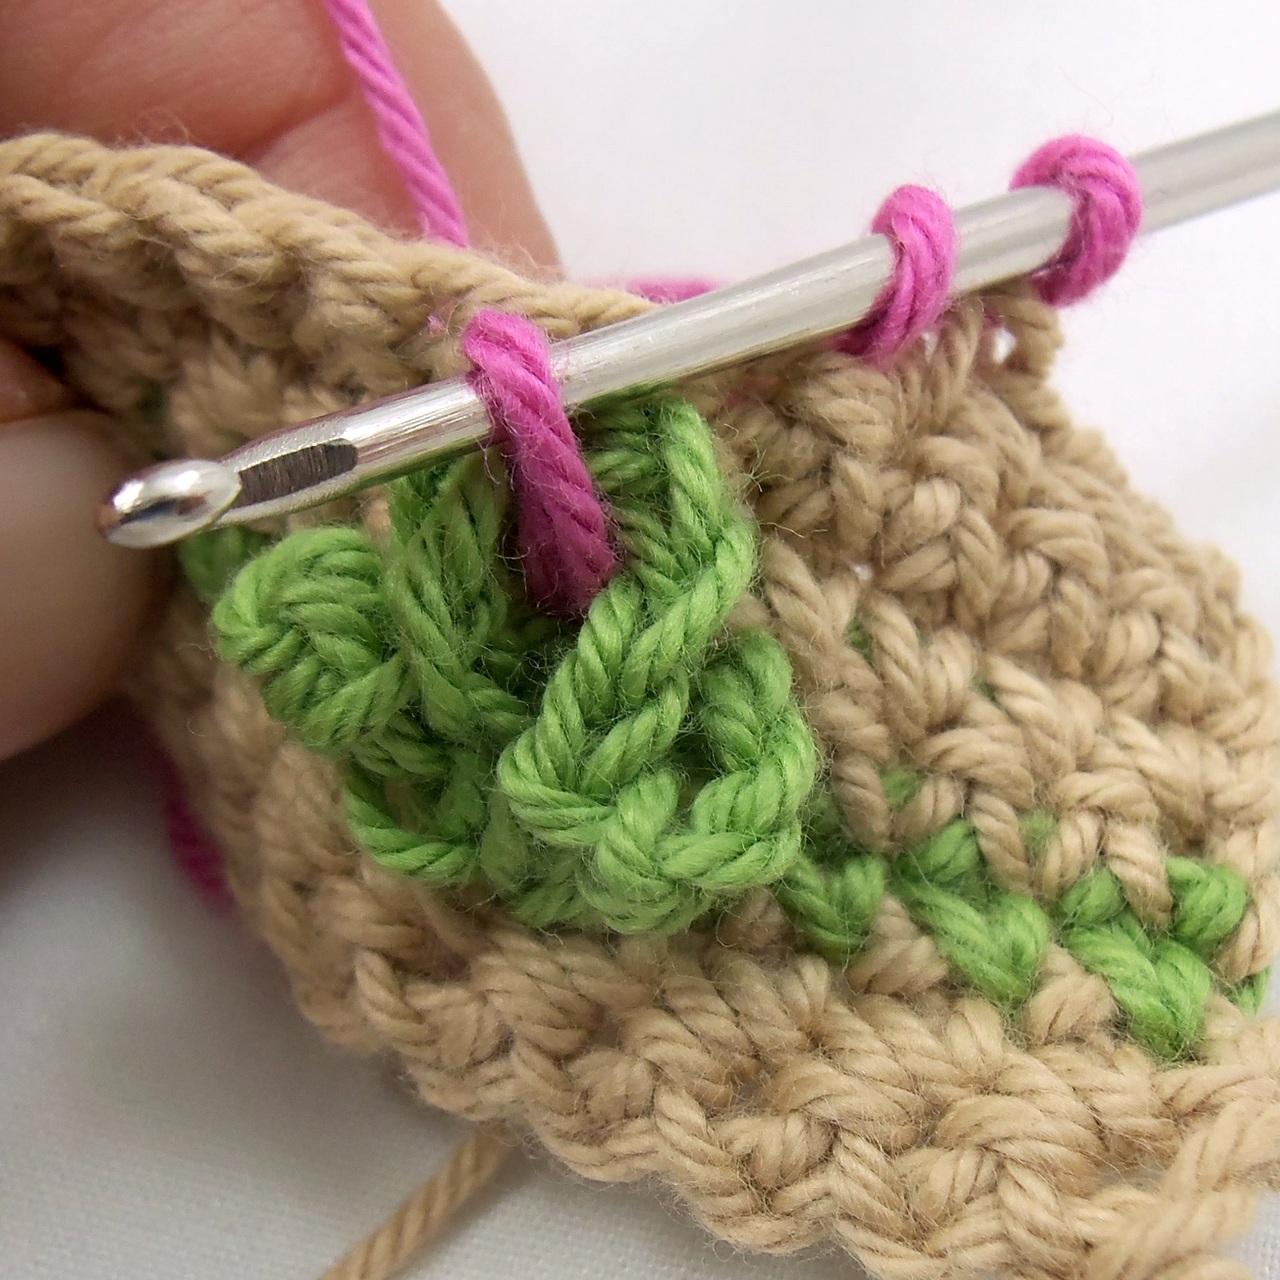
Chain 1. Drop yarn C and chain 1 with color A.
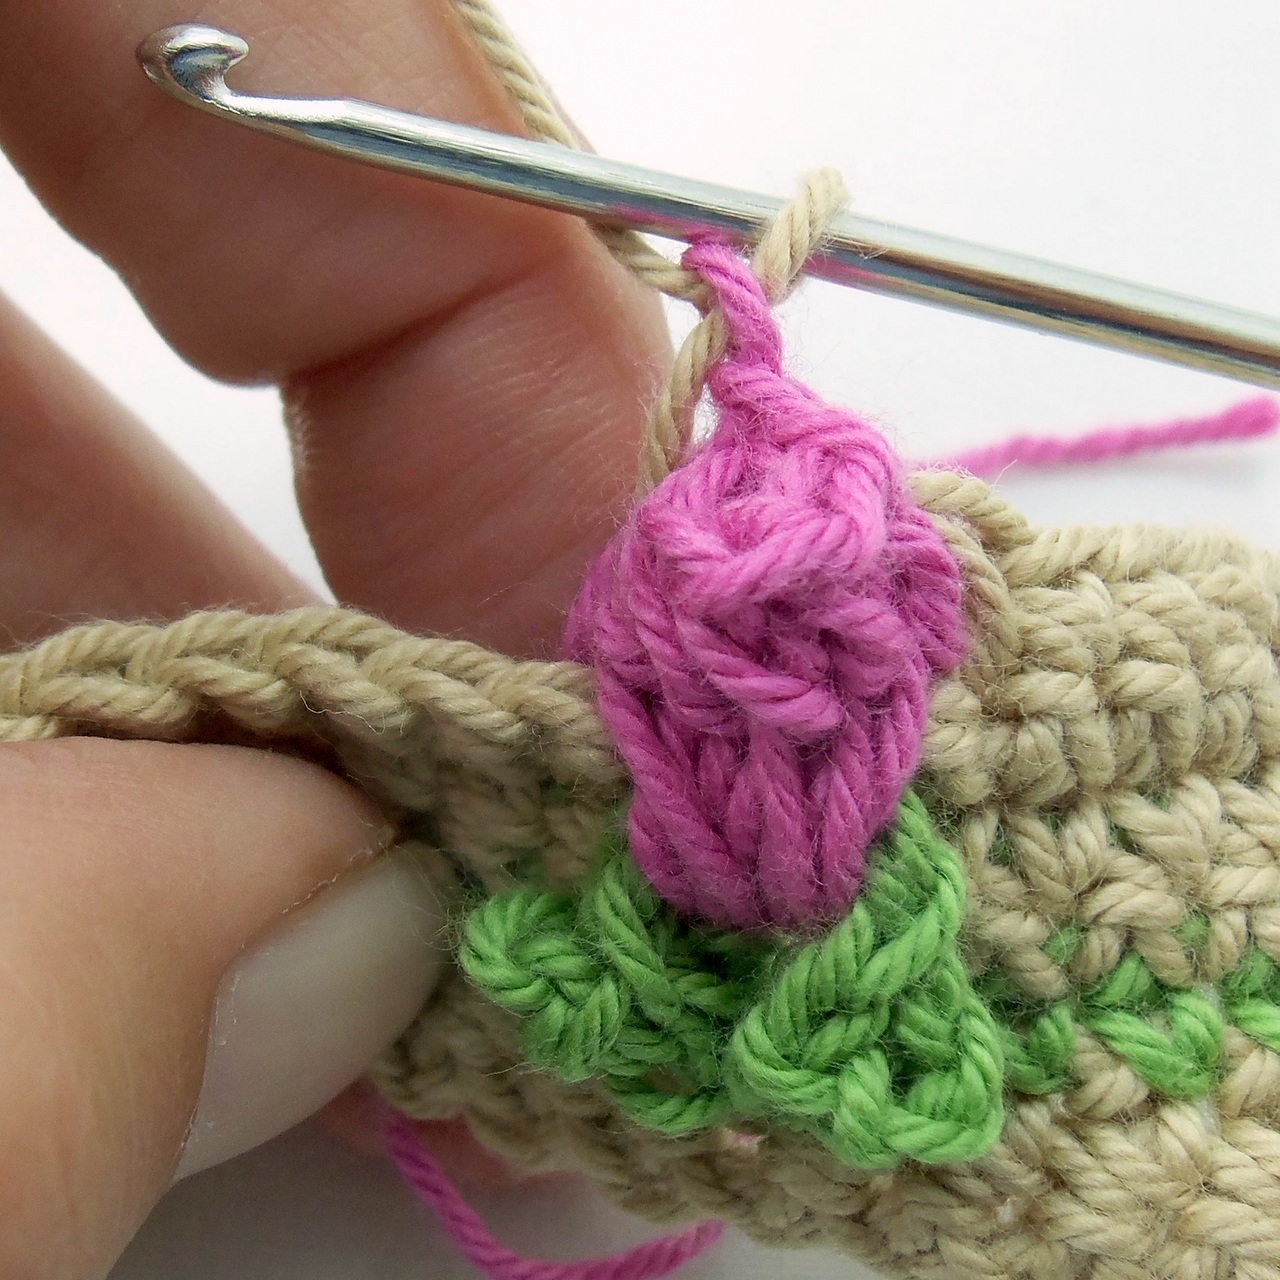
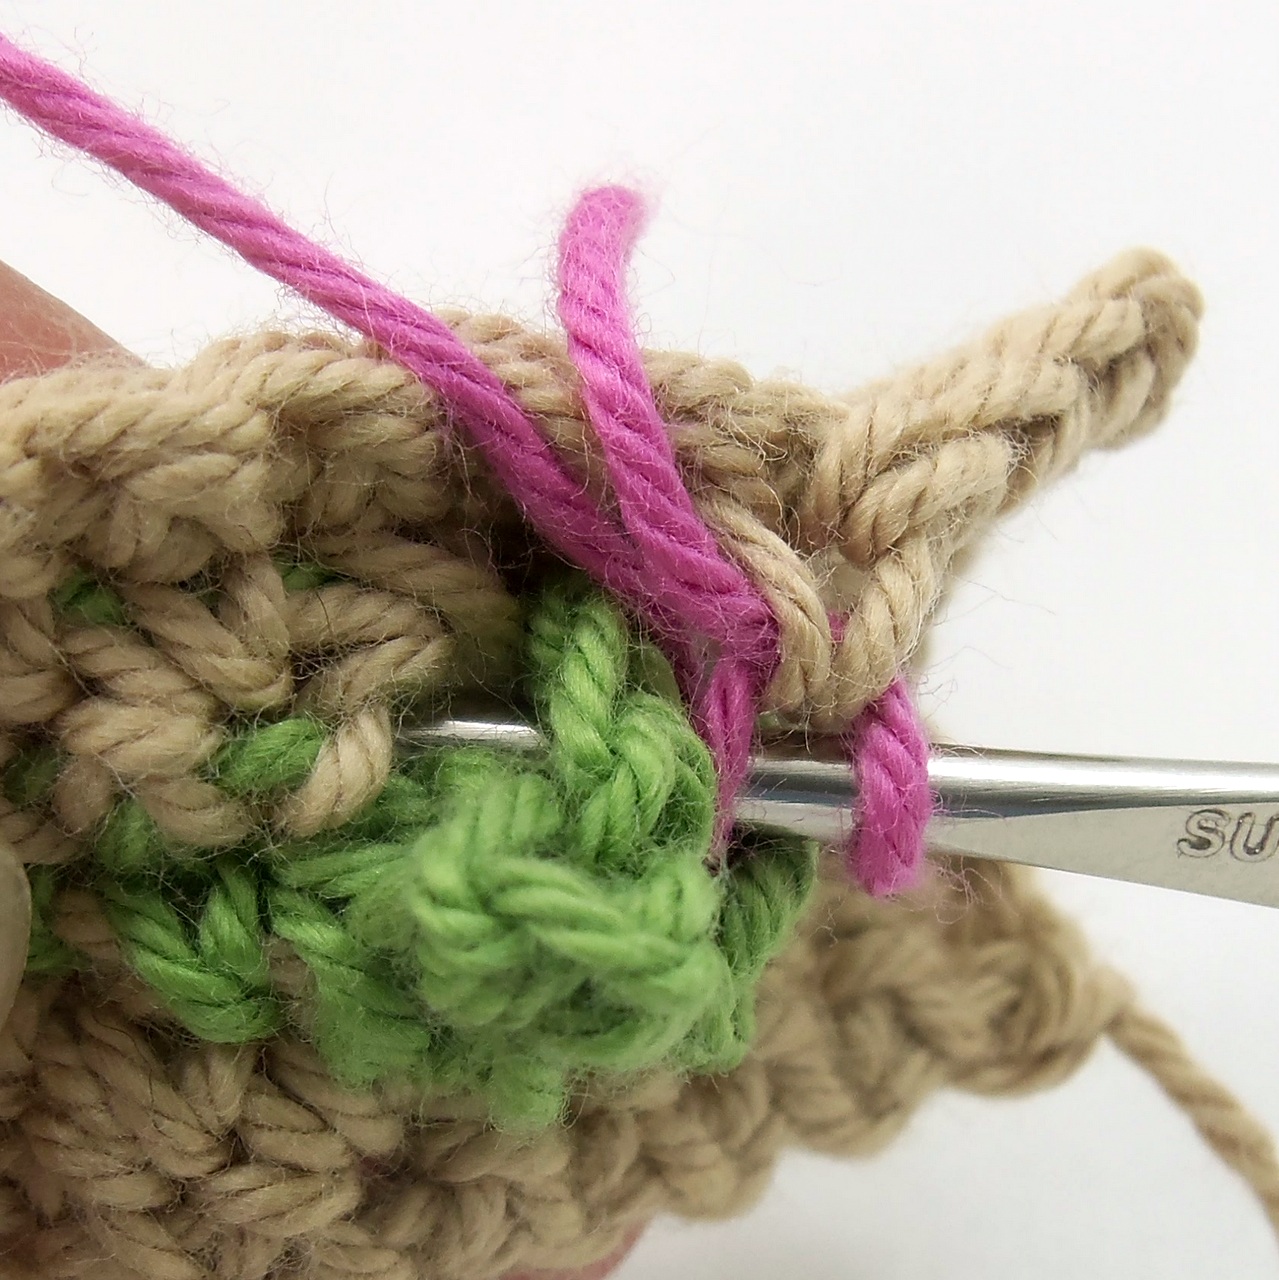
Single crochet into the next stitch, making sure to catch the loose color C under the stitch to hide it. The next stitch may be crowded under the rosebud. Push the rosebud out of the way to make sure you find the correct stitch.
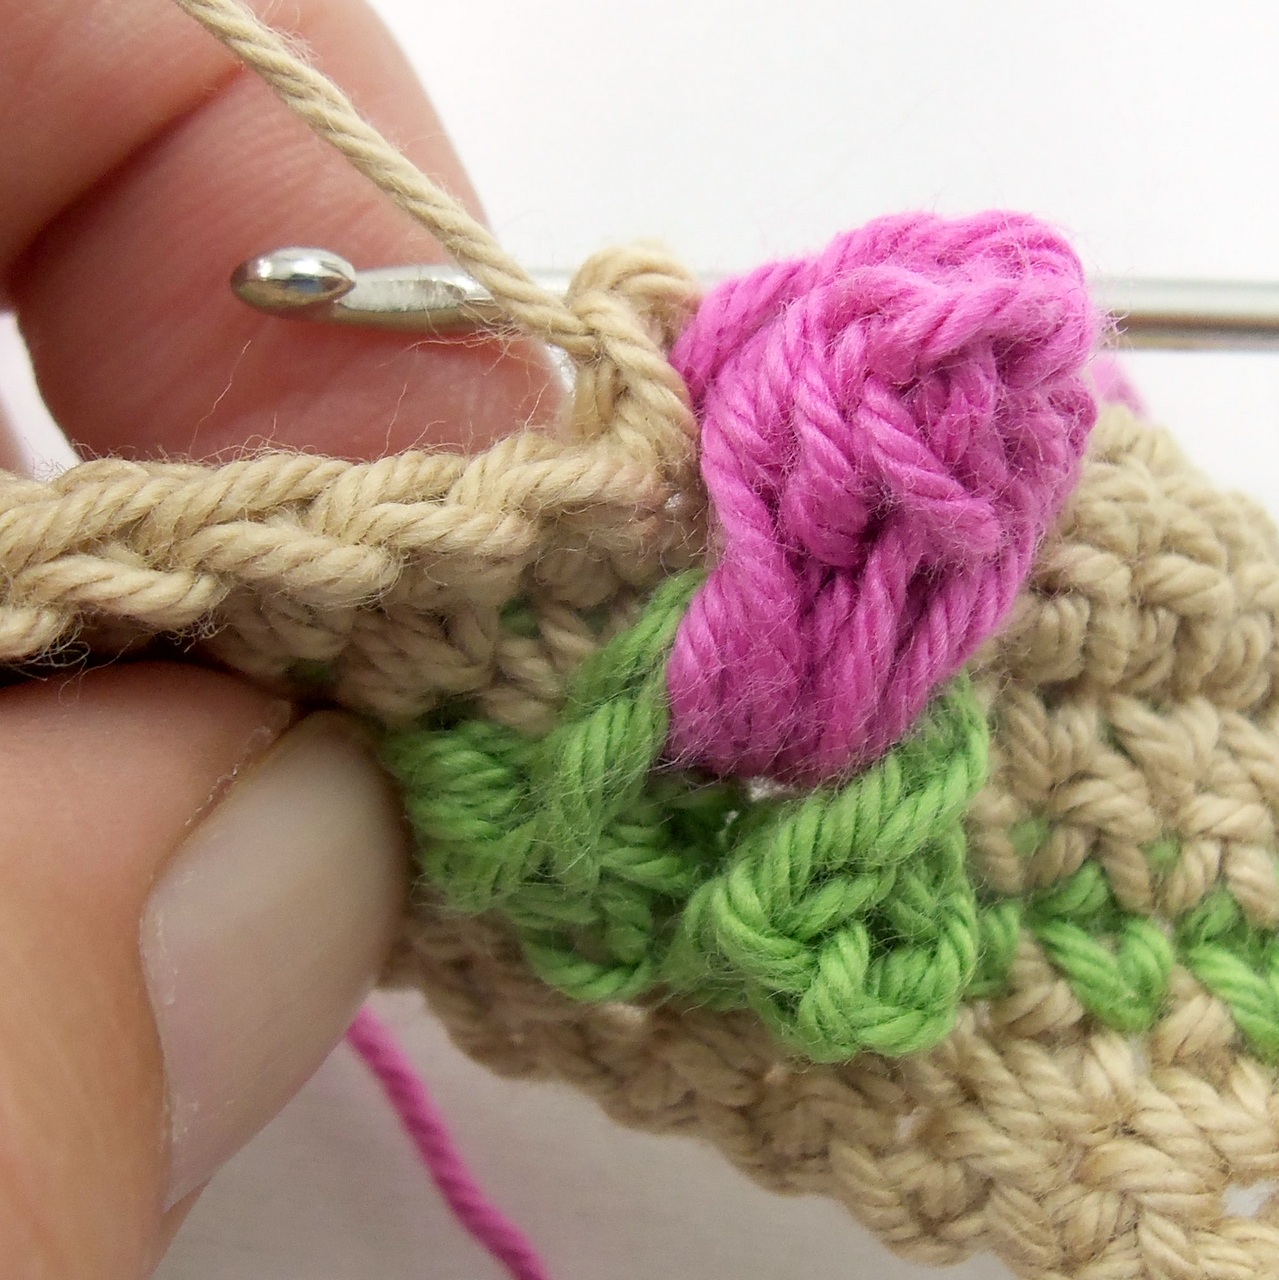
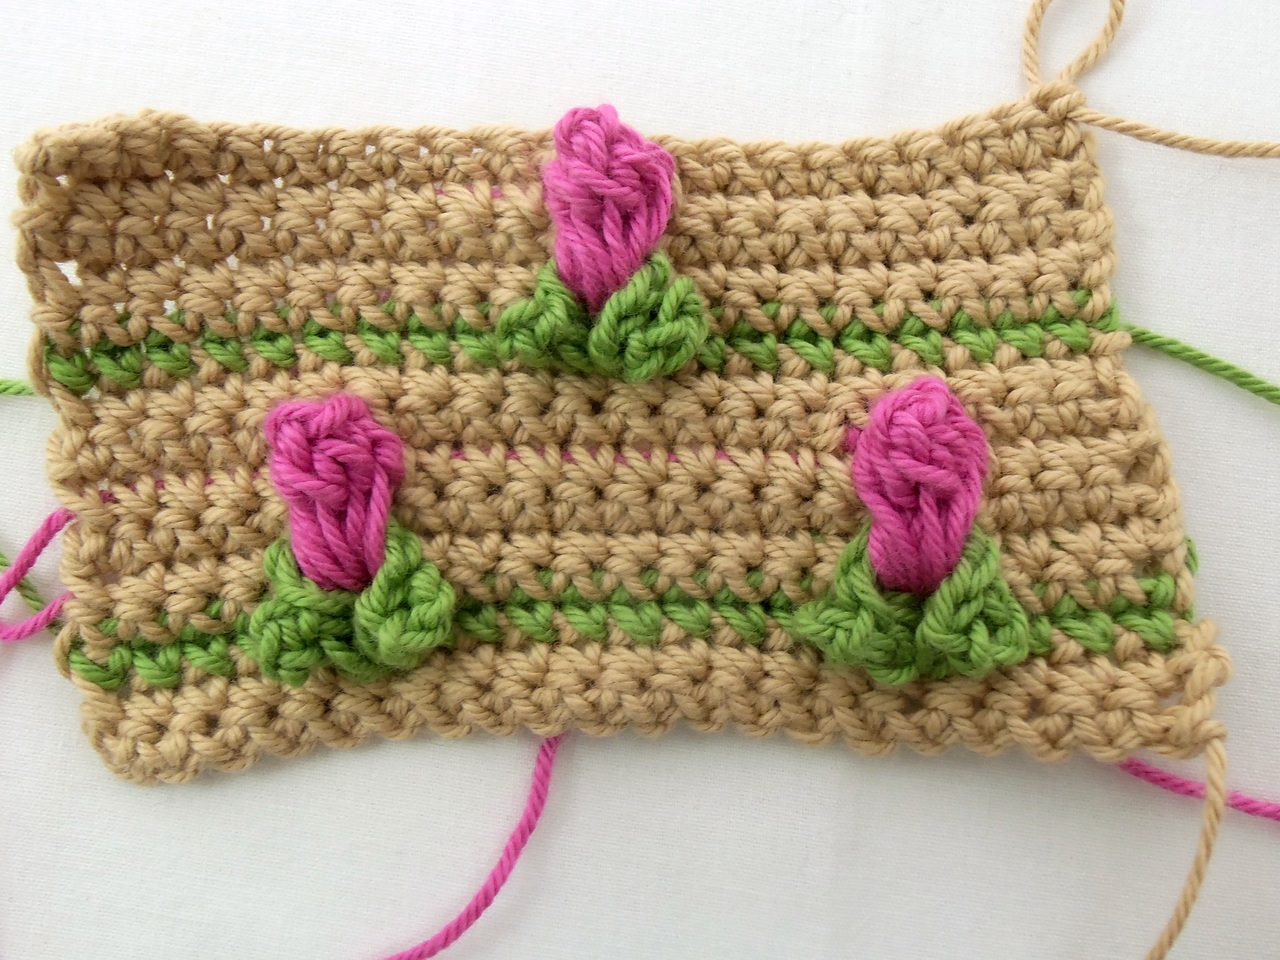
[Single crochet into the next 7 stitches, finishing trapping color C under the stitches. Single crochet into the 8th stitch, joining in color C by dropping color A after pulling it through and finishing the last stitch with color C. Rosebud stitch into the leaf and space as before, switching back to color A. Put a single crochet into the next stitch.]Repeat until you have added a rosebud to each leaf. You should have five stitches left in the row. Single crochet to the end.
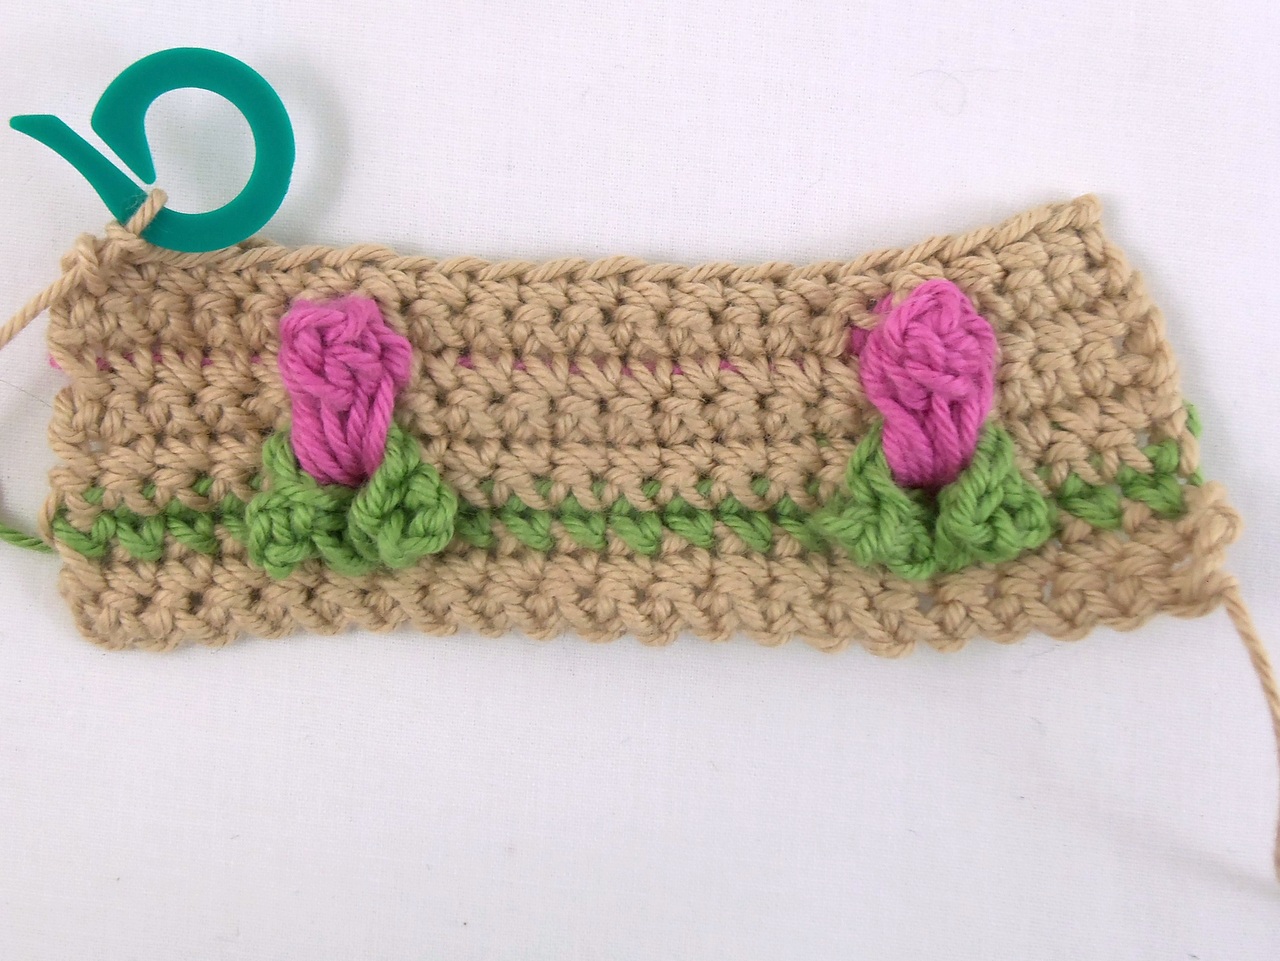
Row 6: Background
Chain 1 and turn. Single crochet into the first five stitches. Single crochet into the top of the rosebud cluster. Repeat [single crochet into the next 9 stitches, single crochet into the top of the next rosebud cluster] to the last rosebud. Single crochet to the end (four more stitches).
Row 7: Background
Add one more row of single crochet. Secure yarn A with a stitch marker.
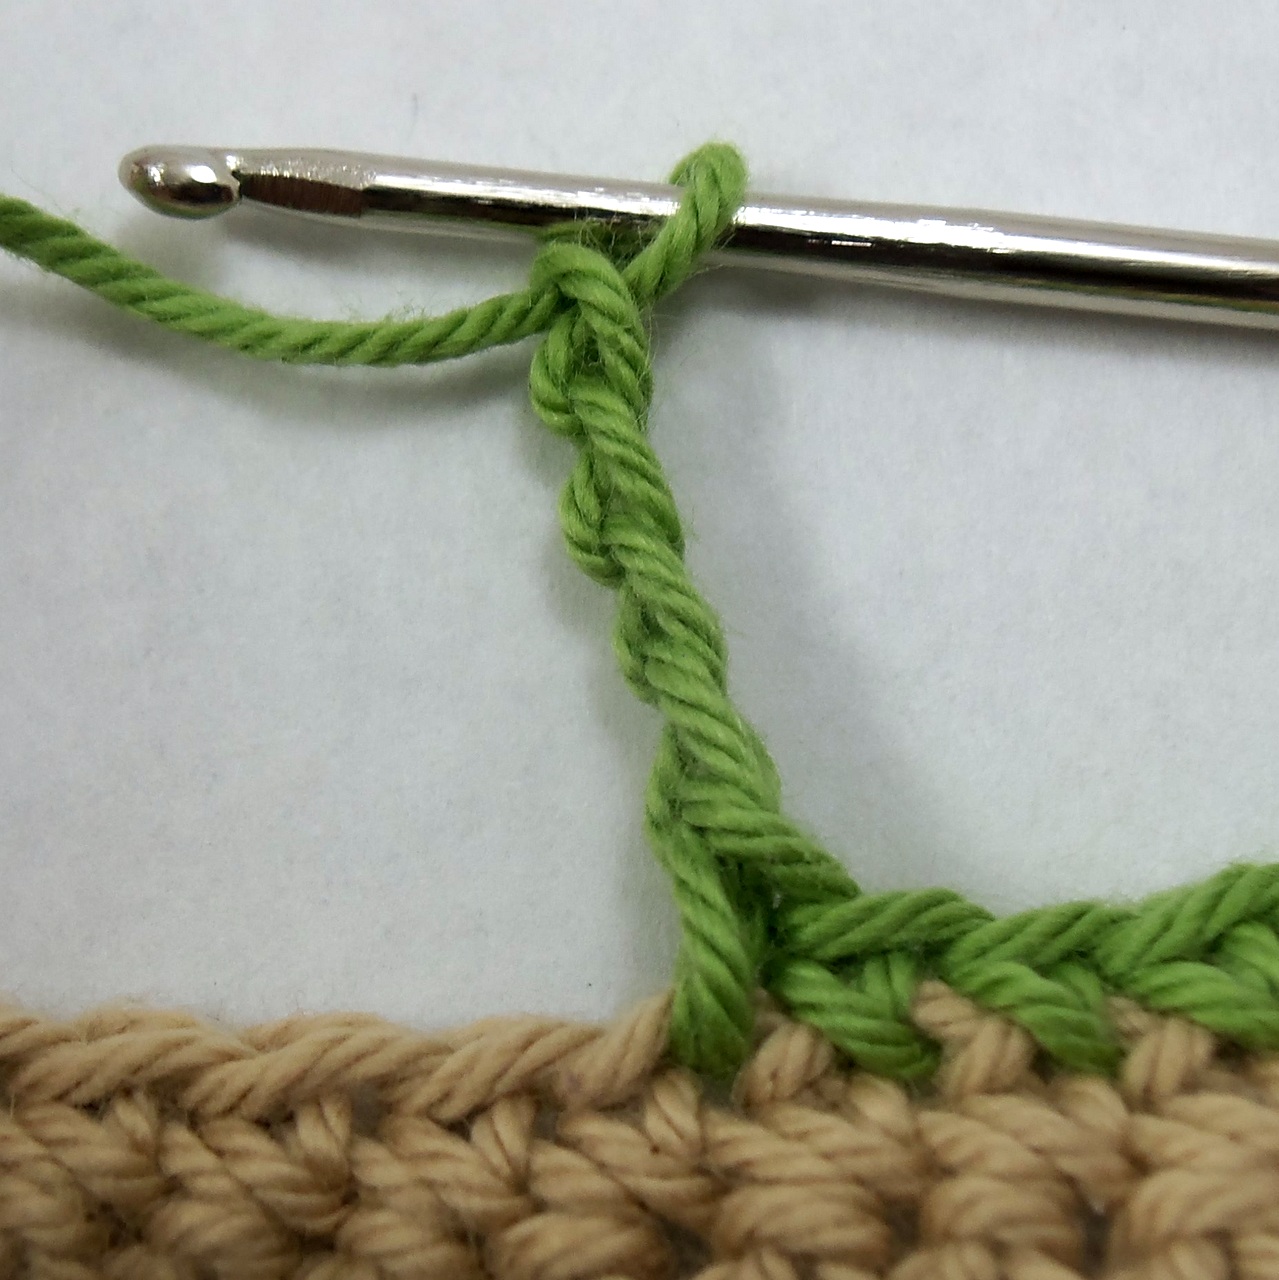
Row 8: Leaves
Join color B with a standing single crochet. Single crochet into the next 8 stitches, for a total of 9 single crochets. Leaf stitch into the 10th stitch.
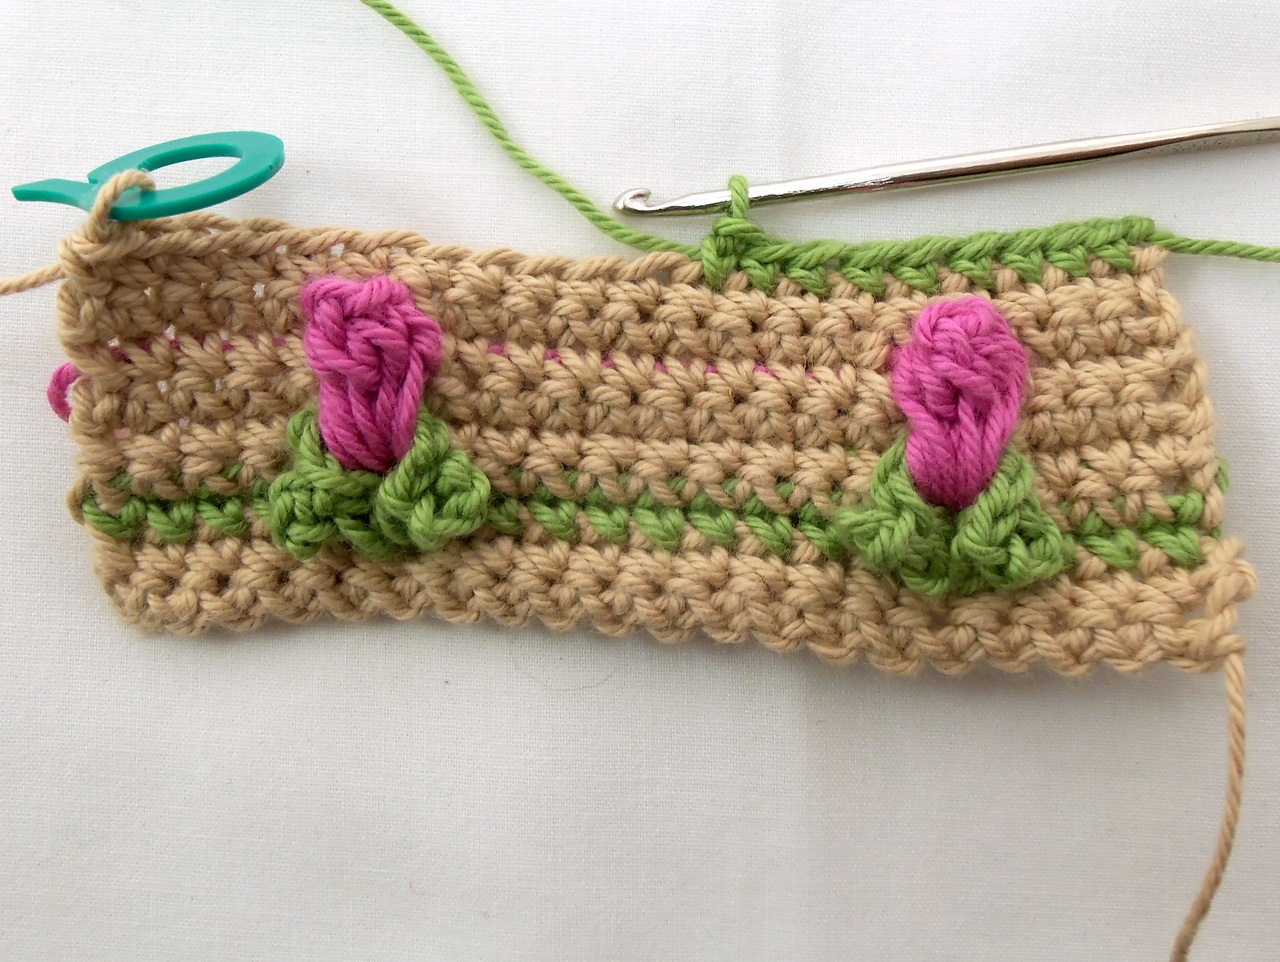
Repeat [single crochet 9, leaf stitch 1] until you have 10 stitches left in the row. Single crochet to the end, finishing the last stitch with color A to join. As before, cut color B and weave in the tail. Chain 1 and turn.
Row 9: Background
Single crochet 10. Repeat [chain 1, skip 1, single crochet 9] to last leaf. Single crochet to end (9 more stitches).
Rows 10 & 11: Background
Single crochet two more rows.
Row 12: Rosebuds
Repeat [single crochet 9 in color A, rosebud stitch 1 in color C] until you have added a rosebud to each leaf cluster. Single crochet to the end (10 more stitches). As you alternate between colors A and C, remember to catch the yarn you aren’t using under the stitches as you work across to hide it. Cut off yarn C.
Rows 13 & 14: Background
Add two more rows of single crochet.
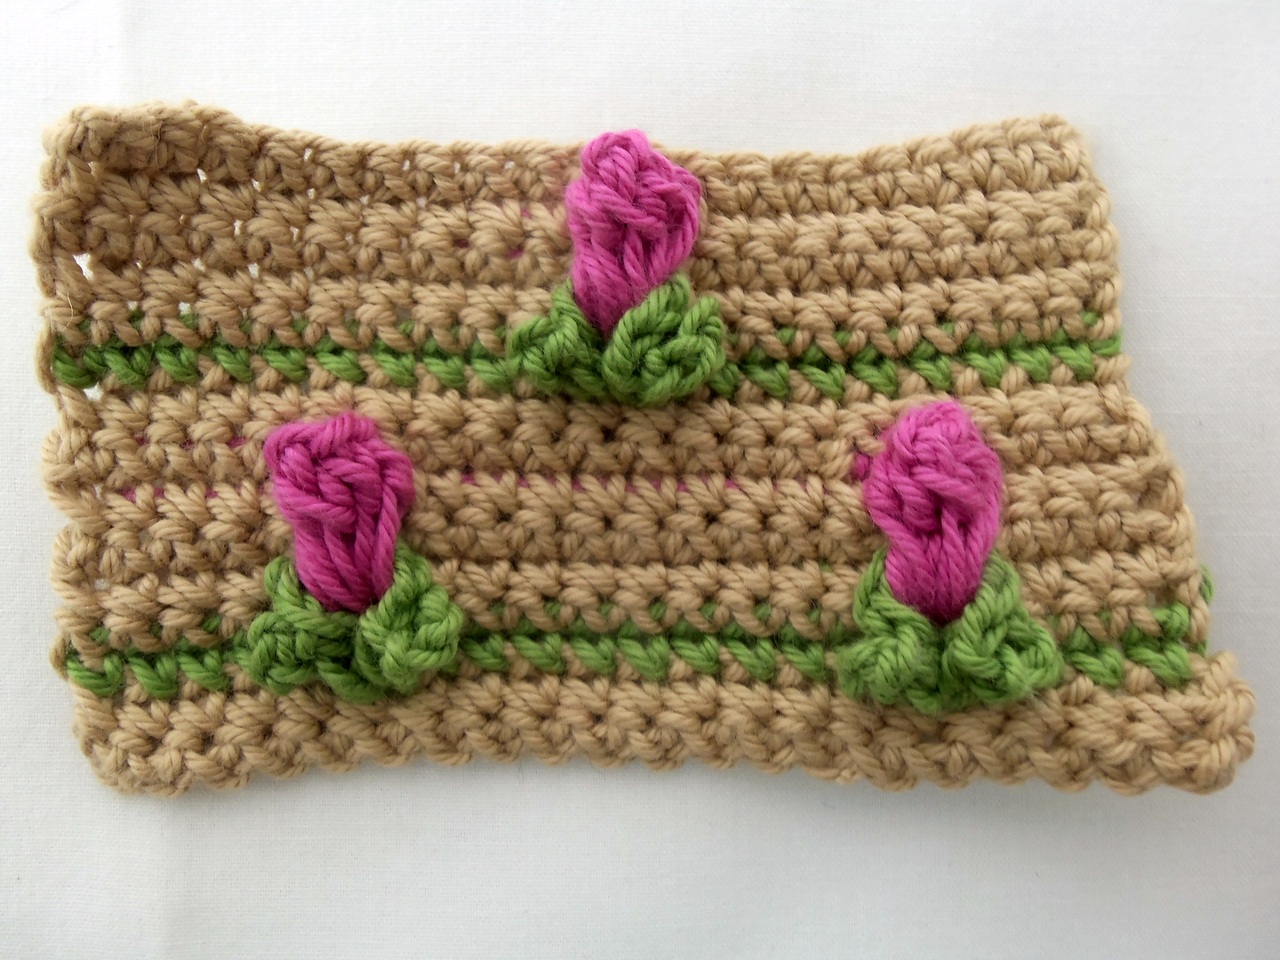
Repeat rows 1 through 14 to add more rows of rosebuds.
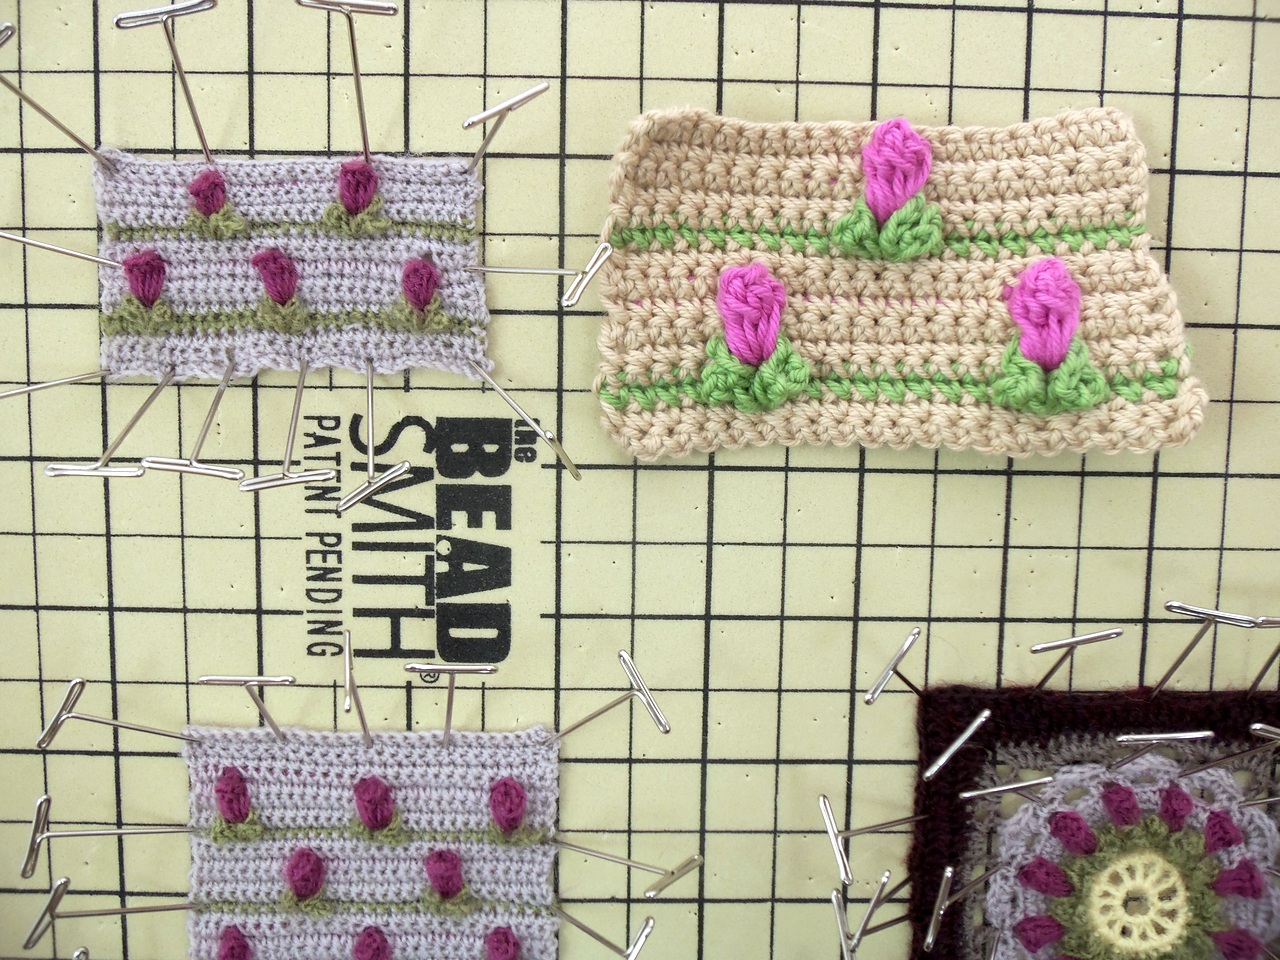
Examples
Here is the piece I made for this demo alongside two “field of rosebuds” pieces done in a lace weight acrylic-wool blend. Because the lace weight yarn is so fine, I ended up doing each rosebud with seven DC spike stitches instead of five like I did with the cotton.
The Pattern in Compact Form
LC (leaf cluster): 1 SC, 4 CH, 1 SC, 6 CH, 1 SC, 4 CH, 1SC into same stitch.
RBC (rosebud cluster): 5 spike DC through CH 6 of leaf and CH 1 space above leaf. 1 CH. Switch to background color and 1 CH.
- R1: In color B with right side facing, 4 SC. Repeat [1 LC, 9 SC] to the sixth stitch from the end of the row. 4 SC. 1 SC in last stitch, finishing with color A to join. 1 CH, turn. Break off color B.
- R2: 5 SC. Repeat [1 CH, skip LC, 9 SC] to end of leaf clusters, working in front of clusters. 4 SC, 1 CH, turn.
- R3: 1 SC in each stitch (or chain space), 1 CH, turn.
- R4: 1 SC in each stitch, 1 CH, turn.
- R5: 4 SC, joining color C into last stitch. Repeat [1 RBC in color C, 9 SC in color A] for each leaf cluster. 5 SC, 1 CH, turn. Break off color C.
- R6: 1 SC in each stitch (or top of RBC), 1 CH, turn.
- R7: 1 SC in each stitch. Secure with stitch marker. Do not turn.
- R8: With right side facing, join color B. Repeat [9 SC, 1 LC] to the 11th stitch from the end of the row. 10 SC, joining in color A on last stitch. 1 CH, turn.
- R9: 10 SC. Repeat [1 CH, skip LC, 9 SC] to end of leaf clusters. 9 SC, 1 CH, turn.
- R10: 1 SC in each stitch, 1 CH, turn.
- R11: 1 SC in each stitch, 1 CH, turn.
- R12: 9 SC, joining color C into last stitch. Repeat [1 RBC in color C, 9 SC in color A] for each leaf cluster. 10 SC, 1 CH, turn. Break off color C.
- R13: 1 SC in each stitch, 1 CH, turn.
- R14: 1 SC in each stitch, 1 CH, turn.
Repeat R1 – R7 or R1 – R14 to desired number of rows. If breaking off yarn A to finish work, skip the last “1 CH, turn” and tie off work.