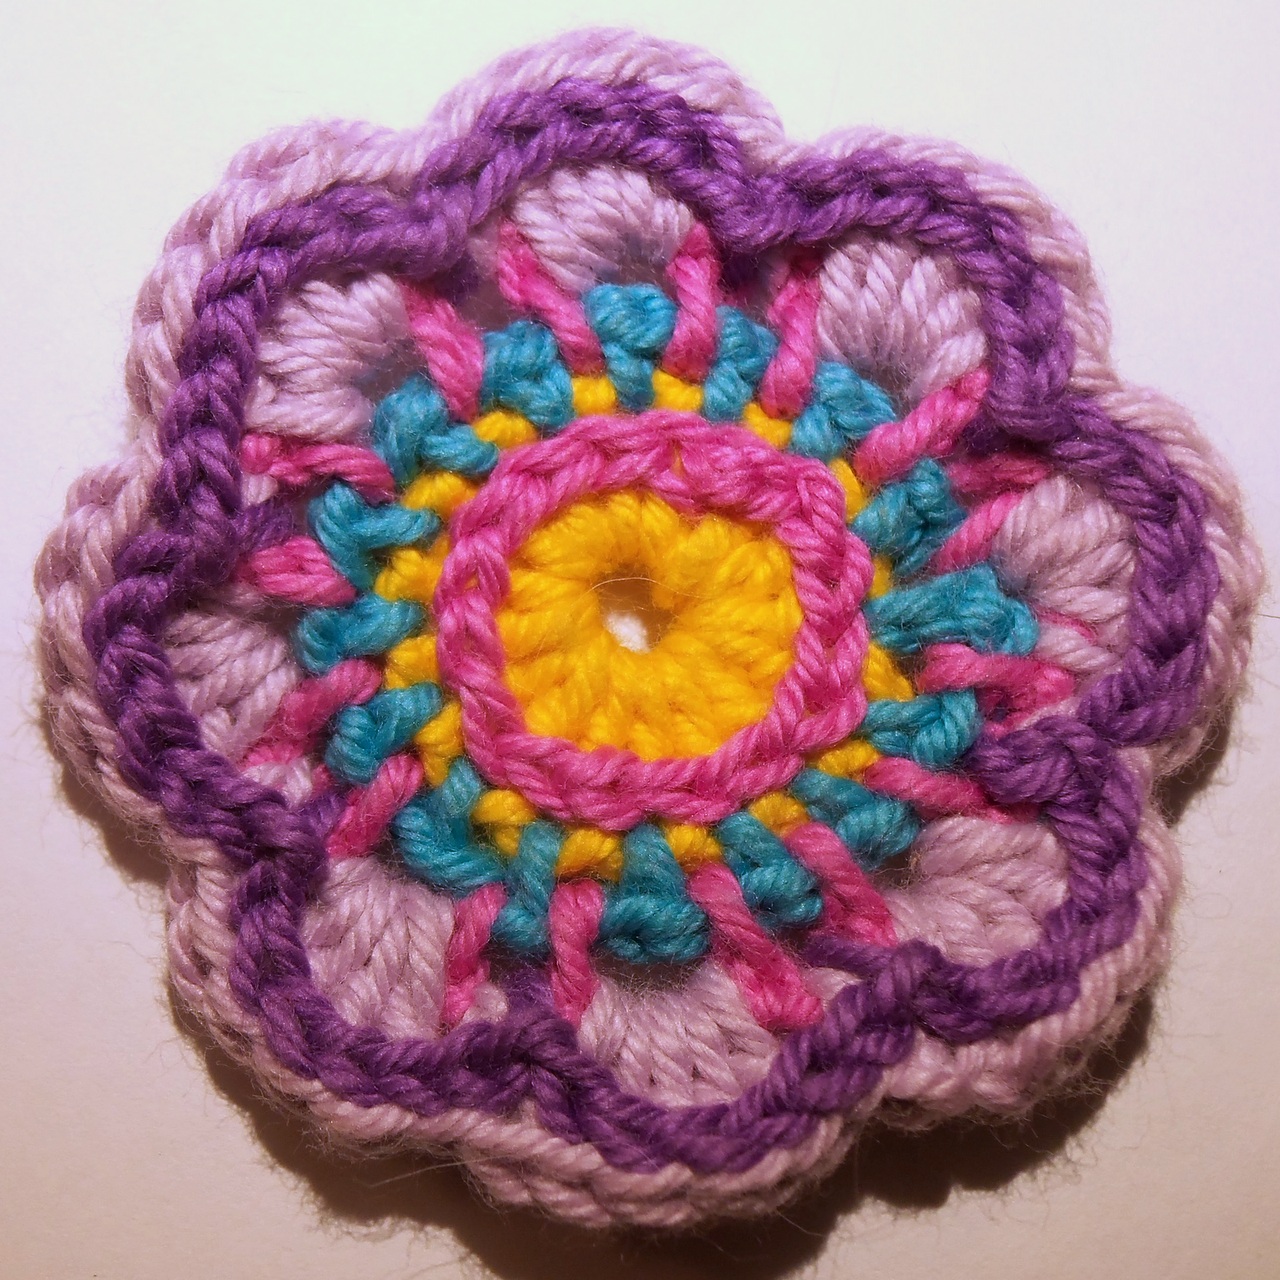
I have fallen in love with crochet flowers and mandalas. I came across photos of this adorable flower mandala, and found this pattern for it. After working through the flower a couple times, I am posting my own version of the pattern for this flower.
I used yarns from my stock of Lion Brand BonBons Beach and Nature collections. These are cotton sport weight yarns that make a nice tight, clean design.
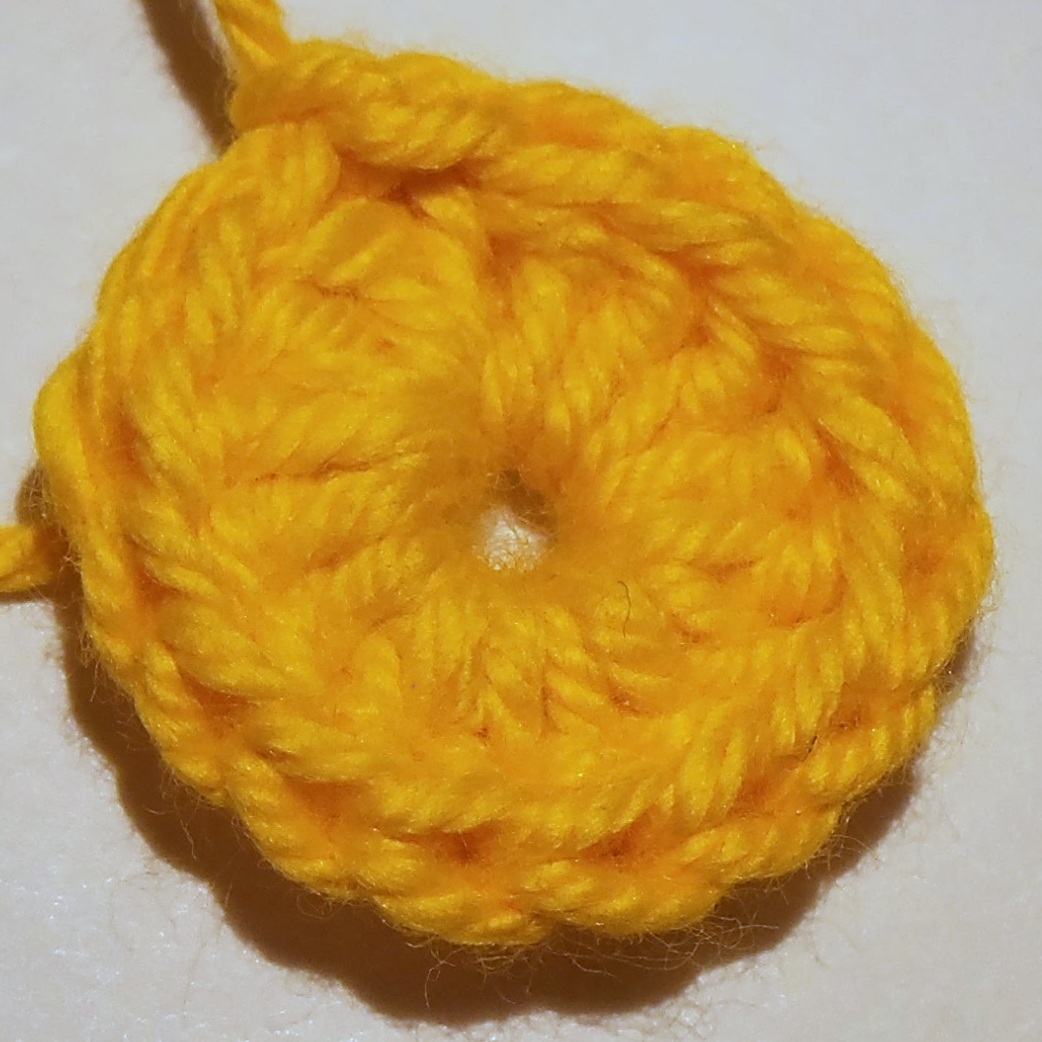
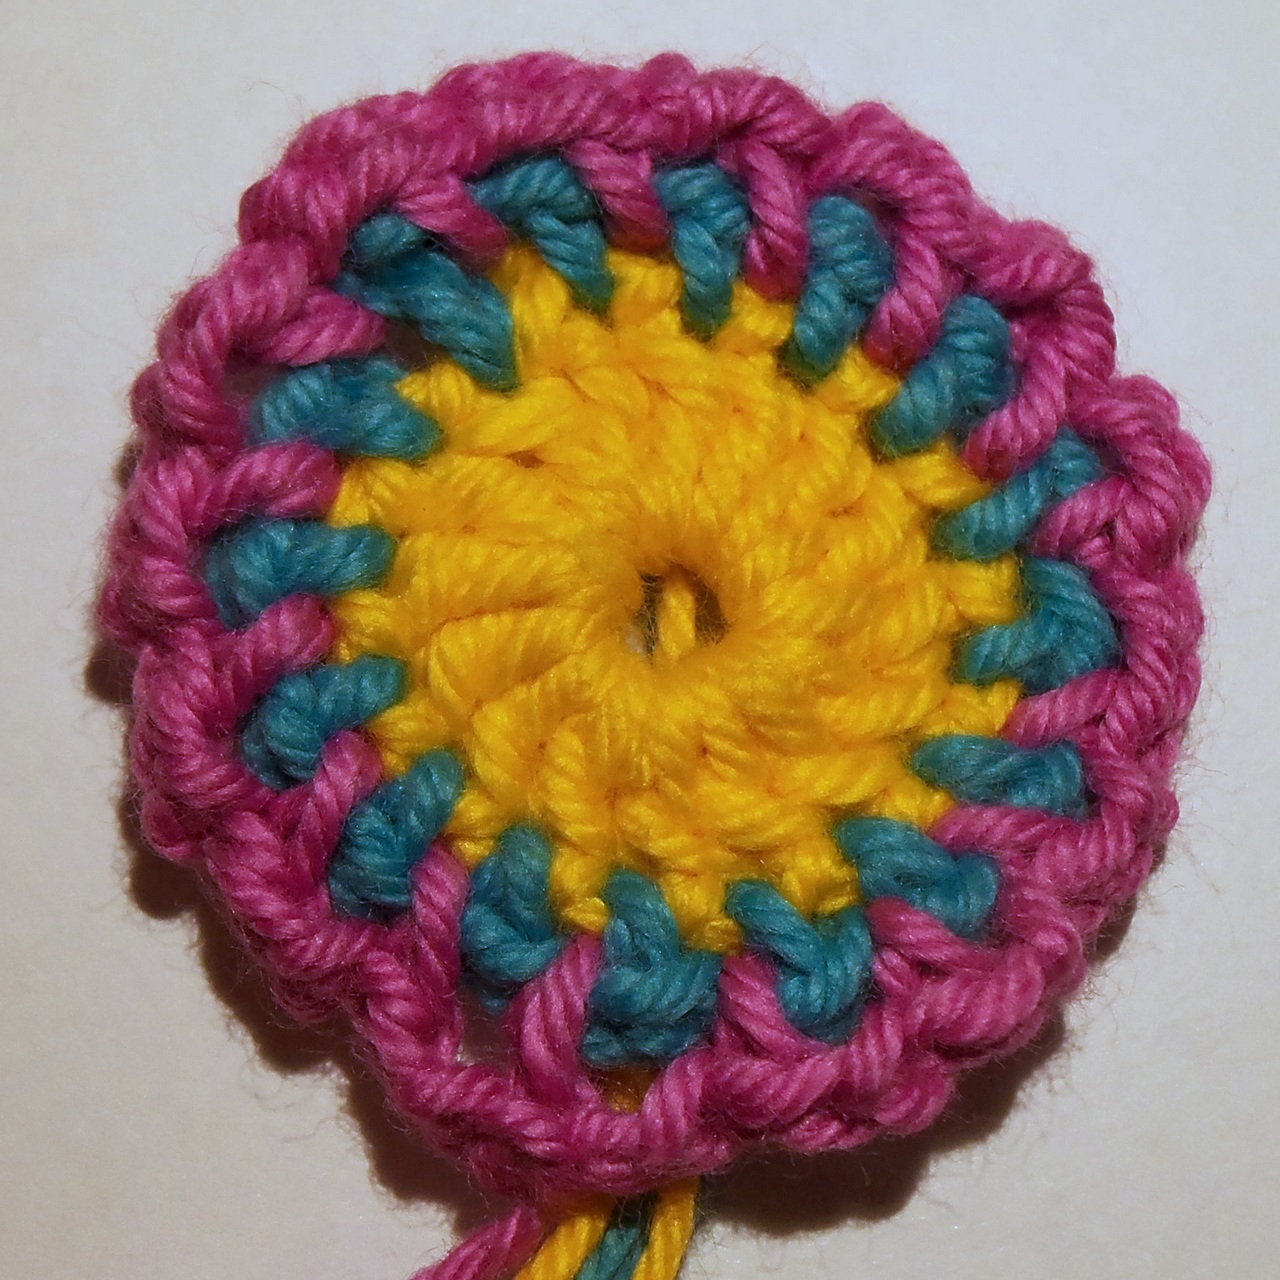
Row 1: Magic circle, ch3, 15dc into the ring. Slip stitch to join to first stitch and tie off.
The initial chain 3 counts as a double crochet stitch, giving you a total of 16 double crochet stitches in the first row.
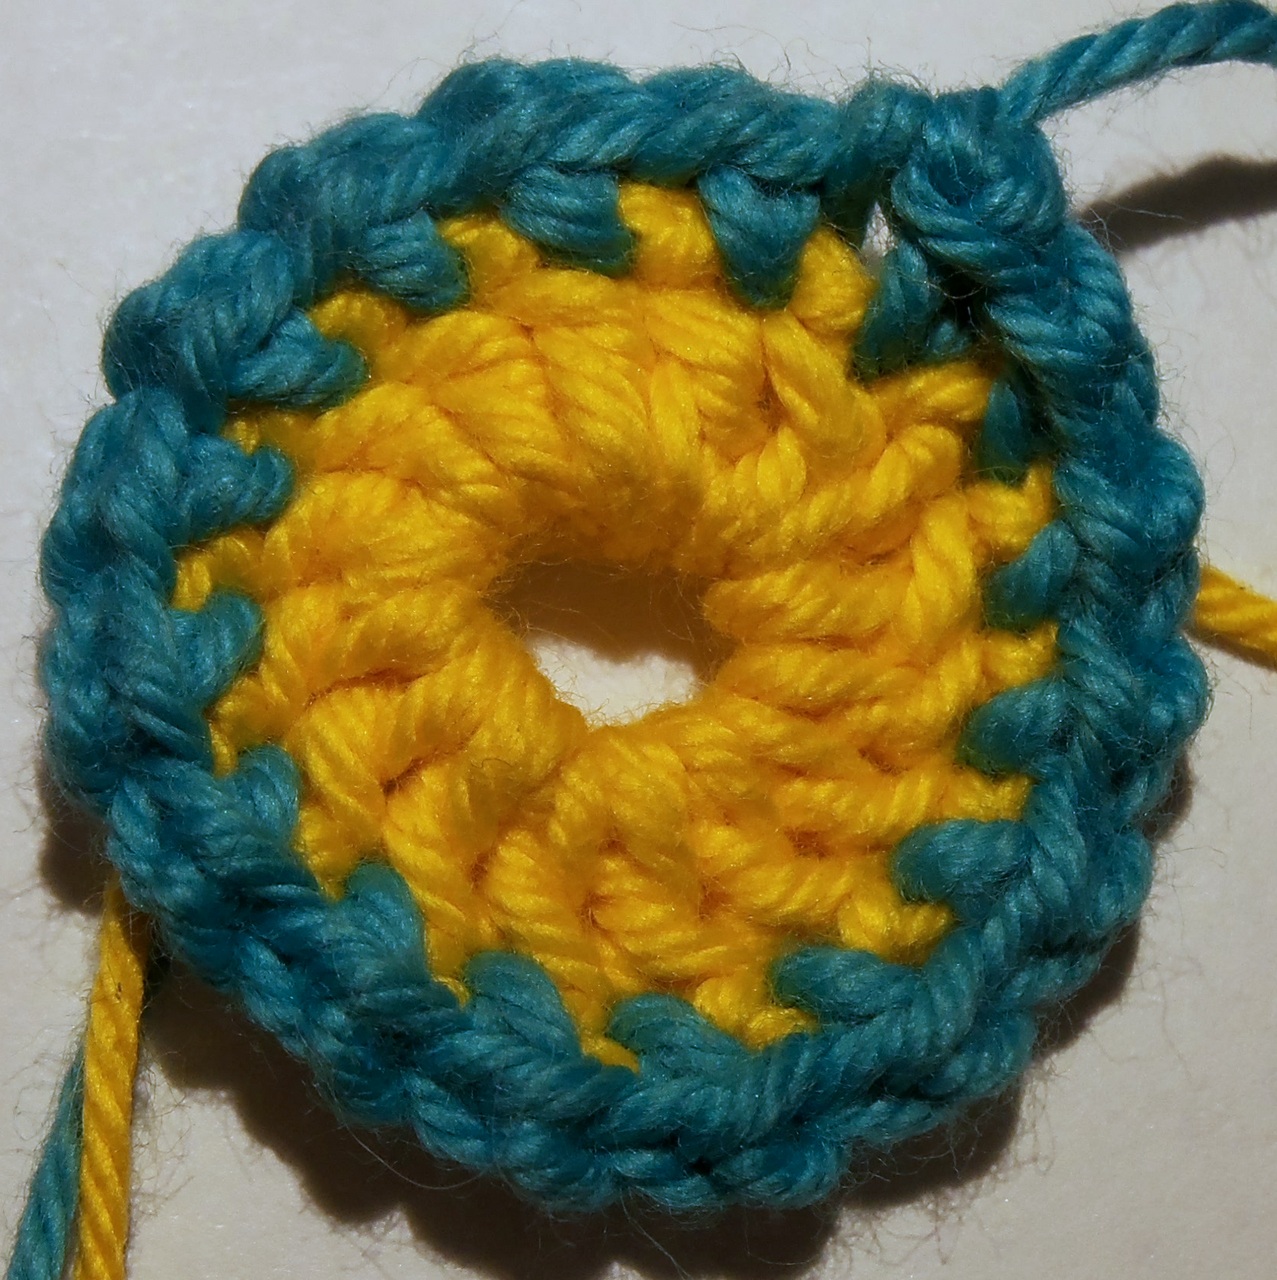
Row 2: Join in new color. Ch3, sc1, ch1. Repeat sc1, ch1 around the ring. Slip stitch into the second chain in the initial ch3. Tie off.
The initial chain 3 counts as the first single crochet plus chain. Each chain 1 makes a space between the single crochet stitches. Slip stitching into the second chain of the initial chain 3 leaves the space between the initial chain and the first single crochet stitch. There are a total of 16 single crochet stitches and 16 chain spaces in the second row.
Row 3: Join new color into any of the chain spaces in the previous row. Ch4, sc1 into next space, ch2, sc1 into next space. Repeat ch2 sc1 around. Slip stitch into second chain of initial ch4. Tie off.
The initial chain 4 counts as the first single crochet plus chain 2. Each chain 2 makes a space between the single crochet stitches. Slip stitching into the second chain of the initial chain 4 leaves the chain 2 space between the initial chain and the first single crochet stitch. There are a total of 16 single crochet stitches and 16 chain spaces in the second row.
Row 4 (petals): Join in new color in any chain space in the previous row. Ch3, dc4 into same space, single crochet into next space. Repeat dc5 into a space, sc into a space around. Slip stitch to join and tie off.
The first chain 3 counts as a double crochet stitch. You should have 8 dc5 petals with a single crochet stitch between each one.
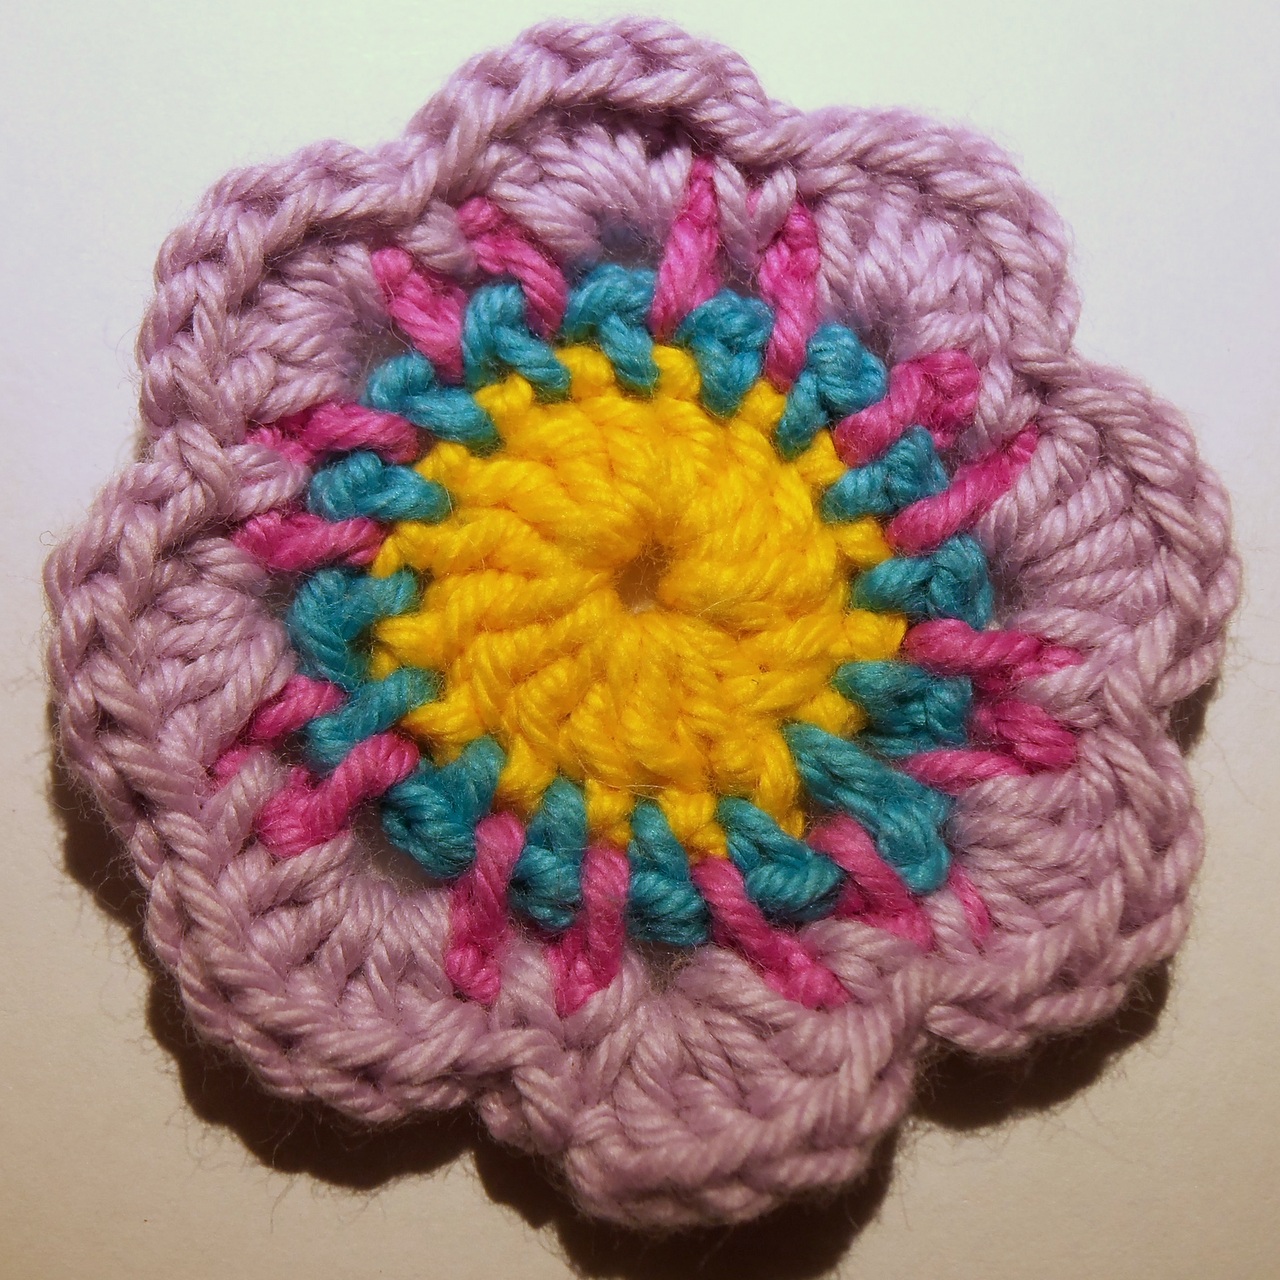
Embroidery: Crochet embroider in a contrasting color between rows one and two. Crochet embroider in another contrasting color along the top of the petals, just below the top of the stitch (so the chain-like part of the stitching is still visible).
On the petals, make sure to dip the embroidery deep in between the petals to make them stand out from each other. See this surface crochet embroidery tutorial.
Row 5 (optional): Join in a new color in the middle dc stitch in any dc5 petal. Ch2, hdc1, dc1, tr1, dc1, hdc1. Sc3 into same stitch (top of next petal). Continue hdc1, dc1, tr1, dc1, hdc1, sc3 around. Sc2 into base of initial chain (instead of sc3).
This row will add a background that makes the piece a circle. It’s not a perfect circle, and has a subtle wave to it.

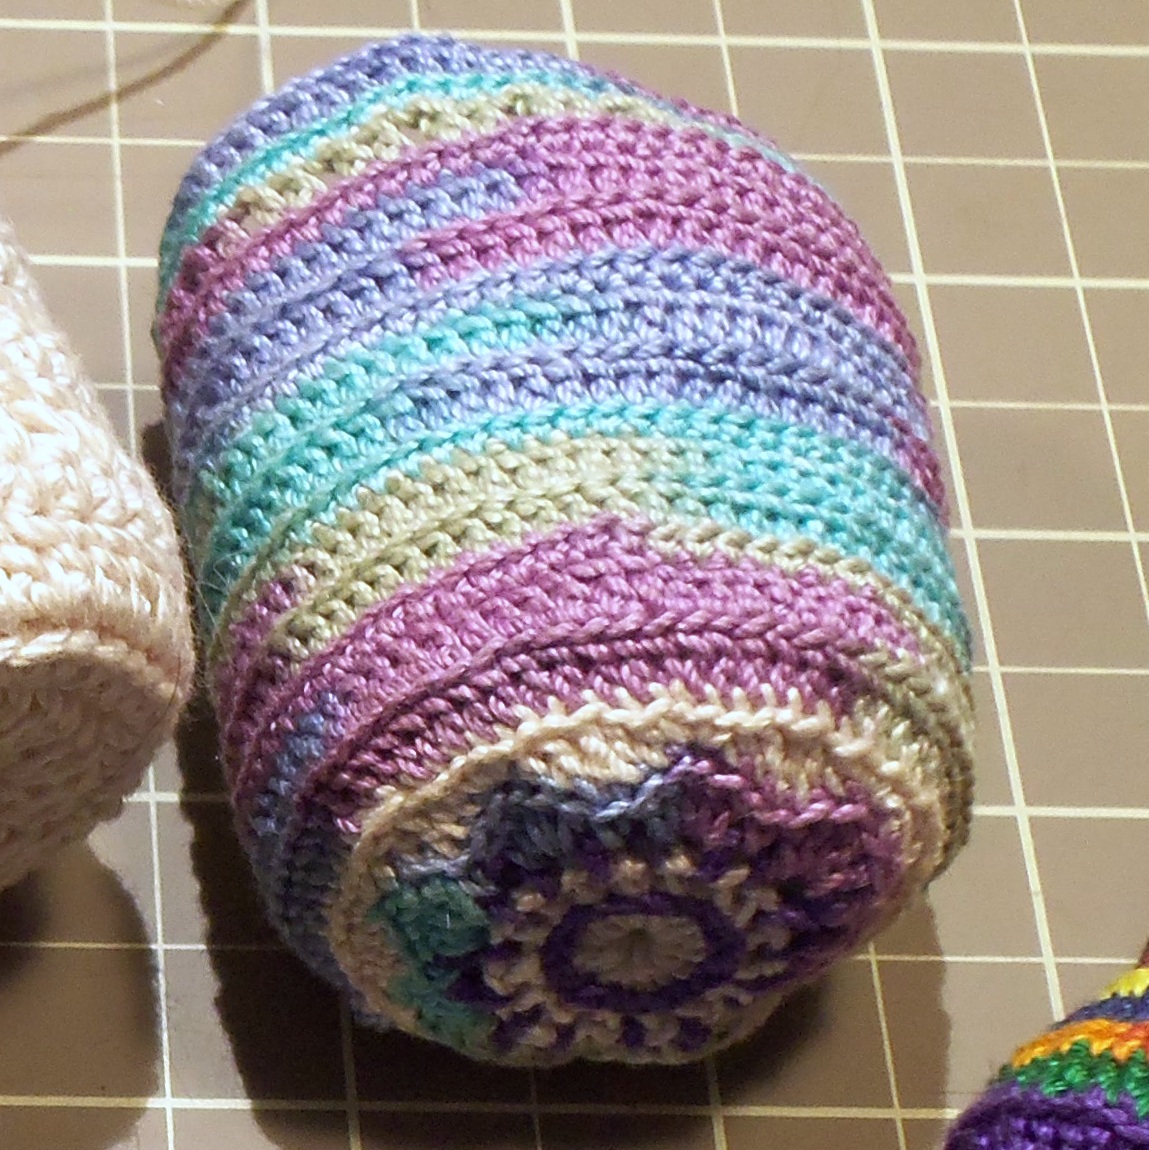
From here, the piece can be continued on into a larger mandala, hat, pot holder, etc., or could be turned into a square using standard squaring and corner turning techniques. My purpose was to make the bottom of a pouch (shown below). From here, I stitched additional rows without increasing to make the straight sides of the pouch. I did the embroidery on row 1, but I did not outline the petals.